![Light Priority - Photography by Rory Prior]](https://lightpriority.net/wp-content/uploads/2020/05/fulllogo.png)
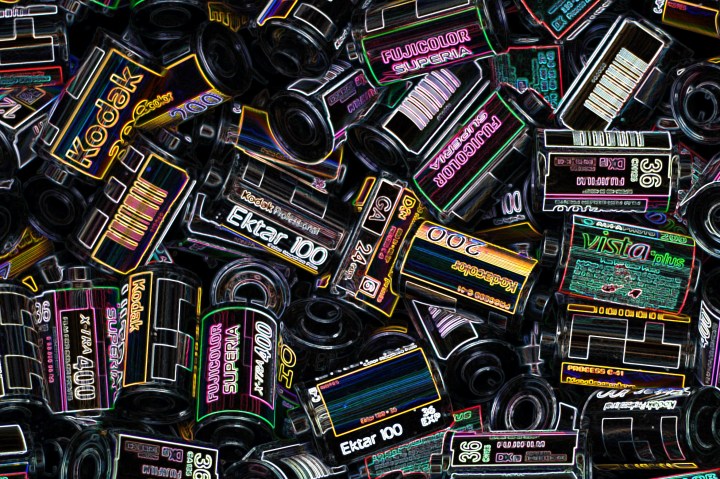
DSLR scanning sucks. There I said it! Since my journey back into film photography started in 2017 I’ve been using my digital camera to digitise my negatives. It works, it can produce arguably great results – on a level with the very best quality you can achieve from a high end commercial scanner. But it’s a terrible solution.
Why is it terrible? Because it requires a shed ton of expensive gear to be done remotely well. Yeah you can just about cobble something together with any semi-recent digital camera, a macro extension tube and a nifty fifty (because proper 1:1 macros are expensive), you can sort of use a tripod, you can find a cheap LED light panel that produces whiteish light and so on. But this creates a really awkward setup, once the initial euphoria of “it works!” passes, you’re left with this really cumbersome and unreliable system that probably produces uneven sharpness and is a nightmare to align each time you set it up again. Oh and you’re on your own when it comes to turning your digitised negatives into positives.
The solutions to improving this setup are all really expensive – once you’ve added up the costs of a high quality 1:1 macro lens (£300-1000 depending on system), a proper sturdy copy stand (£200 or more), a high CRI light box (£50-100) and something to hold the negatives themselves flat (£30-300) you’ve easily spent £1000 or more. That puts you well into the ball park price of the highest end prosumer scanners like the Epson v850, the Plustek OpticFilm 120, the Reflecta MF5000 and so on.
For my DSLR* scanning I’ve tried a variety of things, starting off with the bodged solution outlined above. Trying, failing and trying again, replacing and tweaking each of the many components that make it up. Each step has cost more money and I’m incredibly fed up of it. To give a recent example, I’ve been unhappy with using my old Durst negative carrier as it cuts off about 4mm of the frame in each direction and its a faff to align the film well in it, especially at the ends of the strip. I’ve all but given up on ever receiving my Pixl-Latr so I bought both of Lomograph’s DigitaLIZA masks. The 120 model is excellent and works really well, the 35mm one on the other hand isn’t fit for purpose. So I’m back to the suboptimal Durst carrier again. At least I was able to resell the DigitaLIZA so I only ended up about £10 out of pocket, but still it’s frustrating.
* I use a Fuji X-T2 which is obviously a mirrorless camera, but for the sake of simplicity and brevity I’ll refer to it as a DSLR in this article.
So is the solution simply to buy a flatbed or dedicated film scanner?
Dedicated scanners also suck. Yeah, I know. Most scanners currently on the market are at best anywhere from 5 to 10 year old models. Sure periodically manufactures bump the model numbers, but the fundamental hardware is basically the same. A telling sign of this is that we’re still stuck with slow USB 2 connections, now a twenty year old standard that should feel as anachronistic as parallel and SCSI ports. Scanning speed is glacial – generally the fastest you can find is around a minute per 35mm frame and more typically you’re talking about several minutes per frame, so the process of digitising an entire 36 exposure role is likely to take an hour at a minimum. They also nearly all lie about their actual resolution (DPI) so it becomes a guessing game of what resolution you need to scan at and then downsample from to achieve the optimal result.
“A telling sign of this is that we’re still stuck with slow USB 2 connections, now a twenty year old standard that should feel as anachronistic as parallel and SCSI ports.”
However scanners do get some important things right, or at least they try to. Automatic dust removal, software designed to handle the whole process of capture, inversion and colour balancing, consistent results and quick setup. Some scanners even automate the process to the extent they can do whole strips or even multiple strips without supervision.
I enjoy editing my photos almost as much as taking them, but I do not overly enjoy the digitisation process itself so anything that makes that simpler and more reliable is a huge win for me. So I’ve decided to buy a dedicated film scanner, in the knowledge that it’s rebadged old hardware, that it will be slow and that I’m likely to encounter a learning curve to get the quality of results that I demand. In an ideal world I’d have been able to buy a scanner capable of handling 120 and 35mm film, but the only two choices there I can find on the market that produce adequate scan resolutions are both over £1000 and seem if not discontinued, then extremely scarce on the ground. So I’ve decided to keep my DSLR scanning setup for medium format for now, but switch my 35mm scanning to using a PlusTek 8200i. I’ll explain my thought process a bit below.
Why I chose the 8200i
I’ve been researching film scanners on and off for awhile now and have found there is precious little information out there on this subject despite the prevalence of YouTube channels and blogs dedicated to film photography. The only website with comprehensive scanner reviews I’ve found is ScanDig, which itself feels like a time capsule from the early 00’s. Reading their reviews you’ll quickly spot a theme – most of the scanners aren’t that good, they all over state their resolution to varying degrees and that they’re all generally worse than the long discontinued Nikon models. What they don’t provide is any full resolution sample scans or offer any head-to-head comparisons with a reference image for you to make your own mind up. At least they provide a good list of different scanners you can then look up individually on Google.
I quickly decided I wasn’t happy with the quality from flatbed scanners and it sounded like they nearly all had issues with accurately focusing on the negatives which resulted in extremely low resolution being achieved with 35mm, and only barely acceptable resolution from medium format. So next I turned to the dedicated film scanner market that thankfully is still limping along. The two main players here are currently Reflecta and PlusTek. Reflectas are also sold under a few different brands like Braun and Pacific Image.
“The Reflecta scanners seem to have a slight edge in terms of resolution, but are more expensive than equivalent PlusTek models.”
The Reflecta scanners seem to have a slight edge in terms of resolution, but are more expensive than equivalent PlusTek models. They also had very restrictive warranties until recently (up to 8000 scans) which makes me question the manufacturer’s expected longevity of their products given each photo will generally require at least 2 scans (preview and main), and potentially 3 with infrared dust removal. I also seemed to come across quite a few people complaining about technical problems with their Reflecta scanners, but that may just have been happenstance.
In the world of 35mm scanners they fall broadly into two camps; automatic and manual feed. If you’re sitting there with a huge box of negatives that all need scanning and you don’t have unlimited time and patience on your hands, then an automatic feed scanner is basically essential. You drop the negative into a carrier and it will work out where the frames are and scan each one for you. However for my needs, where in the worst case I maybe have two or three films to scan at any one time, manual feed is fine. As you might expect, manual feed scanners are cheaper. It also seems like one less thing to go wrong. PlusTek sell three manual feed 35mm scanners, the 8100, the 8200i SE and the 8200i AI. The 8100 is the cheapest and most basic model, it doesn’t do infrared dust removal – whether that’s important to you or not will depend on how much black and white you shoot (it only works on colour film). The 8200 models are identical except for the versions of the SilverFast 8 software they ship with.
First Impressions
The 8200i is a compact little unit and takes up considerably less space than any of the various DSLR scanning setups I’ve tried. It comes with a two film holders, one for mounted slides and one for a 6 exposure long negative strip (shorter strips can be used). I was a little apprehensive about the scanning software it comes with, SilverFast SE 8 Plus, as it has a reputation of having a steep learning curve. However it turned out it’s fairly easy to use – but I’ve been using professional level photographic software for over twenty years now so I’m not your average user.
The default scan setting uses 3600 dpi which produces roughly 19 megapixel images. This is definitely the sweet spot for useful detail from any film that’s ISO 100 or over unless you just want more defined grain. Scan times on my computer (3.6GHz i7 9700K, 32GB RAM) are around 55 seconds at 3600 dpi. A preview scan takes around 25 seconds. That time roughly doubles if you turn on the infrared dust spot removal as it has to do a second pass.
The 8200’s top resolution is 7200 dpi. At this resolution you’re not actually gaining that much more information, just inflating the size your file. Scanning at this resolution took 2:45 minutes on my machine. If you downsample this massive scan though you can extract slightly more detail than you get from the 3600 dpi scan so for certain special images it may be worth the hassle. It might also be useful if you need to do a lot of fine repair work on your negative before down sampling.
| Resolution | Normal Scan | Scan + iSRD (infrared repair) |
| 3600 dpi | 55 seconds | 1 minute, 40 seconds |
| 7200 dpi | 2 mins, 45 seconds | 5 minutes, 50 seconds |
SilverFast has lots of modules you can add to your work flow for sharpening, grain and noise removal, auto-contrast and so on. I’m not using any of them – I want my scans to be relatively neutral because I will be post-processing them in Lightroom and Photoshop. I’m not really convinced any of them hold a candle to what you can achieve in Adobe’s apps either. Take the infrared dust and scratch removal feature – it does a fairly decent job of spotting the blemishes on your film, but the actual corrections it applies are ham fisted compared to what you can achieve in a few minutes with the dust and scratches filter in Photoshop (applied locally) and the clone stamp or healing brush. It’s fine for dust specs, but if you have scratches or damage to the emulsion it will do more harm than good.
What SilverFast does do a very good job at is converting colour negatives into positives. It has an extensive range of presets for all the common films from Kodak and Fuji, including many long discontinued ones from other brands. It is however missing anything that’s come out in the last few years like CineStill or Lomography films and surprisingly also Kodak’s ColorPlus. However you can easily switch profiles without needing to rescan to see how the colours change, so it’s just a case of choosing something that looks pleasing.
For black and white films the profiles tend to mess with the contrast and sometimes introduce a slight warming or cooling effect. I just look for which ever is neutral enough – I don’t want to bake a load of contract into my scans. Unless you scan your black and white images in colour mode you’re unfortunately limiting yourself to 8 bit output (that is only 256 shades of grey) which feels a bit unforgivable in a piece of software as mature and expensive as SilverFast.
When it comes to fine tuning your scans the first port of call should ideally be Photoshop (or a similar tool). You can fix any obvious blemishes and then a little colour noise reduction will leave your image looking pretty nice if still a little soft at the pixel level. Applying a moderate level unsharp mask (say around 100% with a radius of 0.9 and threshold of 2) and your image should begin to look pretty crisp, but not over sharpened. It’s at this stage that I import the photo into Lightroom for any colour correction or further sharpening. You could skip the Photoshop step and go directly to Lightroom, but I find Photoshop faster for dust spotting.
So how does the 8200i compare to my DSLR setup?
So far I’ve found the 8200i compares favourably to the best scans I’ve managed to make with my DSLR and macro lens. In terms of raw detail, when the macro lens is perfectly focused the results look as good as the 7200 dpi scans downsampled to around 24 megapixels (the native output of my DSLR). But where the scanner excels is that it’s always properly focused, something that is not easy to achieve with a manual focus macro lens like the one I use. So that means the regular 3600 dpi scans look as a good as or better than my typical results with the DSLR. I’ve found this especially true for slide film. I thought slide film just wasn’t that sharp – turns out I was wrong, I just could never focus on it properly!

Top right, DSLR capture. Note the mushy green foliage with very little fine detail. This is already a weak spot of my Fuji X-T2’s X-Trans sensor, but even non-green areas are this lacking in detail and I tried refocusing on the slide several times.
Bottom right, 8200i scan. The fine detail of the leaves in the distant trees here really surprised me – I just didn’t think ISO 100 slide film could resolve that much detail!


SilverFast also does a hands down better job at creating pleasing and balanced colours from colour negatives than I’ve ever been able to achieve myself. I’ve always found correcting for the orange mask kills my reds leaving them looking more orange and washed out than they should be. Films which I thought looked a bit washed out because of my low temperature home processing are suddenly bursting with vibrant colours, it’s a total revelation!

So in terms of raw image quality and colours I’m honestly thrilled, it’s a marked improvement over what I had. I have discovered some downsides though. The first is that SilverFast can only output 8 bit per channel tiff files*, that somewhat limits your headroom for pushing and pulling highlights and shadows. It’s especially egregious for greyscale files where you are dealing with only one 8 bit channel. To get true 16 bit output you have to spend a fortune on Silverfast Ai Studio which is an expensive upgrade for such a basic feature.
“So in terms of raw image quality and colours I’m honestly thrilled, it’s a marked improvement over what I had.”
* it can also output to its own proprietary HDR raw files which do offer 16 bits per channel but which of course require an expensive dedicated piece of software from Silverfast to work with 🙄.
I decided to try rival scanner software VueScan to get 16 bit greyscale output and it works fine, however it seems to produce a little bit of banding that I don’t see with Silverfast, although it only effects the extreme edge of the scan so I can crop it off easily enough and only lose around 20 pixels. I don’t find VueScan’s colour output especially good however, I’m sure with enough patience and trial and error you can make it good, but in this regard Silverfast is hands down better as it works out of the box.
The second major downside is that it turns out scanners can ‘see’ damage to the surface of a negative that my DSLR could not. I’ve never mistreated my negatives, I keep them all in glassine sleeves and I don’t squeegee them when drying. However I still seem to have scratched a lot of them, I can only assume during my previous digitisations pulling them through the negative carrier. I’ve not come across anything that was especially hard to fix in Photoshop, but if you’re going to be dealing with less well treated films then this is something to keep in mind. As I mentioned above the automatic dust and scratch removal is limited and it’s particularly poor at correcting scratches turning them into coloured gashes that clearly disrupt the grain pattern and any other fine detail they pass through.
So I should buy a film scanner?
If you’re totally happy with whatever setup you have at the moment and that doesn’t already involve a film scanner, then obviously no. However if you’re at all unhappy with the faff, the colours, the sharpness or whatever and you primarily want to scan 35mm then yeah, you really should invest in a dedicated scanner because the results are that much better. I wish there was an equally good and affordable solution for medium format. Maybe an Epson v850 is a good enough as a stop gap, but I hope either PlusTek or Reflecta will step up here and refresh their offerings for the new generation of film shooters.


