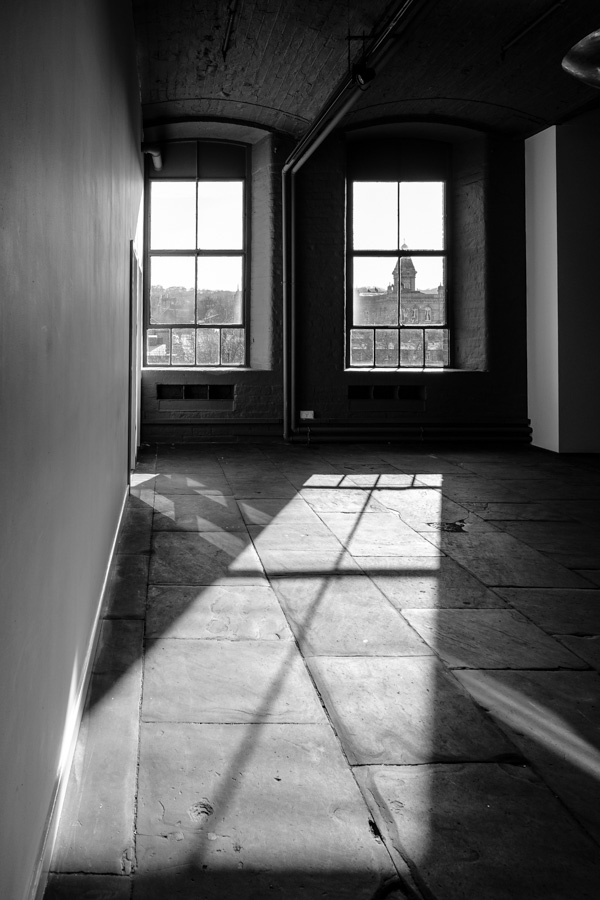
When last I wrote on these hallowed pixels (that’s been awhile, my apologies), I was talking about scanning medium format film with an Epson V600. A little over a year ago now I decided that I quite liked this whole “scan a bunch of images in a batch” workflow and decided to look for something that would also handle 35mm in reasonable quality. Well those options are incredibly limited, so I ended up dumping a bunch of cash on an Epson V850, Epson’s high end flatbed. This boasts increased resolution and a large negative scanning area capable of handling up to 3 strips of 35mm film and the ability to even do up to 8×10 if ever the madness truly takes me.
You have to accept with a flatbed scanner you’re never going to get the full resolution of the film and the smaller the negative size the more this impacts. For me the bare minimum acceptable resolution for making up to A3 size prints and looking nice on a high DPI monitor is about 12 megapixels, this needs a resolution of approaching 3000 DPI to achieve with a 35mm frame. That resolution is very much the upper end of what you can expect with a high end flatbed, but with some careful post processing you can get close enough.
Hardware
Compared to the V600, the V850 is an absolute unit with a very large boxy design. A neat little translucent strip in the lid houses a blue LED that shows the progress of the transparency unit’s light across the negative which is rather a fun detail. The film holders are slightly more substantial than the 600’s and all have ANR (Anti-Newton Ring) glass inserts to help hold the film flat while avoiding those pesky newton rings that can occur when the film isn’t perfectly flat and reflections cause interference patterns. The film holders all have height adjustment sliders to fine tune the focus. These make a subtle change to the sharpness of your scans, slightly improving things when fine tuned. I find it’s easy for the sliders to get knocked out of position though, especially on the 35mm holder which has a lot of them, so attention needs to paid that none have drifted when swapping negatives. The v850 comes with a full duplicate set of negative holders so you can streamline your workflow a bit and have up to 6 strips of 35mm or two strips of 120 mounted and ready to go at any one time. In practice I just use the one set and keep the others as spares should I ever manage to break or scratch any of the glass inserts.
The v850 is still using an antiquated USB 2 connection and the scan speed is pretty slow at working resolutions. How much of this slow speed is necessitated to get a good result and how much is caused by the data processing and transfer speed of the scanner I don’t know. Despite the slow speed however you can set up a batch scan job so you can at least get on with something else while the scanner whirs and grinds its way through your images.
Software
The scanner comes with SilverFast, which I kind of low key hate, and Epson Scan 2 which is kinda good but bad at batch scanning and inexplicably slow even on a powerful system. Epson Scan will be fine for most people and perhaps is less sluggish on Windows? The main issue I have with it is that it overcrops into the image area when auto detecting frames and it’s a tedious process to mark out 18 frames (three strips of six shots) when doing 35mm. At least it can capture 16 bits per channel TIFFs without costing you a fortune to upgrade like SilverFast. Epson Scan also is quite good at producing pleasing colours from negatives which is not to be sneezed at. Personally I use the scanner with VueScan in combination with Negative Lab Pro. VueScan is a confoundingly badly designed piece of software, but once it’s setup “right” it does get the job done. Setting up a batch scan is a painful process as with Epson Scan, but at least it remembers where the frames are so if you have to scan a bunch of 35mm or 120 it’s not too bad, just don’t alternate between formats more than you have to.
Again how any of this scanner software, most of which has been around for getting on 20 years now, still can’t reliably detect frames or even have profiles for the few scanners still on the market that could at least ball park where the negatives are is baffling. But in the cursed world of film digitisation you just have to learn to live with all this bizarreness and accept it will never get better. Just remember DSLR scanning is also a massive pain in the arse too.
Results
Most reviewers who have spent time with resolution test charts, fluid mounting and so on have concluded the Epson pro scanners can achieve around 2400 DPI in terms of real resolution. It’s not amazing, but it’s just enough for 35mm and plenty for medium format or larger. Allegedly there are minor optical differences between the V800 and V850, but I suspect these were dreamed up in Epson’s marketing department as I’ve never seen any evidence of one producing better results than the other. The V850 does produce markedly better results than the V600 though, night and day with 35mm and still noticeably better with medium format. I scan at 3200 DPI and downsample in Photoshop, typically to around 26 megapixels for 6×4.5, 36 megapixels for 6×6 and about 12 megapixels for 35mm. I find Photoshop’s smart sharpen filter tends to provide better results than simply using an edge detect sharpen in either the scanner software or Photoshop. As I mentioned above, I use Negative Lab Pro to handle the colour conversion, so VueScan is relegated to simply providing a decent uninverted tiff as its colour correction is cumbersome and unintuitive to use
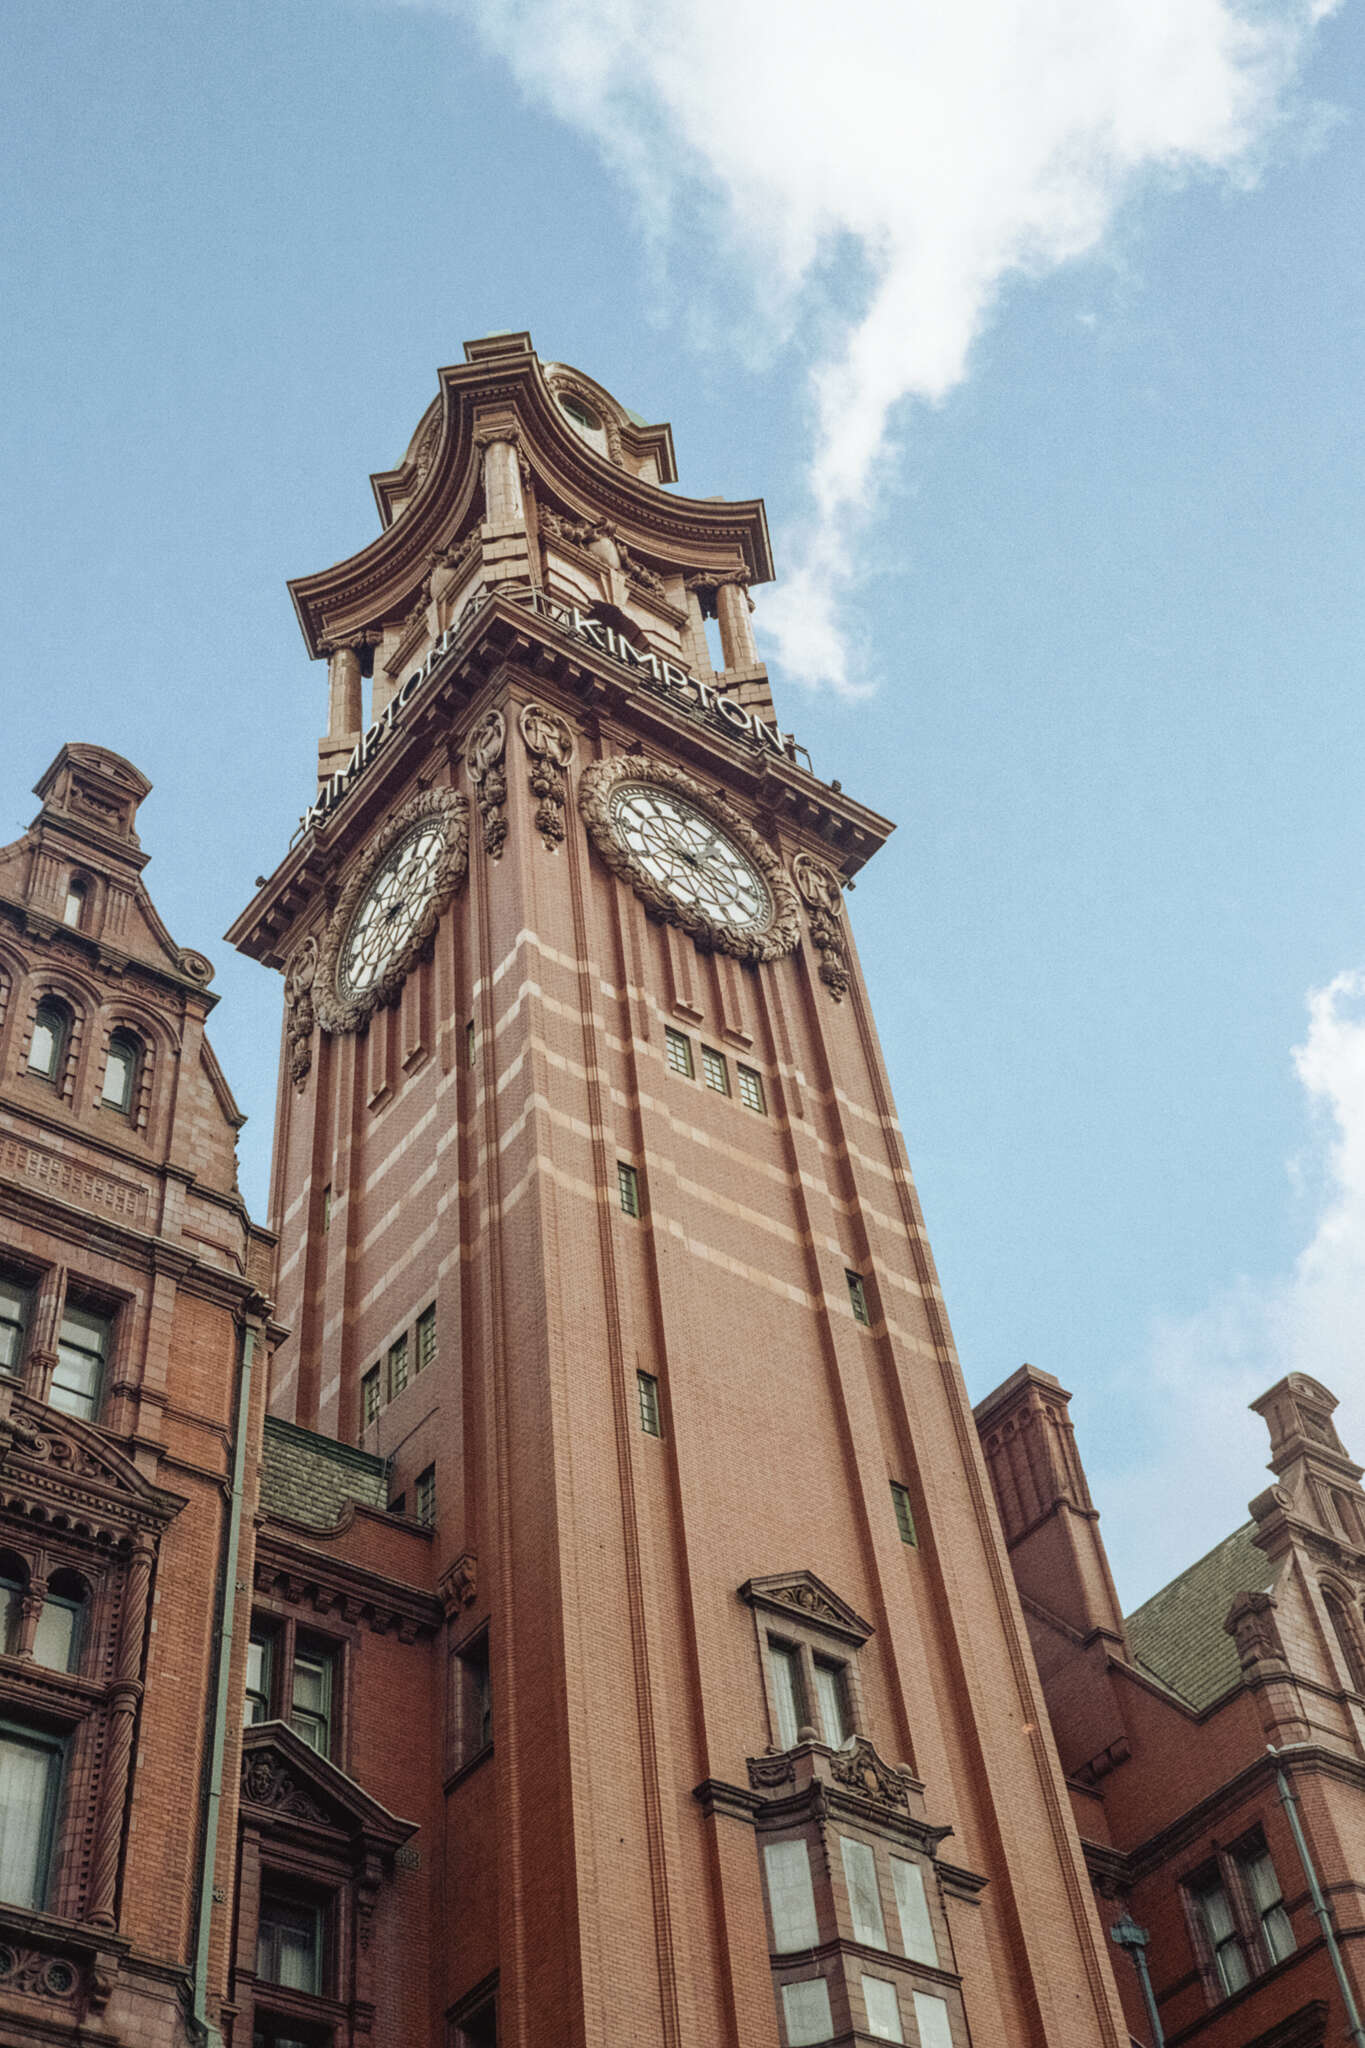
Here’s a 35mm shot from my Rollei 35 SE on Kodak Gold 200 with a 100% crop on the right. As you can see the details are pretty decent and you can make out the individual bricks in the tower in this 12 megapixel digitisation (4319×2879). It’s possible to squeeze a little more perceptual detail by cranking up the sharpness slider in Lightroom, but I’ve left it with the basic smart sharpen applied to the TIFF in Photoshop here.
Could you squeeze more details from this negative with a better scanner or even DSLR scanning? Almost certainly, but you’d probably also make the grain a lot more visible and unless you wanted to print a truly massive image or hugely crop in would you actually gain anything? For me that answer is, “not really”. This is why I think a flatbed scanner with this level of resolution is good enough 90% of the time for 35mm and pretty much 100% of the time for medium format or larger. For that remaining 10% where more resolution is desirable on 35mm I have my PlusTek 8200 which can achieve 4000 DPI of real resolution, and for the occasional shot or even whole roll where I can make use of that it’s a good solution, but the thought of spending literally all day manually feeding each frame of multiple rolls of 35mm is very unappealing.
Is it worth it?
I bought my V850 for about £900 in 2021, since then it seems like the slightly cheaper V800 has been discontinued but despite the rampant inflation over 2022 the price still seems to be in the same ballpark. Now that’s no small chunk of change and I appreciate this scanner will be out of reach for a lot of film shooters. If you don’t need to scan 35mm or don’t mind using a cheaper flatbed scanner in combination with a dedicated 35mm scanner then there are other decent options. If you only need 35mm and don’t mind manual feed then there are a number of decent options for around £300. Compared to the cost of buying and setting up a full DSLR or mirrorless scanning rig with a 1:1 macro, good light source and film holder I think the V850 is still quite a bit cheaper, but your mileage will vary depending on what other gear you already own. For me this Epson is currently the best multi-format film scanner on the market that can still be bought new.
DSLR scanning sucks. There I said it! Since my journey back into film photography started in 2017 I’ve been using my digital camera to digitise my negatives. It works, it can produce arguably great results – on a level with the very best quality you can achieve from a high end commercial scanner. But it’s a terrible solution.
Why is it terrible? Because it requires a shed ton of expensive gear to be done remotely well. Yeah you can just about cobble something together with any semi-recent digital camera, a macro extension tube and a nifty fifty (because proper 1:1 macros are expensive), you can sort of use a tripod, you can find a cheap LED light panel that produces whiteish light and so on. But this creates a really awkward setup, once the initial euphoria of “it works!” passes, you’re left with this really cumbersome and unreliable system that probably produces uneven sharpness and is a nightmare to align each time you set it up again. Oh and you’re on your own when it comes to turning your digitised negatives into positives.
The solutions to improving this setup are all really expensive – once you’ve added up the costs of a high quality 1:1 macro lens (£300-1000 depending on system), a proper sturdy copy stand (£200 or more), a high CRI light box (£50-100) and something to hold the negatives themselves flat (£30-300) you’ve easily spent £1000 or more. That puts you well into the ball park price of the highest end prosumer scanners like the Epson v850, the Plustek OpticFilm 120, the Reflecta MF5000 and so on.
For my DSLR* scanning I’ve tried a variety of things, starting off with the bodged solution outlined above. Trying, failing and trying again, replacing and tweaking each of the many components that make it up. Each step has cost more money and I’m incredibly fed up of it. To give a recent example, I’ve been unhappy with using my old Durst negative carrier as it cuts off about 4mm of the frame in each direction and its a faff to align the film well in it, especially at the ends of the strip. I’ve all but given up on ever receiving my Pixl-Latr so I bought both of Lomograph’s DigitaLIZA masks. The 120 model is excellent and works really well, the 35mm one on the other hand isn’t fit for purpose. So I’m back to the suboptimal Durst carrier again. At least I was able to resell the DigitaLIZA so I only ended up about £10 out of pocket, but still it’s frustrating.
* I use a Fuji X-T2 which is obviously a mirrorless camera, but for the sake of simplicity and brevity I’ll refer to it as a DSLR in this article.
So is the solution simply to buy a flatbed or dedicated film scanner?
Dedicated scanners also suck. Yeah, I know. Most scanners currently on the market are at best anywhere from 5 to 10 year old models. Sure periodically manufactures bump the model numbers, but the fundamental hardware is basically the same. A telling sign of this is that we’re still stuck with slow USB 2 connections, now a twenty year old standard that should feel as anachronistic as parallel and SCSI ports. Scanning speed is glacial – generally the fastest you can find is around a minute per 35mm frame and more typically you’re talking about several minutes per frame, so the process of digitising an entire 36 exposure role is likely to take an hour at a minimum. They also nearly all lie about their actual resolution (DPI) so it becomes a guessing game of what resolution you need to scan at and then downsample from to achieve the optimal result.
“A telling sign of this is that we’re still stuck with slow USB 2 connections, now a twenty year old standard that should feel as anachronistic as parallel and SCSI ports.”
However scanners do get some important things right, or at least they try to. Automatic dust removal, software designed to handle the whole process of capture, inversion and colour balancing, consistent results and quick setup. Some scanners even automate the process to the extent they can do whole strips or even multiple strips without supervision.
I enjoy editing my photos almost as much as taking them, but I do not overly enjoy the digitisation process itself so anything that makes that simpler and more reliable is a huge win for me. So I’ve decided to buy a dedicated film scanner, in the knowledge that it’s rebadged old hardware, that it will be slow and that I’m likely to encounter a learning curve to get the quality of results that I demand. In an ideal world I’d have been able to buy a scanner capable of handling 120 and 35mm film, but the only two choices there I can find on the market that produce adequate scan resolutions are both over £1000 and seem if not discontinued, then extremely scarce on the ground. So I’ve decided to keep my DSLR scanning setup for medium format for now, but switch my 35mm scanning to using a PlusTek 8200i. I’ll explain my thought process a bit below.
Why I chose the 8200i
I’ve been researching film scanners on and off for awhile now and have found there is precious little information out there on this subject despite the prevalence of YouTube channels and blogs dedicated to film photography. The only website with comprehensive scanner reviews I’ve found is ScanDig, which itself feels like a time capsule from the early 00’s. Reading their reviews you’ll quickly spot a theme – most of the scanners aren’t that good, they all over state their resolution to varying degrees and that they’re all generally worse than the long discontinued Nikon models. What they don’t provide is any full resolution sample scans or offer any head-to-head comparisons with a reference image for you to make your own mind up. At least they provide a good list of different scanners you can then look up individually on Google.
I quickly decided I wasn’t happy with the quality from flatbed scanners and it sounded like they nearly all had issues with accurately focusing on the negatives which resulted in extremely low resolution being achieved with 35mm, and only barely acceptable resolution from medium format. So next I turned to the dedicated film scanner market that thankfully is still limping along. The two main players here are currently Reflecta and PlusTek. Reflectas are also sold under a few different brands like Braun and Pacific Image.
“The Reflecta scanners seem to have a slight edge in terms of resolution, but are more expensive than equivalent PlusTek models.”
The Reflecta scanners seem to have a slight edge in terms of resolution, but are more expensive than equivalent PlusTek models. They also had very restrictive warranties until recently (up to 8000 scans) which makes me question the manufacturer’s expected longevity of their products given each photo will generally require at least 2 scans (preview and main), and potentially 3 with infrared dust removal. I also seemed to come across quite a few people complaining about technical problems with their Reflecta scanners, but that may just have been happenstance.
In the world of 35mm scanners they fall broadly into two camps; automatic and manual feed. If you’re sitting there with a huge box of negatives that all need scanning and you don’t have unlimited time and patience on your hands, then an automatic feed scanner is basically essential. You drop the negative into a carrier and it will work out where the frames are and scan each one for you. However for my needs, where in the worst case I maybe have two or three films to scan at any one time, manual feed is fine. As you might expect, manual feed scanners are cheaper. It also seems like one less thing to go wrong. PlusTek sell three manual feed 35mm scanners, the 8100, the 8200i SE and the 8200i AI. The 8100 is the cheapest and most basic model, it doesn’t do infrared dust removal – whether that’s important to you or not will depend on how much black and white you shoot (it only works on colour film). The 8200 models are identical except for the versions of the SilverFast 8 software they ship with.
First Impressions
The 8200i is a compact little unit and takes up considerably less space than any of the various DSLR scanning setups I’ve tried. It comes with a two film holders, one for mounted slides and one for a 6 exposure long negative strip (shorter strips can be used). I was a little apprehensive about the scanning software it comes with, SilverFast SE 8 Plus, as it has a reputation of having a steep learning curve. However it turned out it’s fairly easy to use – but I’ve been using professional level photographic software for over twenty years now so I’m not your average user.
The default scan setting uses 3600 dpi which produces roughly 19 megapixel images. This is definitely the sweet spot for useful detail from any film that’s ISO 100 or over unless you just want more defined grain. Scan times on my computer (3.6GHz i7 9700K, 32GB RAM) are around 55 seconds at 3600 dpi. A preview scan takes around 25 seconds. That time roughly doubles if you turn on the infrared dust spot removal as it has to do a second pass.
The 8200’s top resolution is 7200 dpi. At this resolution you’re not actually gaining that much more information, just inflating the size your file. Scanning at this resolution took 2:45 minutes on my machine. If you downsample this massive scan though you can extract slightly more detail than you get from the 3600 dpi scan so for certain special images it may be worth the hassle. It might also be useful if you need to do a lot of fine repair work on your negative before down sampling.
Resolution
Normal Scan
Scan + iSRD (infrared repair)
3600 dpi
55 seconds
1 minute, 40 seconds
7200 dpi
2 mins, 45 seconds
5 minutes, 50 seconds
Typical scanning times with and without infrared dust and scratch repair on a high spec desktop PC.
SilverFast has lots of modules you can add to your work flow for sharpening, grain and noise removal, auto-contrast and so on. I’m not using any of them – I want my scans to be relatively neutral because I will be post-processing them in Lightroom and Photoshop. I’m not really convinced any of them hold a candle to what you can achieve in Adobe’s apps either. Take the infrared dust and scratch removal feature – it does a fairly decent job of spotting the blemishes on your film, but the actual corrections it applies are ham fisted compared to what you can achieve in a few minutes with the dust and scratches filter in Photoshop (applied locally) and the clone stamp or healing brush. It’s fine for dust specs, but if you have scratches or damage to the emulsion it will do more harm than good.
What SilverFast does do a very good job at is converting colour negatives into positives. It has an extensive range of presets for all the common films from Kodak and Fuji, including many long discontinued ones from other brands. It is however missing anything that’s come out in the last few years like CineStill or Lomography films and surprisingly also Kodak’s ColorPlus. However you can easily switch profiles without needing to rescan to see how the colours change, so it’s just a case of choosing something that looks pleasing.
For black and white films the profiles tend to mess with the contrast and sometimes introduce a slight warming or cooling effect. I just look for which ever is neutral enough – I don’t want to bake a load of contract into my scans. Unless you scan your black and white images in colour mode you’re unfortunately limiting yourself to 8 bit output (that is only 256 shades of grey) which feels a bit unforgivable in a piece of software as mature and expensive as SilverFast.
When it comes to fine tuning your scans the first port of call should ideally be Photoshop (or a similar tool). You can fix any obvious blemishes and then a little colour noise reduction will leave your image looking pretty nice if still a little soft at the pixel level. Applying a moderate level unsharp mask (say around 100% with a radius of 0.9 and threshold of 2) and your image should begin to look pretty crisp, but not over sharpened. It’s at this stage that I import the photo into Lightroom for any colour correction or further sharpening. You could skip the Photoshop step and go directly to Lightroom, but I find Photoshop faster for dust spotting.
So how does the 8200i compare to my DSLR setup?
So far I’ve found the 8200i compares favourably to the best scans I’ve managed to make with my DSLR and macro lens. In terms of raw detail, when the macro lens is perfectly focused the results look as good as the 7200 dpi scans downsampled to around 24 megapixels (the native output of my DSLR). But where the scanner excels is that it’s always properly focused, something that is not easy to achieve with a manual focus macro lens like the one I use. So that means the regular 3600 dpi scans look as a good as or better than my typical results with the DSLR. I’ve found this especially true for slide film. I thought slide film just wasn’t that sharp – turns out I was wrong, I just could never focus on it properly!
Here’s a shot on new Kodak Ektachrome
Top right, DSLR capture. Note the mushy green foliage with very little fine detail. This is already a weak spot of my Fuji X-T2’s X-Trans sensor, but even non-green areas are this lacking in detail and I tried refocusing on the slide several times.
Bottom right, 8200i scan. The fine detail of the leaves in the distant trees here really surprised me – I just didn’t think ISO 100 slide film could resolve that much detail!
100% crop from DSLR scan100% crop from 8200i scan
SilverFast also does a hands down better job at creating pleasing and balanced colours from colour negatives than I’ve ever been able to achieve myself. I’ve always found correcting for the orange mask kills my reds leaving them looking more orange and washed out than they should be. Films which I thought looked a bit washed out because of my low temperature home processing are suddenly bursting with vibrant colours, it’s a total revelation!
DSLR scan with colour correction in Lightroom
PlusTek 8200i scan with colour correction in SilverFast
So in terms of raw image quality and colours I’m honestly thrilled, it’s a marked improvement over what I had. I have discovered some downsides though. The first is that SilverFast can only output 8 bit per channel tiff files*, that somewhat limits your headroom for pushing and pulling highlights and shadows. It’s especially egregious for greyscale files where you are dealing with only one 8 bit channel. To get true 16 bit output you have to spend a fortune on Silverfast Ai Studio which is an expensive upgrade for such a basic feature.
“So in terms of raw image quality and colours I’m honestly thrilled, it’s a marked improvement over what I had.”
* it can also output to its own proprietary HDR raw files which do offer 16 bits per channel but which of course require an expensive dedicated piece of software from Silverfast to work with 🙄.
I decided to try rival scanner software VueScan to get 16 bit greyscale output and it works fine, however it seems to produce a little bit of banding that I don’t see with Silverfast, although it only effects the extreme edge of the scan so I can crop it off easily enough and only lose around 20 pixels. I don’t find VueScan’s colour output especially good however, I’m sure with enough patience and trial and error you can make it good, but in this regard Silverfast is hands down better as it works out of the box.
The second major downside is that it turns out scanners can ‘see’ damage to the surface of a negative that my DSLR could not. I’ve never mistreated my negatives, I keep them all in glassine sleeves and I don’t squeegee them when drying. However I still seem to have scratched a lot of them, I can only assume during my previous digitisations pulling them through the negative carrier. I’ve not come across anything that was especially hard to fix in Photoshop, but if you’re going to be dealing with less well treated films then this is something to keep in mind. As I mentioned above the automatic dust and scratch removal is limited and it’s particularly poor at correcting scratches turning them into coloured gashes that clearly disrupt the grain pattern and any other fine detail they pass through.
So I should buy a film scanner?
If you’re totally happy with whatever setup you have at the moment and that doesn’t already involve a film scanner, then obviously no. However if you’re at all unhappy with the faff, the colours, the sharpness or whatever and you primarily want to scan 35mm then yeah, you really should invest in a dedicated scanner because the results are that much better. I wish there was an equally good and affordable solution for medium format. Maybe an Epson v850 is a good enough as a stop gap, but I hope either PlusTek or Reflecta will step up here and refresh their offerings for the new generation of film shooters.
The C35 was an entry level colour 35mm enlarger made by Italian firm Durst in the early 1980s. It had a sister model called the C65 (yes65) that was designed for up to 6×6 negatives. The only difference between the two models was the supplied mixing box, negative carrier and lens, they otherwise shared all the same components. From my searching it seems like the C65 is rather rare, especially compared to the C35 which can be easily found on eBay or at specialist photography stores that carry secondhand kit, usually for around £50 or less.
Upgrading to an LED light source
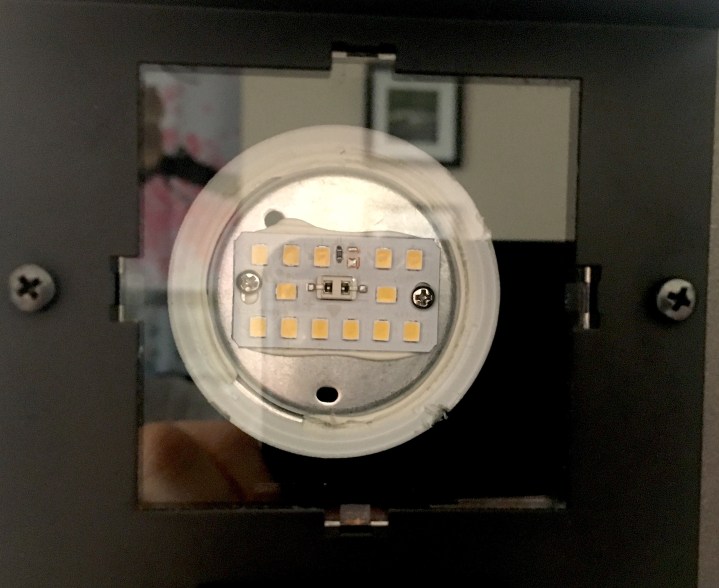
The main weakness of the C35 (and C65) is the light source. They were originally designed to be used with a 55W reflector bulb. When paired with the mixing box diffusor this was decidedly dim compared to an enlarger using a condensing lens. Luckily the lamp fitting takes a standard E27 Edison screw mains voltage bulb, so we can bring things into the 21st century by fitting a much brighter LED bulb.
I recommend the Philips Corepro LED bulbs, you’ll want a cool white version because photographic paper reacts primarily to blue light. Don’t cheap out on the bulb as you want something that will emit an even and wide spectrum of light.
Philips Corepro LED bulb with diffuser removed.
To level up the light bulb even more for our purposes I recommend (carefully) removing the opal diffuser from the bulb itself. This means more of the light will go directly into the mixing box instead of bouncing around in the lamp housing. On the Corepro bulbs this is simply held in place with adhesive and can be pried loose with a flat head screw driver without too much difficulty. Obviously don’t do this while it’s plugged in or turned on and don’t touch the exposed LEDs or you risk electric shock! Once installed in the enlarger the bulb will be safely behind a glass heat shield.
Note that I’ve only tried black and white multigrade printing with an LED bulb, I can’t guarantee you’ll get great colour results using one; but then if you’re serious about colour printing the C35 isn’t a good option anyway given the lack of a proper cyan filteror voltage regulator.
Upgrading the Lens
The C35 comes with a fairly basic, plasticky 50mm f2.8 lens Durst brands as a Neotaron. Mine was full of fungus and refused all attempts at disassembly so I was unable to clean it. The C35’s lens board will take any Leica M39 screw mount lens so you have plenty of upgrade options.
Durst also made a very nice premium 50mm f2.8 lens with the Neonon name. This is an excellent quality lens that generally sells for a lot less than other popular enlarging lenses from the big brands. If you’re looking for a 50mm lens for your C35 this is what I’d recommend.
Note that due to the maximum column height of the C35 you won’t be able to make much more than a 9.5×12″ print with a 50mm lens. If you want to print bigger you either need to find a wide angle 40mm lens or rotate the column on the enlarger so it projects on to the floor. Sadly you can’t rotate the enlarger head to project on to a wall.
If you have a C65 or an upgraded C35 that can handle 6×6 negatives, you’ll also need a 75 or 80mm lens. Durst made a fairly dark 75mm f4.5 lens, but I’d recommend looking for something a little brighter. I have an inexpensive Meopta 80mm f4 that came bundled with my old Gnome enlarger. Unfortunately it’s too big to use the C35’s swing in red filter, but that’s not the end of the world.
Upgrading the C35 to handle 6×6 negatives
The incredibly rare Durst MEKIT 65 6×6 upgrade kit for the C35
As I mentioned at the start of the post, the only differences between the C35 and C65 are the negative carrier, mixing box and lens. So it stands to reason you can simply upgrade by swapping these components. Indeed Durst sold a kit called the MEKIT 65 for just this purpose. Unfortunately despite how common the C35 itself is, these kits are exceptionally rare*. So this part of the guide will probably only be helpful to a small number of people, but given the absence of any real information about it online I thought I’d try and fill the void.
* Another source of these components (other than the kit) might be a broken C65 – as long as you have at least the negative carrier and intact mixing box you should be in business.
I was extremely lucky and did manage to find a MEKIT 65 the other week by chance, albeit missing the 75mm f4.5 lens. As mentioned above I already own a Meopta 80mm lens so this wasn’t an issue.
However it wasn’t until after ordering I noticed a problem when examining pictures of the kit – on my C35 the magenta and yellow filters are integral to the mixing box, but the MEKIT 65 seems designed for a version of the C35 where this is instead fixed to the lamp housing. Oh dear!
So it turns out there are two versions of the C35, my one that is presumably a late model, whose main differentiating feature seems to be illuminated scales on the mixing box and the original which didn’t have this. The illuminated scale model for some reason moved the yellow and magenta filters to the mixing box itself, where as on the older model this was on the lamp housing.
From the manual, MESIXKIT 65 vs MEKIT 65
Checking the manual that came with my C35 it still talks about the enlarger being upgradable but makes no mention of the MEKIT 65 and instead mentions MESIXKIT 65. Searching for MESIXKIT 65 turned up nothing of use.
After further inspecting both my mixing box and pictures of the MEKIT 65 one, I became convinced it would be possible to retrofit the colour filters to it as the overall design of the box itself was largely unchanged. Today I put that to the test as the upgrade kit was delivered!
The MEKIT 65‘s 6×6 mixing box on the left with my ‘new style’ 35mm box on the right (the apparent size difference is due to the added height of the colour filters on the back).
It was straight forward to remove both the metal plate from the 6×6 mixing box and the colour mixer from the 35mm mixing box. They both attach in the same manner at the top of the box with two little hooks that clip into the plastic, but they are screwed into slightly different locations at the bottom.
Mixing boxes with the backs removed, MEKIT 65 on the left again.
Interestingly there are indents where the screws should go on the 6×6 version of the box, presumably that isn’t a coincidence! I removed the black card baffles and swapped the metal filter holder over from the 35mm mixing box. It fit perfectly so that was a good sign (the 35mm box still has a 6×6 aperture where it meets the lamp housing).
Next up I tried to fit the colour filter plate and thankfully it simply slotted into place. The metal plate from the 6×6 mixing box would not fit the 35mm box however – although that’s not a concern here, it does mean you might have difficulty if you were trying to fit a MESIXKIT 65 to an older style C35 for some reason.
The 6×6 mixing box with colour filters attached but not yet screwed in.
Now it was just a case of screwing the colour filter plate into the 6×6 mixing box. First I removed the diffuser from the bottom of the box to make sure I wouldn’t be damaging anything with the screws (and to give it a clean). There was just an empty void where the screws were going so I had nothing to worry about. The plastic is fairly soft and it wasn’t hard to drive the screws from the 35mm mixing box into it without risking cracks.
Checking the area the screws would be tapped into.
After getting the screws in, I blew out any remaining dust with a blower, gave both sides of the diffuser box a gentle clean and then screwed that back in place.
The assembled MEKIT mixing box with colour filters.
The final step then was to simply affix the mixing box with colour filters back to the enlarger. This is super easy as there are four fixed bolts on the back of the colour filter plate that correspond with holes on the lamp housing, then it’s just a case of tightening 4 plastic nuts to lock it into position.
So that’s how you fully upgrade your Durst C35 to handle both 35mm and 6×6 negatives, at least if you end up with a mismatched enlarger and upgrade kit! Knowing now that there are multiple versions of the C35, if I were buying one today I’d look for the older model as it would be easier to upgrade and the illuminated scales are really not worth the extra hassle.
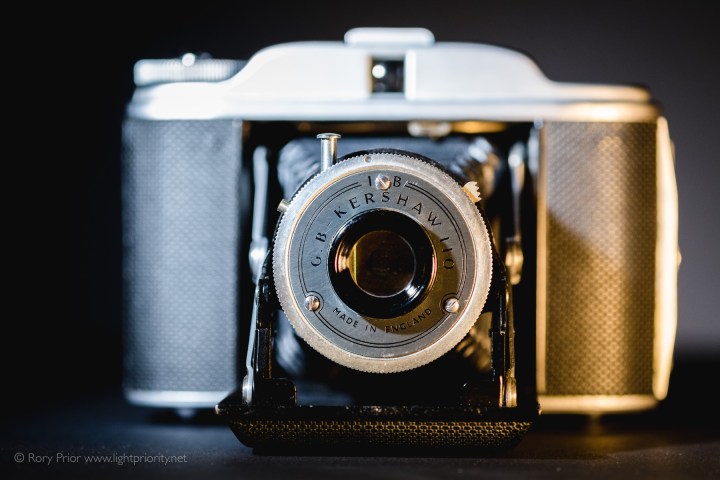
Exploring a local antiques shop recently, I came across a beautiful 6×6 format folding camera that appeared to be in very nice condition. After giving it a once over and determining nothing was obviously wrong, I plunked down £9 ($12) of my hard earned cash to take the thing home. It turned out I had bought a Yorkshire camera. A GB Kershaw 110 to be precise, made in the great city of Leeds some 60 or so years ago. It was in very nice condition for its age, with just some dust in the optics and a tiny bit of corrosion here and there on the aluminium parts.
The biggest worry with any camera that makes use of soft bellows is pin holes and tears that could cause light leaks. These are usually found around the folds where the material is under the most stress. Thankfully the bellows on this camera are in tip-top shape, requiring no repair at all. Another common problem to look out for in old cameras is worn out light seals, where foam or felt has disintegrated or worn away over the years. Helpfully the Kershaw’s design made no use of either material, so there were no concerns there either.
The lens and viewfinder were very simple to clean of dust, both being made of just two elements. After I finished cleaning things up I loaded a roll of Ilford FP4 Plus. The use of bog standard 120 roll film means the Kershaw is as usable today as when it was new. Getting the film into the camera took a few attempts given the slightly awkward swing out spool holders, but I got there in the end.
In terms of operation, the Kershaw 110 is a very basic camera. A button on the top plate makes the front pop open, extending the bellows and putting the lens into shooting position. A single knob lets you wind the film on, with a red window in the back to let you see which frame you’re on*. The lens is anonymous, but I’d estimate it at around 80mm (45mm equivalent in 35mm terms) with its focus fixed to give you a depth of field from around 3m to infinity. It has a single shutter speed of somewhere around 1/50 of a second and a choice of two apertures, f11 or f16. Its only other features are a bulb mode and a flash sync port. Getting an accurate exposure is rather out the window with such limited control so you’re fairly reliant on the wide latitude of film and hoping for the best!
* 120 roll film is paper backed and that paper has frame numbers printed on to it for cameras like this without mechanical frame counters.
I found the camera simple to use in practice, even if I had a degree of ‘exposure anxiety’ while using it, worrying that for the light conditions I was hopelessly under or overexposing. In the end just about everything turned out fine. The ISO 125 film I’d picked meant I wasn’t too far off in terms of exposure when I was out of the shade.
I found I had no trouble remembering to wind on the film after each shot, so avoided any accidental double exposures. I didn’t have especially high hopes for the optical quality of the anonymous two element lens, but it actually produced some alright results. It’s a little soft at the edges, but the main portion of the frame is pretty sharp – if you can hold the camera still enough.
Indeed the slow shutter speed and awkward handling were the camera’s main let down and I lost about a quarter of the film to camera shake. It’s too bad it can’t take a threaded shutter release as I’m sure that would help quite a bit. It’s made me quite curious to see how good the results could be from a slightly less basic folding camera which could achieve better hand-holdable shutter speeds and with a more serious lens.
Exploring Flickr proves that Agfa Isolette’s and Zeiss Ikons can certainly produce wonderful results. The challenge with such old cameras is finding a copy in good working order without parting with too much money. Certain models are popular with collectors which can push the prices up to silly amounts.
So if you spy an old folding camera in an antiques shop, charity shop or at a car boot sale, don’t just brush if off as a relic from the past – it may be a very capable little camera in your hands. If it’s inexpensive and looks in fair condition, definitely give it a go!
If you enjoy my writing and images please help support me and the site by purchasing a print from my store here or on Etsy. Those old folders aren’t free ya know 😉
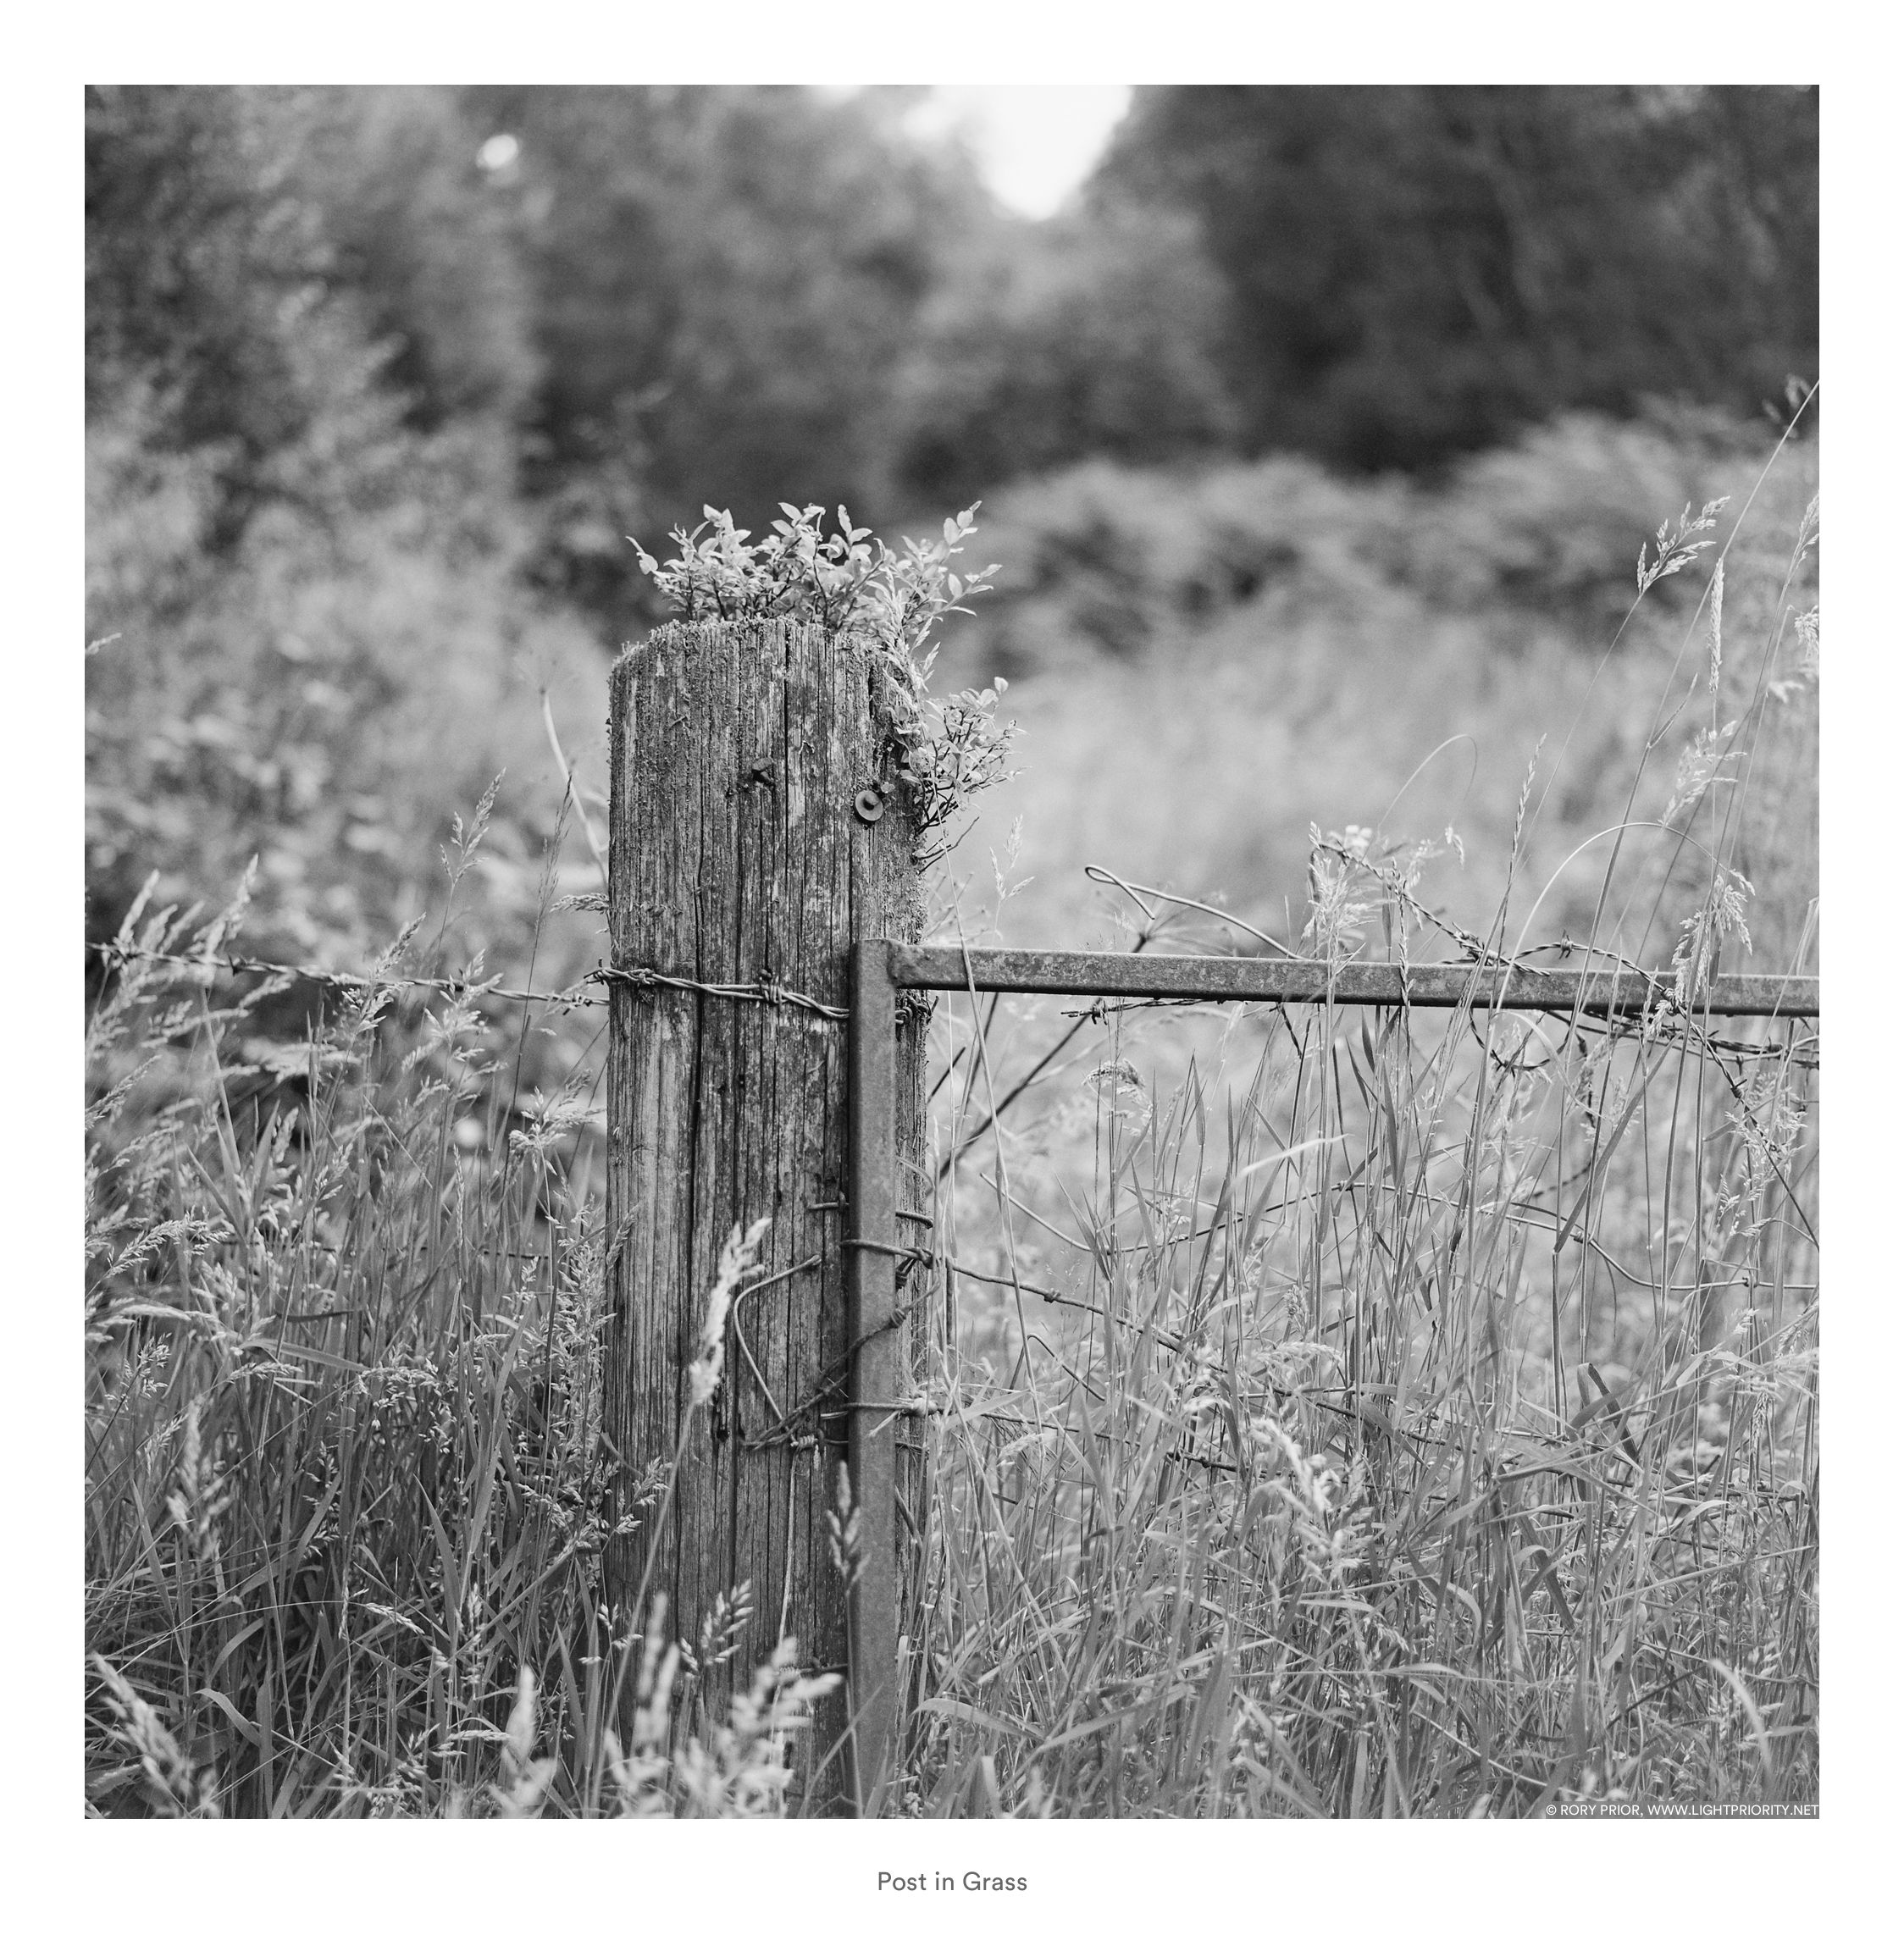
I guess the trouble with medium format is that once you start down the route of ‘bigger is better’ you start itching for the next format size up from what you have. My Fuji GS645 and Bronica ETRSi are both 6×4.5 cameras and for awhile I’ve been thinking it would be really nice to have a camera that could do 6×6 square format. The big benefit of this is that it allows any kind of crop you’d like (if any) without losing too much image area. Since my preferred way of shooting is with a waist level finder on the Bronica, square format also takes away the ‘landscape only’ limitation that comes from having a non-rotating film back. In portrait orientation, even ignoring the very awkward ergonomics, the image is upside down without a prism to correct it. I can cope with the horizontally flipped image in the waist level finder, but putting it upside down is a step too far!
My first though was to find another range finder camera to get a slightly lighter setup, but after a couple of failed attempts at acquiring a working Mamiya 6 I shelved this idea and decided to go with a Bronica SQ-Ai as they are both reasonably priced and very reliable in my experience. With some eBay luck I was able to purchase an immaculate copy from the early 90s that looked barely used for £299, which is a steal frankly. It may not have the desirability factor of a Hasselblad (or the price tag), but in terms of image quality, usability and durability it’s got nothing to be ashamed of.
So far I’m really loving the square format. I feel like 12 exposures per 120 roll is a good compromise between image size and film economy. The 80mm f2.8 PS is a really lovely lens (about 40mm f1.5 equivalent) and definitely seems sharper than the 75mm f2.8 on the ETRSi, especially when shot wide open). In terms of handling the SQ-Ai, while a couple of hundred grams heavier and definitely a bit bulkier, feels much nicer to use even without a grip. I always found the on-body shutter button on the ETRS bodies a bit indecisive, seemingly needing varying amounts of pressure to fire from one shot to the next. The SQ-Ai by contrast is consistently firm and feels very deliberate. I think this along with the added heft makes it easier to get sharp results at slower shutter speeds more consistently. The SQ-Ai also has a vastly improved mirror lockup mechanism that resets after a shot is taken unless you set it not to. This is unlike the ETRSi where if you forgot to flip a switch the mirror would flip up as you wound on to the next frame.
Anyway enough of my waffling, here’s a few photos taken so far:
This was shot wide open at f2.8, the grass right into the corners is tack sharp where in the plane of focus. This is such a improvement over the 75mm f2.8 on the ETRS and honestly not a common characteristic on many modern lenses which are geared only towards centre sharpness until stopped down.
Finally, I’m working on doing a round up of all the various film types I’ve shot with my thoughts on their rendering, easy of digitising etc. so keep an eye out for that. If you enjoy my writing and images please help support me and the site by purchasing a print from my store here or on Etsy.
As soon as I saw the leaked images of the 35mm f2, back in early 2015, I knew I wanted one. I’ve shot with the older 35mm f1.4 on many occasions and it’s a lens I’ve repeatedly considered buying and then pulled back from. Optically great, not too large or heavy, but showing its age in many respects with regards to its construction and AF performance. So enter the new f2 model, with it’s Leica style tapered design, weather resistance, super fast internal focusing and it already looks like we have a winner on our hands.
Construction & Handling
As we’ve come to expect from Fuji’s Made in Japan lenses, the 35mm f2’s build quality is fantastic. There’s no cheap plastic here like you’d find on a Canon or Nikon lens in this price range. Compared to Fuji’s other entry level prime, the 27mm f2.8, the quality is markedly better. I’m sure I’m not alone in suspecting that the 27mm f2.8 was originally intended to be part of the XC range of aperture ringless budget lenses.
Fuji finally seems to have cracked what an acceptable level of clickiness is for an aperture ring. The 35mm f2 offers just the right amount of resistance in that it won’t turn accidentally, but also doesn’t feel like its putting up a fight when you do want to change it. The focus ring is nice and smooth like every Fuji lens I’ve used. It’s on the narrow side, but it’s usable for manual focus.
As the lens carries the “WR” badge for weather resistance, it has a rubber gasket around the mount. This is a feature that I was used to in my Nikon days, even on non-weather sealed lenses, and I’m glad it’s finding its way into Fuji’s lineup. It helps to seal the camera body against dust as much as moisture. Of course there are plenty of other seals within the lens too that should help keep moisture and dust from getting into the internals.
Exactly how effective Fuji’s WR is I don’t know – I certainly feel less worried about WR gear getting a bit of rain or snow on it, but without any kind of official standard it’s impossible to know just how “resistant” it is. Erring on the side of caution is therefore still probably your best bet to secure the longevity of your gear, with the WR stamp being more of an insurance policy than an invitation to treat things carelessly.
One area where the 35mm f2 does let us down a little is with the supplied hood. That it’s plastic is not unexpected these days, but what’s less forgivable is that it’s a nasty screw-in design that uses the filter thread. This is despite the fact the lens has a bayonet fitting specifically for a hood. Fuji will happily sell you a metal vented hood that uses said bayonet, but of course it’s stupidly expensive. On the positive side, at least the plastic screw-in hood is small and the lens cap fits neatly inside it. If you happen to also own the new Fuji 23mm f2, both hoods are interchangeable and the 23mm version does use the bayonet.
One more slight disappoint is the introduction of yet another odd-ball filter size, this time 43mm. Thankfully now the 23mm f2 has been launched sharing this thread size, at least there are two lenses in the lineup with it. Unfortunately the newly announced 50mm f2 lens doesn’t make it three, so if you opt for the 23-35-50 f2 set you’ll need either multiple filter sizes or step up rings *sigh*.
Optical Quality
As you might expect, the 35mm f2 isn’t optically as good as the 35mm f1.4. There’s a bit of electronic distortion correction being applied and the extreme corners never quite get there in terms of sharpness. That said the center is fantastic and in real world shooting, the very extreme corners being fractionally soft has never been a problem.
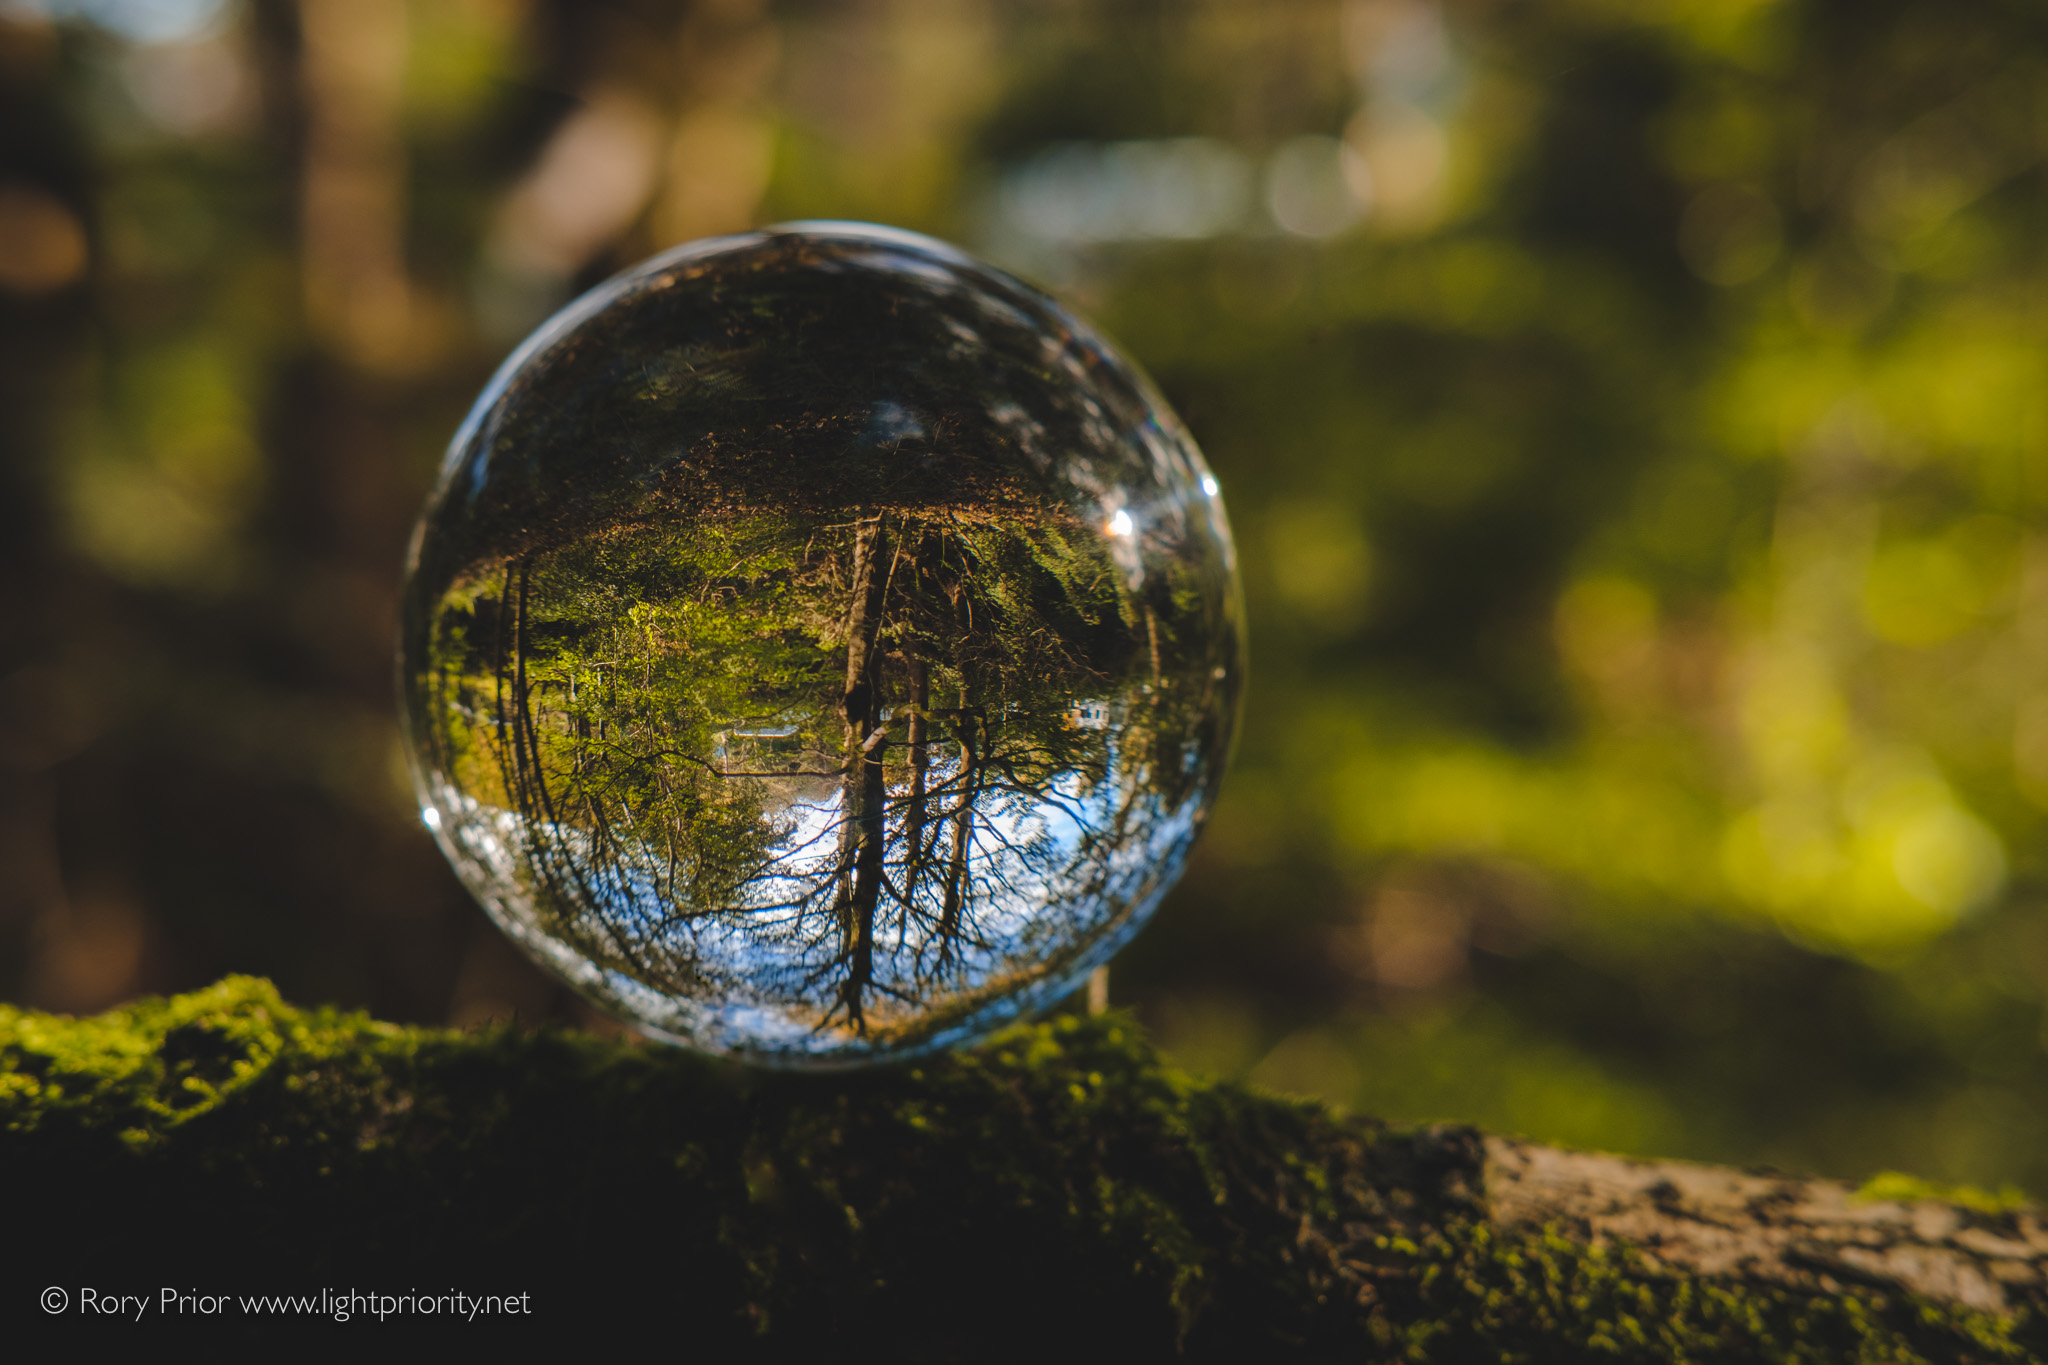
The lens’s bokeh is smooth and pleasing, with Fuji blessing it with 9 aperture blades. Out of focus highlights stay nice and round even when stopped down. The example below with the crystal ball was shot at f5.6 for example. The older 35mm f1.4 only has 7 blades by contrast and produces more angular bokeh balls as a result. F2 still provides plenty of scope for shallow depth of field photography, but obviously the f1.4 model has the edge in terms of extreme subject separation and will produce slightly sharper results when stopped down to f2.
[exif id=”1448″]
[exif id=”1219″]
AF Speed
This little lens is a speed demon! It may not have one of those fancy linear motors to brag about, but its internal focus mechanism is incredibly quick on all recent Fuji bodies. Even old X-Trans 1 models show a good level of performance. As the 35mm f2 has an internal focus design, outwardly no parts move while focus is being acquired. This no doubt contributes to its extremely quiet operation and is a boon for polariser users.
[exif id=”1455″]
Compared to the Fuji 35mm f1.4
If you already own the older Fuji 35mm lens, should you “upgrade” to the new model? The answer to that question will depend heavily on the type of photography you do. If you’re mostly shooting posed portraits, desperately need that extra f stop or require the ultimate in corner sharpness then the older lens is probably still your best bet. However if you rarely shoot at f1.4, would benefit from the faster autofocus, quieter operation and weather sealing, then the new lens does look very attractive. If you have the money to spare then owning both could be a good compromise. For my shooting style and wallet the 35mm f2 just makes more sense.
[exif id=”1452″]
Conclusion
This lens isn’t optically perfect and it’s a little darker than its older f1.4 brother, but both those quibbles are largely offset by just how nice this lens is to shoot with. From its diminutive proportions, to its weather resistance, build quality, focus speed and general rendering – it’s just a pleasure to use. It pairs well with all Fuji’s current cameras, especially the X-Pro series. As part of a small f2 prime kit, along with the 23mm and 50mm, it will no doubt be finding its way into a lot of gear bags. All indications are that it is one of the best selling and most popular XF lenses available at the moment and I can see why.
If you find this review helpful please consider purchasing a print from my store here or on Etsy to help support the site.
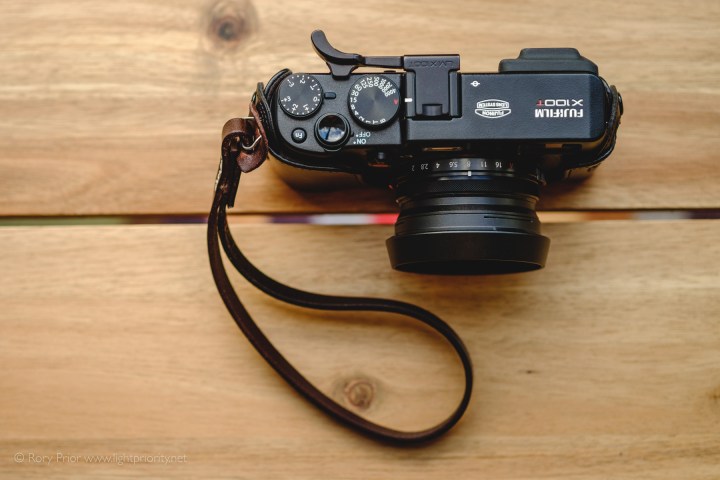
The X100 series cameras from FujiFilm are a joy to shoot with out-of-the-box, but they benefit enormously from a few essential accessories. These improve the ergonomics, add a little physical protection from bumps and scuffs and make them even more gorgeous to behold.
Fuji X100T Premium Leather Case
The Fuji case comes in two parts, a lower half-case that protects the bottom and sides of the camera and a removable upper case that protects the lens, rear screen and top of the camera, naturally you can’t use the camera while this part is attached.
I had the official Fuji case for my 1st generation X100, and while it looked great and provided good protection for the camera, it was a bit of a pain to use. You had to remove the whole lower portion just to change the battery or memory card. Not ideal on a camera that chews through batteries quickly. Thankfully since then Fuji has learned how to add little button up flaps to their cases to make the battery and SD card slot accessible. Unfortunately they are still omitting a tripod mount, so you’ll need to remove the case to mount the camera on anything. The case also blocks the ports on the side of the camera which is a nuisance if you need to use a cable to transfer photos or charge the battery.
The case is made of black leather (a brown version is also available) with a smooth, completely untextured finish. Inside it has a dark grey, felt-like lining. The case is secured to the camera by little loops that fasten over the camera’s strap lugs. When using a wrist strap the case is only secured on one side, but it has a snug enough fit to still remain firmly on the camera without flopping about or sliding off. Whether this will loosen up over time of course remains to be seen.
Speaking of the snug fit, this case was originally designed for the X100/X100S body, and the X100T made some minor changes to that which mean the fit is a little tighter. The alignment of the battery access flap isn’t quite perfect as a result and I find I have to gently press the camera into the front of the case in order for it to spring open. Not a big deal, but not ideal given the cost of the case. It’s also worth mentioning that you’ve no hope of securing the upper part of the case with any accessories attached, so you’ll need to remove thumb grip, filter adapter and lens hood. For me I find this relegates the upper case to when I need to protect the camera during travelling, where I’m not intending to actually shoot with it (e.g. buried in a rucksack).
Honestly I think Fuji could do a little better for the money they charge here. If you’re not fussed about having full camera protection you might want to look at some of the premium half-cases from other manufactures like Gariz.
LightPriority rating: 3/5
Lensmate LMX100T Thumb Rest
If I could only choose one accessory for my X100T, it would be a thumb grip – they make such a big improvement to the handling. Without one you only have a tiny area to actually grip the back of the camera without inadvertently interacting with the controls.
If you live outside Japan you only really have two choices* when it comes to quality thumb grips for Fuji cameras; Lensmate and Match Technical. Fuji actually make their own for various models, but only sells them in Japan. Match Technical charges astronomical sums for theirs, as they primarily target Leica customers, so most mere mortals will probably choose Lensmate.
Unfortunately getting hold of the Lensmate grip in the UK proved to be quite a headache. They only sell via their website and the first one I ordered went missing in the post. It took Lensmate’s customer service people a lot of persuading to send me a replacement, as it had been marked as delivered by the courier. When the replacement did come I inevitably got whacked with a customs charge.
Anyway delivery woes aside, the grip itself is excellent. It comes in a premium box with a magnetic clasp. It fits snuggly into the camera’s hotshoe and has a little rubber gripper underneath to ensure it’s not going to come out without a good tug. As it’s designed for the X100T specifically, it doesn’t block the drive button or command dial. A rubber bumper braces the grip against the side of the camera and a rubber pad inside the end of the grip helps to prevent your thumb slipping.
LightPriority rating: 5/5
* It’s worth noting you’ll find tons of cheap generic thumb grips on eBay/Amazon Marketplace, but most are poorly designed and are not targeted at any specific camera model. As they nearly all lack any kind of bracing against the camera body, they put a lot of leveraging force on the hotshoe, which overtime is likely to damage your camera.
Cam-In Leather Wrist Strap
I’ve always been a neck strap kinda guy, as I prefer to keep my hands free, but as I often carry my X100T in addition to my X-T10, having both on neck straps quickly gets impractical. I was tempted to get another Gordy’s strap as I love the one on my X-T10, but burned by my recent experience buying from the US with Lensmate, I decided to try buying a strap from a UK company called Colourful Camera Accessories. They didn’t have a huge selection of wrist straps, so from the limited selection I opted for a Cam-In brown leather model.
Despite being described as brown, it’s so dark in colour as to almost look black. Still the colour works well with my black X100T and case, so no problem there. The leather is a bit on the thin side (about half the thickness that Gordy’s use) but should be sufficient to handle the weight of the X100T without any undue risk. As with all leather products, it takes time to break in and soften up, so I expect the comfort using it to improve over time. Overall it’s decent enough quality, but not up to the standard of Gordy’s – which is disappointing given the comparable price.
LightPriority rating: 3.5/5
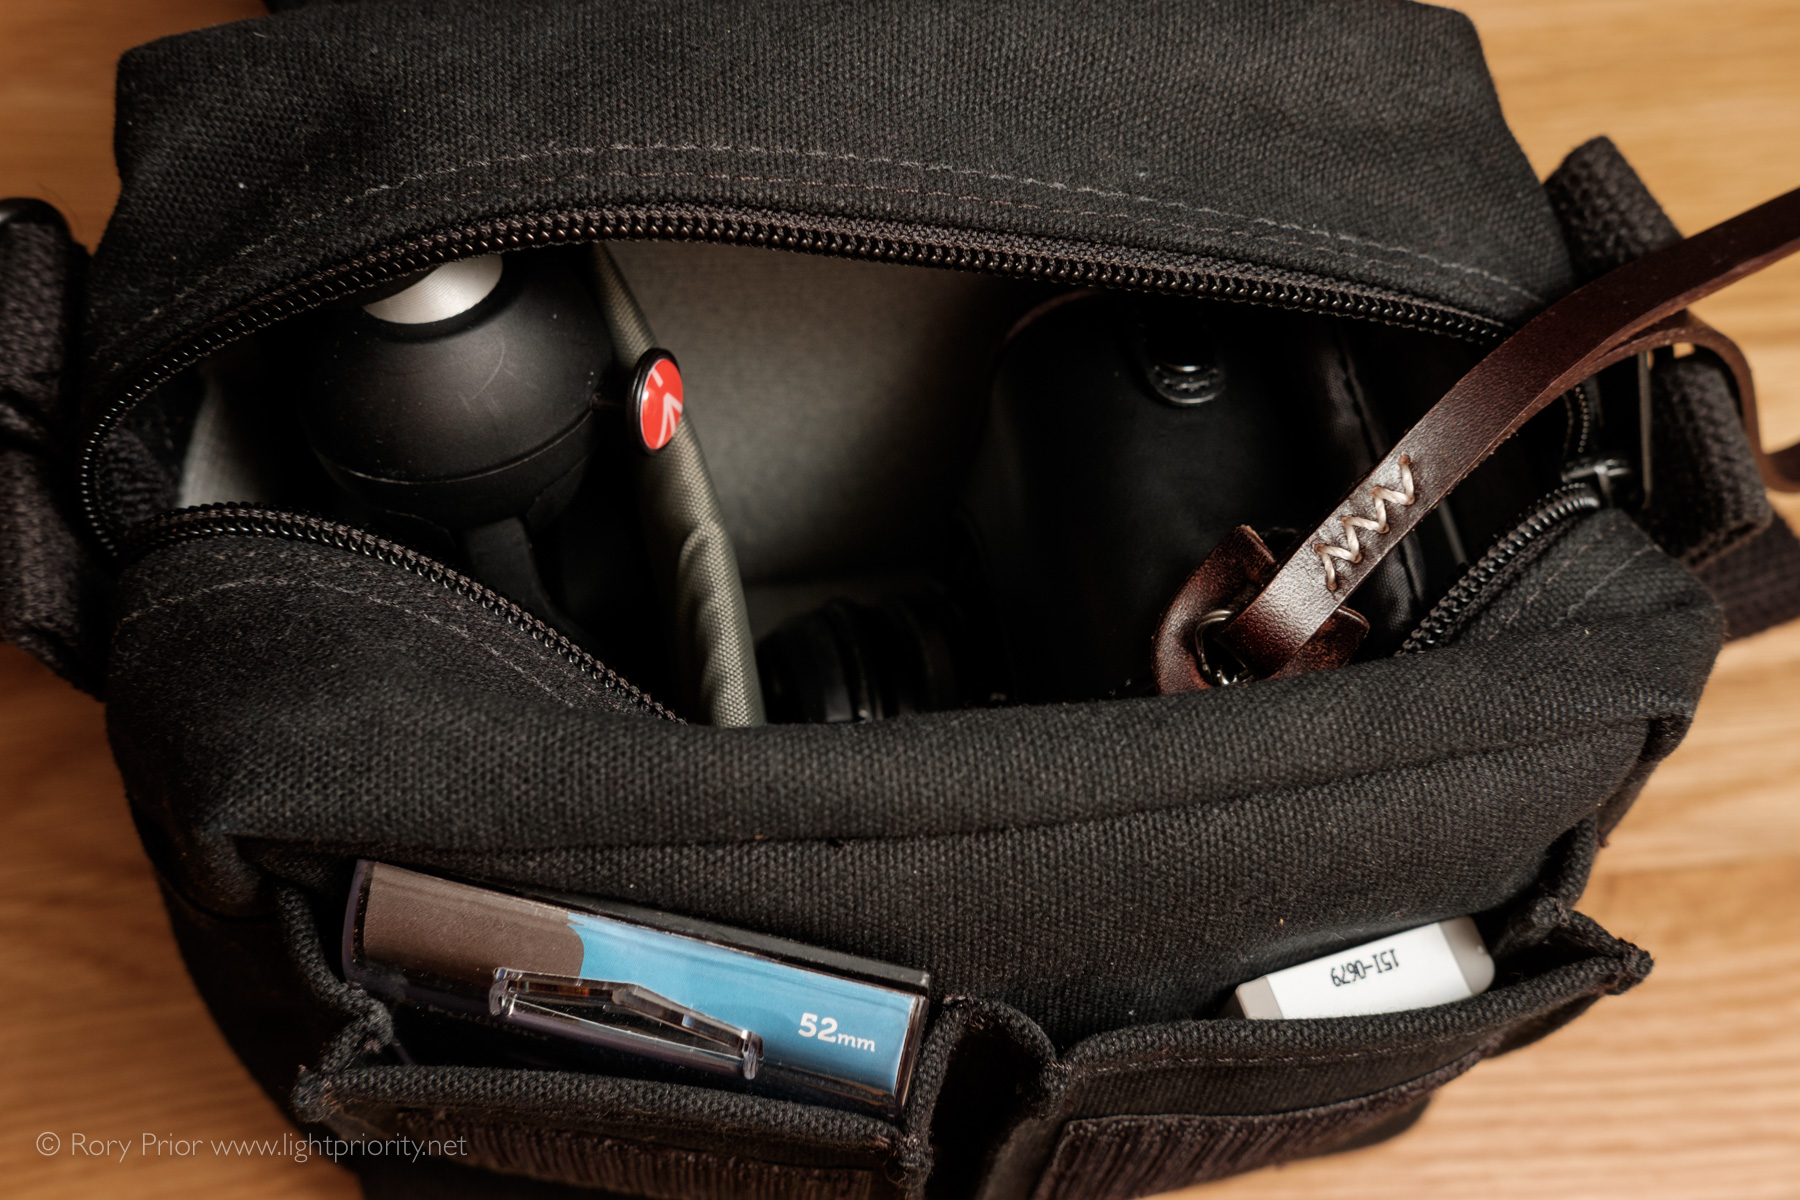
Domke F-5XA Shoulder Bag
After a lot of research trying to find a good quality compact camera bag, suitable for a mirrorless camera with one or two small lenses, I finally settled on the Domke F-5XA. It’s ideal for holding a camera the size of the X100T, along with a mini-tripod or converter lens. If you don’t plan to stow your camera itself, the bag is handy for holding a couple of lenses and other accessories in combination with an interchangeable lens Fuji.
The bag is made from tough canvas that has been treated to be water resistant – I can vouch that it certainly resists light rain well. A flap secured by velcro hides the two front pockets and a chunky zipper guards the main compartment. The front pockets are suitably sized for spare batteries or filters (but not much else)
The easily detachable strap has rubber cords woven into it that make it very grippy and unlikely to slip from your shoulder. This is far preferable to those Velcroed on shoulder pads you get with many camera bags, that always end up slipping down the strap.
The only real niggle I have is that the bag only comes with one internal separator which can make organising smaller accessories tricky. Handily I found a divider from another old camera bag that was the right size and used that to create a very narrow pocket just big enough for a LensPen, white card and spare battery.
I have the black version of the bag which manages to look fairly anonymous, even with the Domke logo emblazoned on one corner in red lettering. The bag also comes in khaki and olive green colours, but not Domke’s “Rugged Wear” waxed finish.
LightPriority rating: 4.5/5
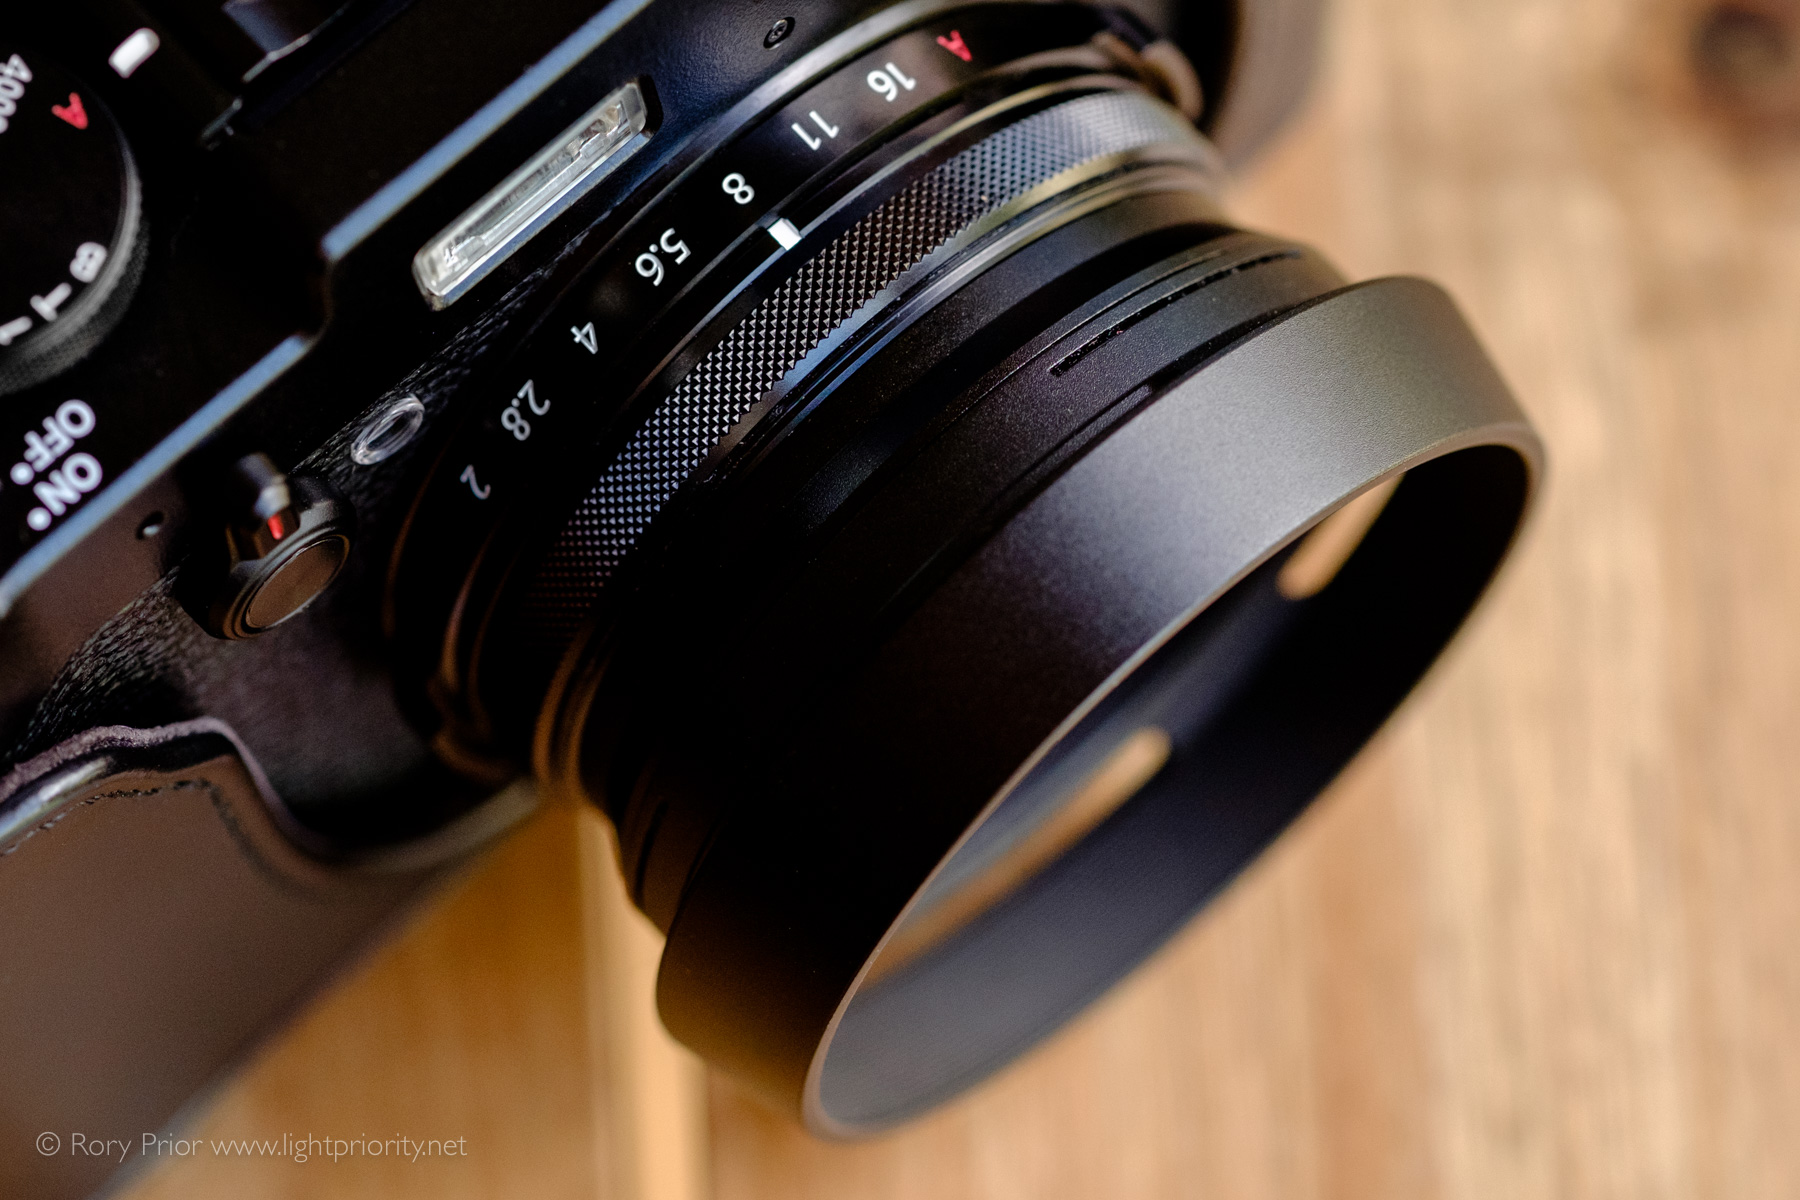
JJC Lens Hood & Filter Adapter
Aside from the white printed JJC logo, this is identical to Fuji’s far more expensive hood and filter adapter. As with Fuji’s offering, it part blocks the optical viewfinder and the hood is non-reversible. JJC do make a smaller domed lens hood which I’m hoping to try soon. That should block the OVF no more than just the plain filter adapter. Unfortunately the JJC hood doesn’t come with the little fabric pouch that the official Fuji model has, but then it’s a fraction of the price so it’s hard to complain.
LightPriority rating: 5/5
I hope these mini-reviews are helpful to X100 series camera owners. It might seem a little over the top adding tons of accessories to a camera, but they really do add to the overall experience and make the camera even more of a pleasure to shoot with. If you have any questions about any of the gear I’ve reviewed here, leave a comment and I’ll try and answer as best I can.
If like my images and reviews and would like to help support the site, please consider buying a print.
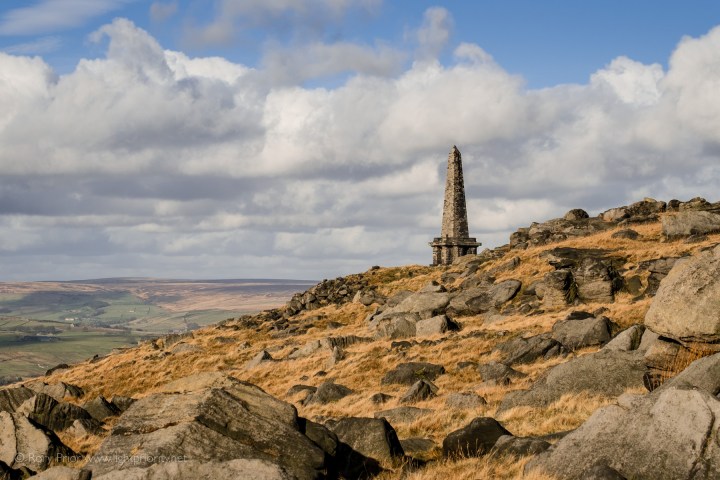
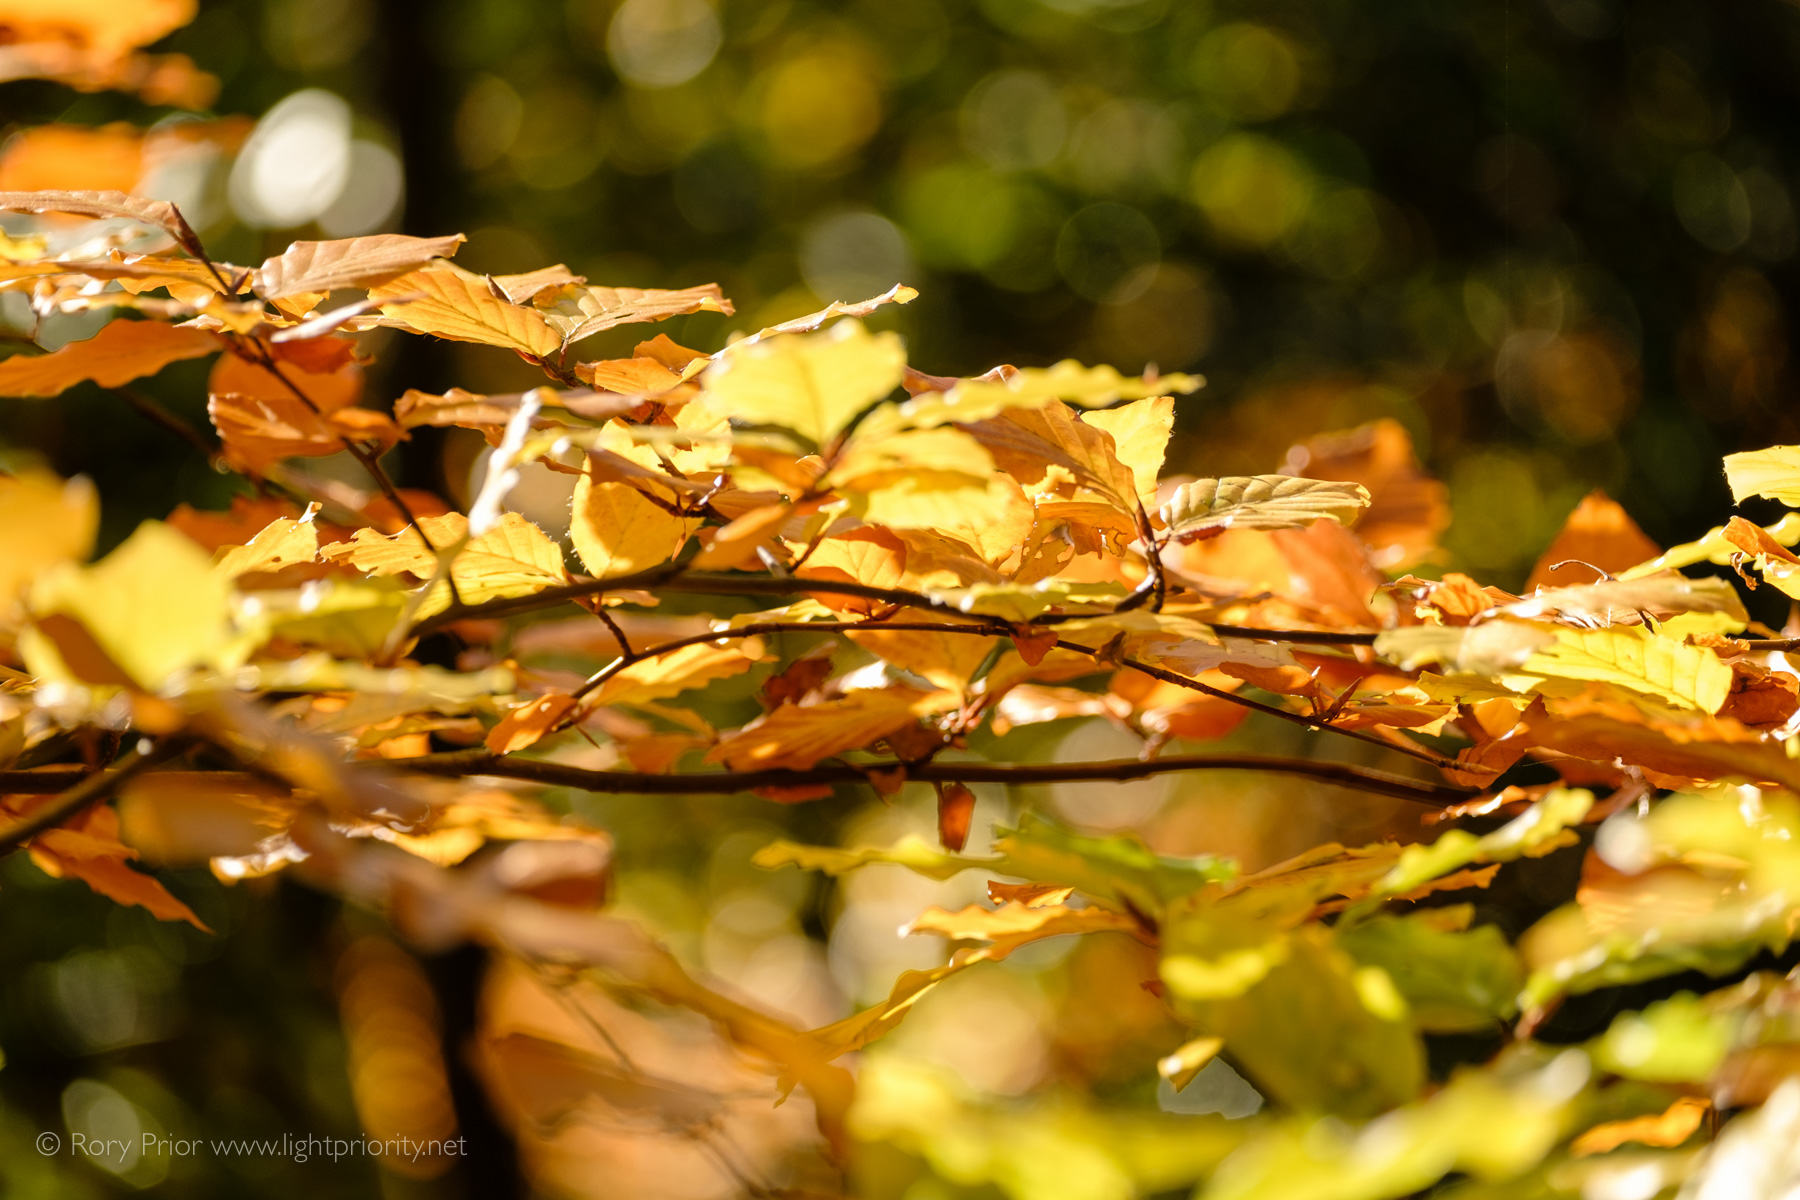
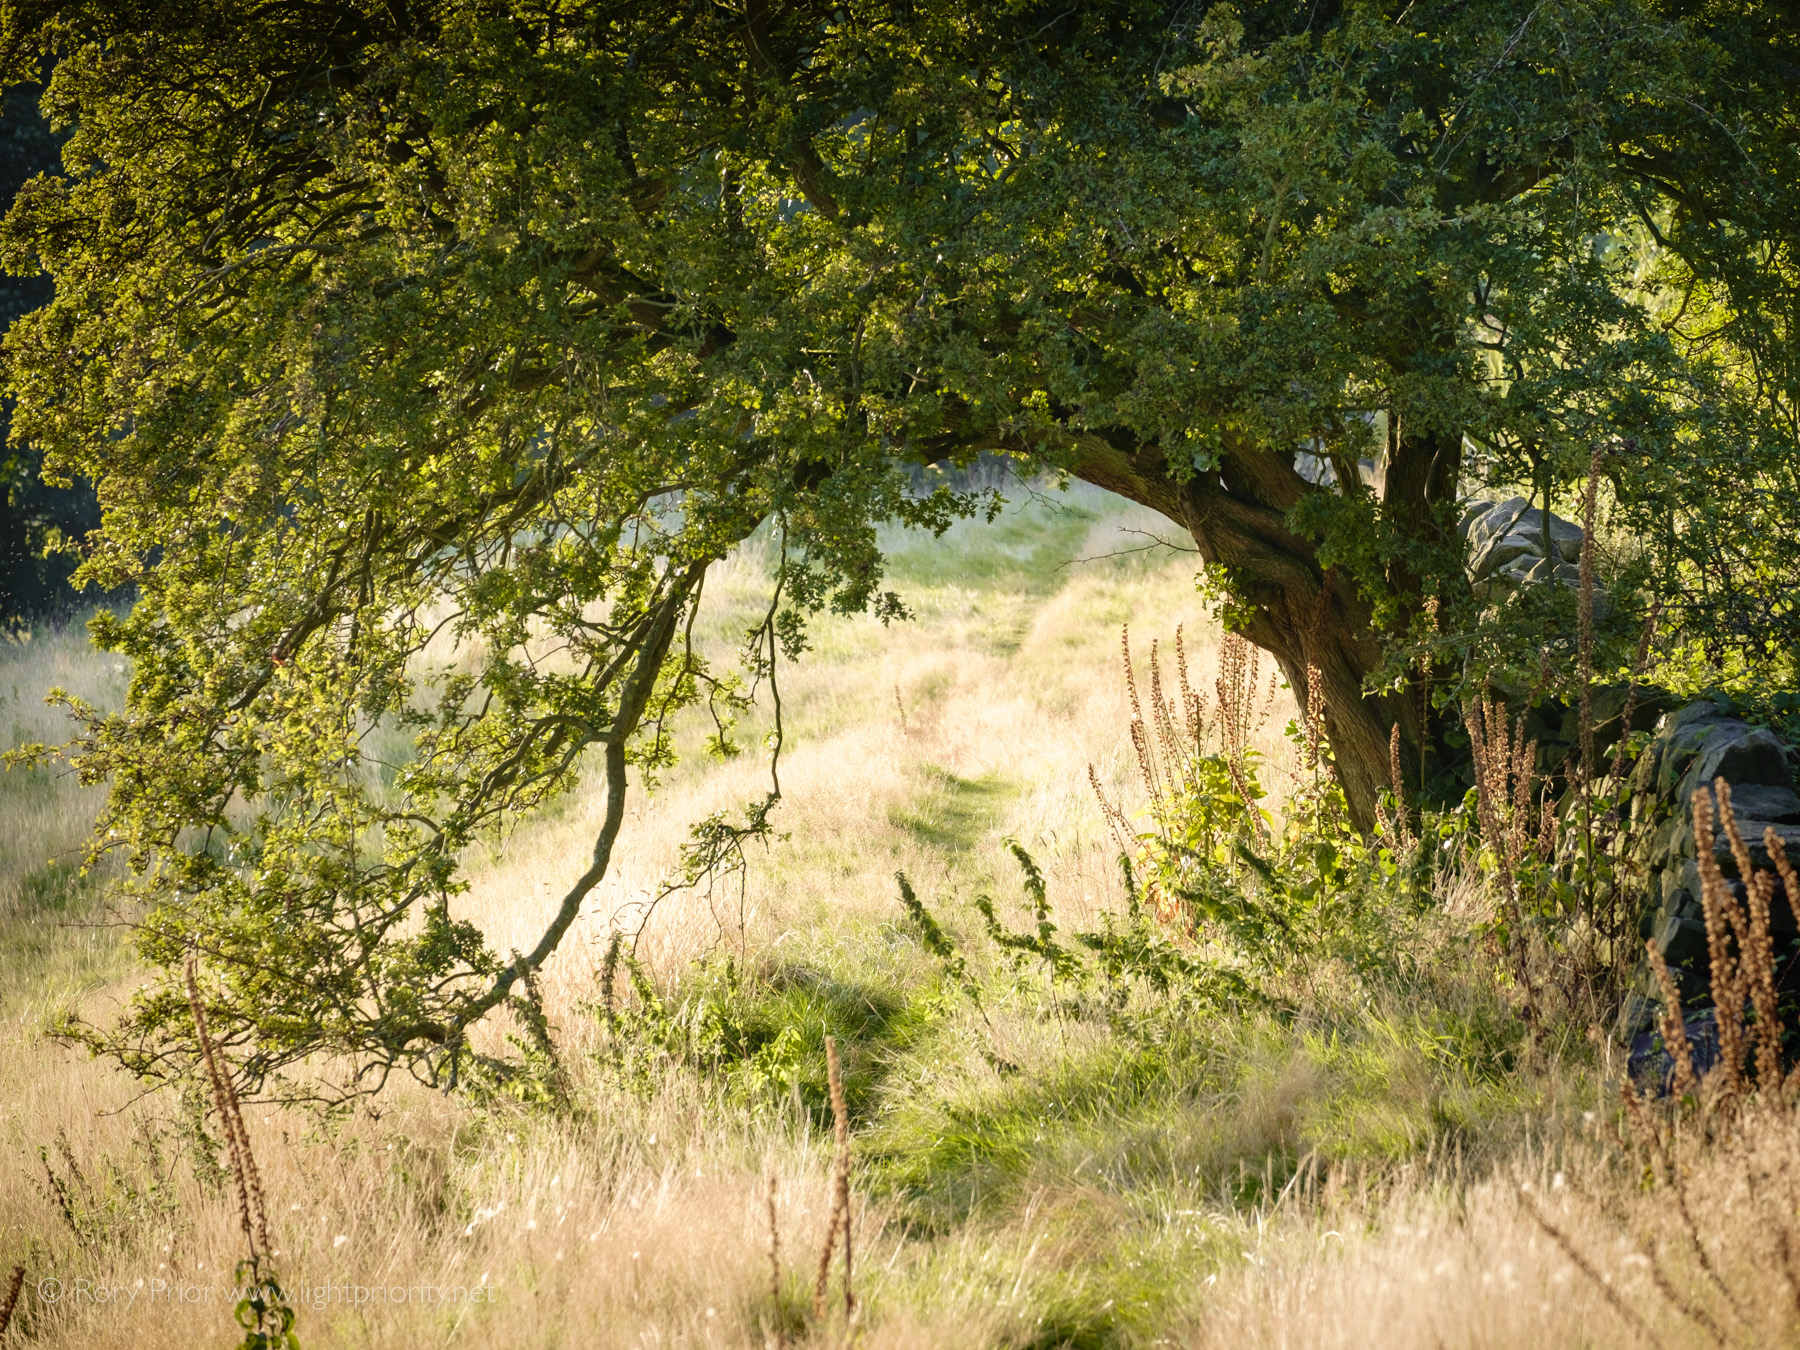
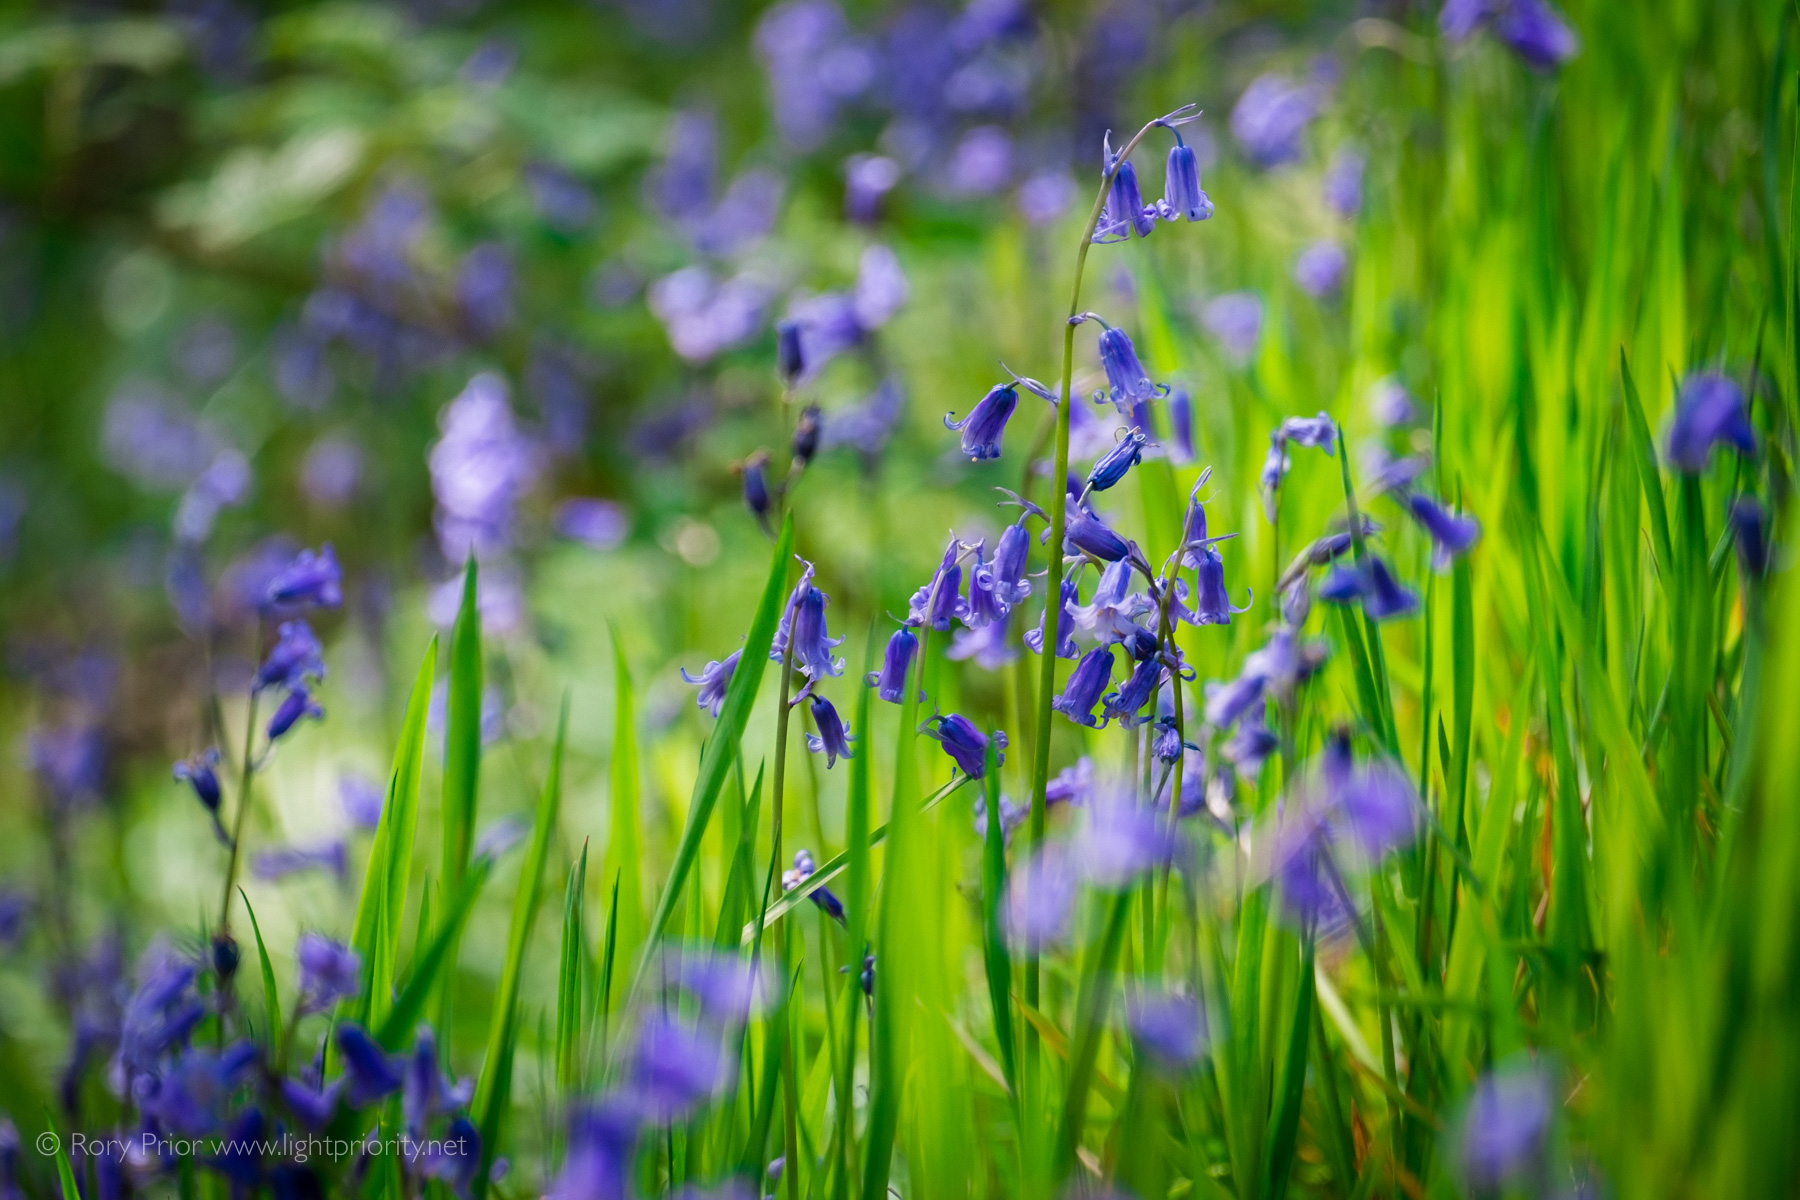
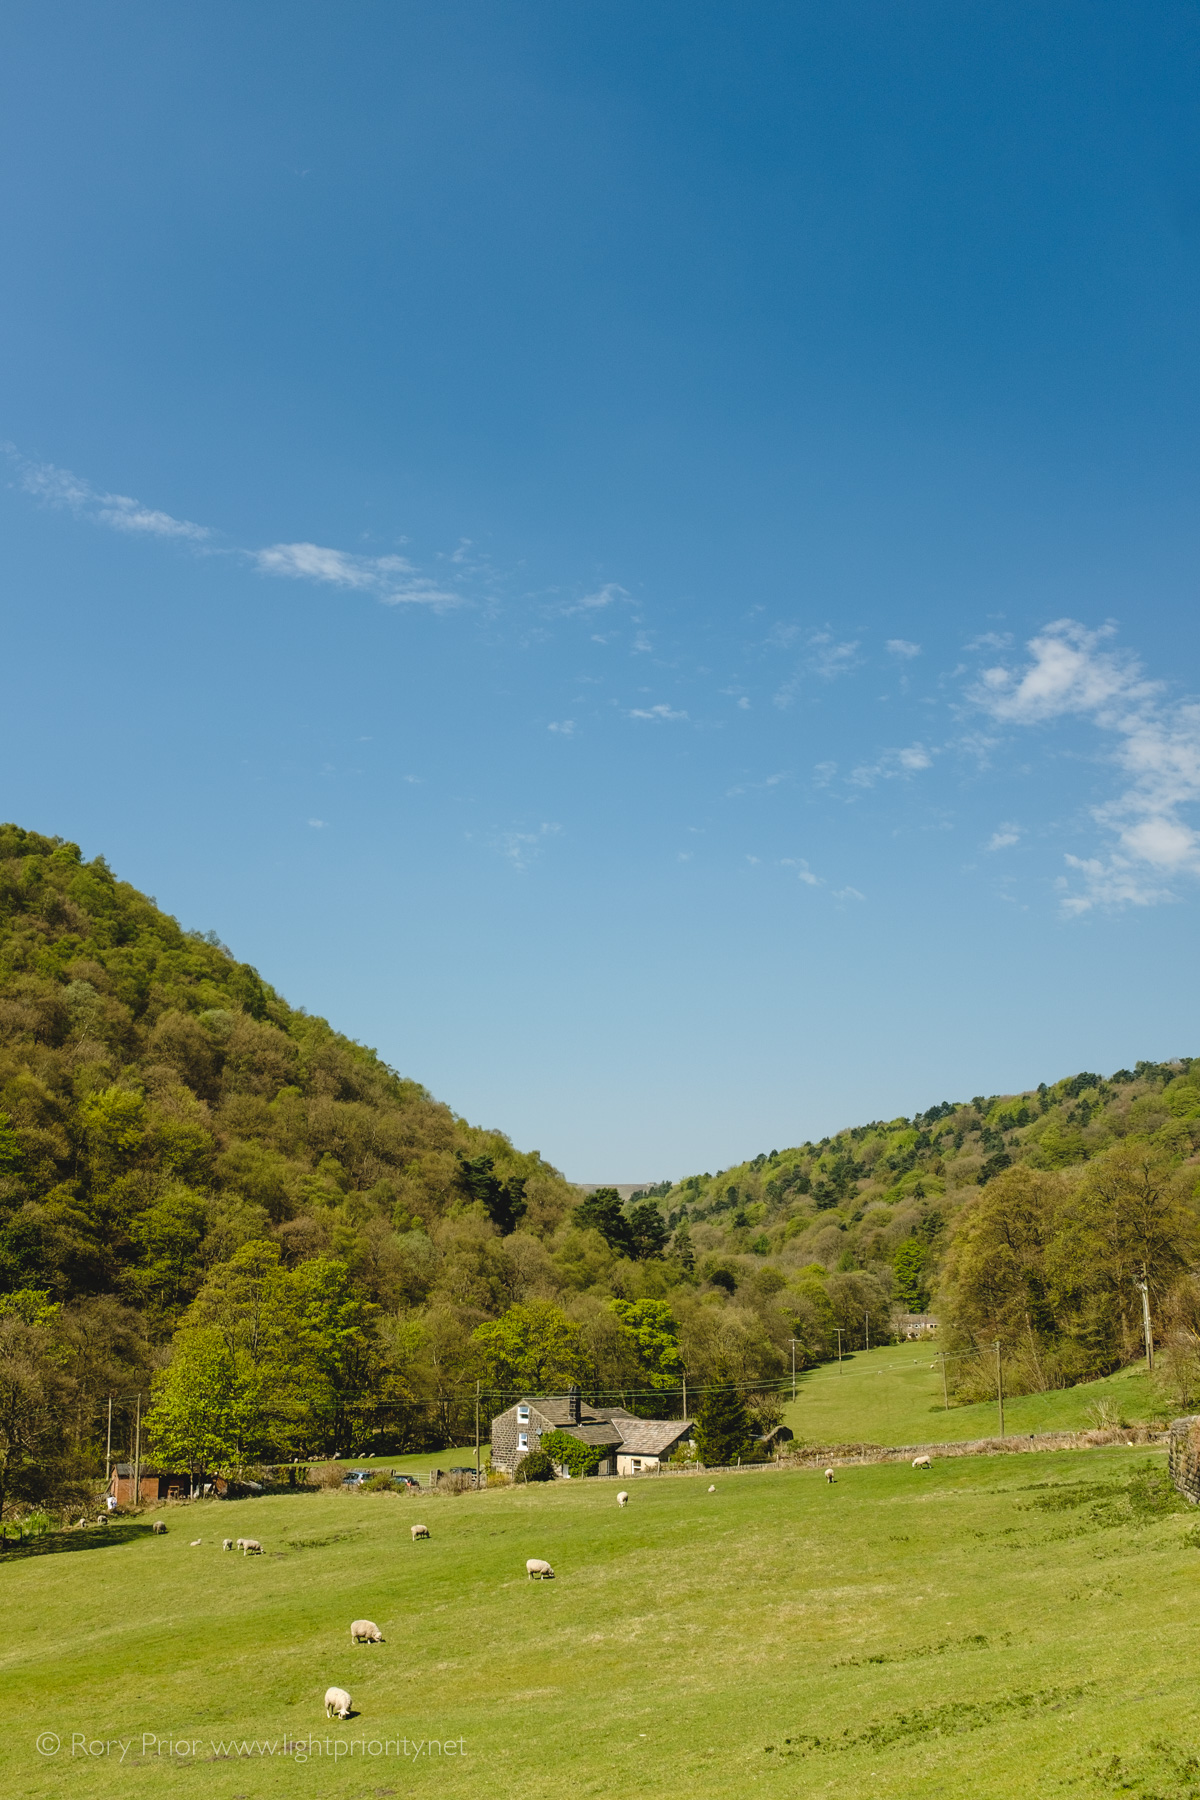
On a warm and sunny spring day there are few nicer places to be, than wandering the trails that criss-cross Hardcastle Crags. A beauty spot just north of Hebden Bridge, that has drawn visitors from far and wide for over a century. The landscape is rugged and interesting, having been carved over eons by the fast flowing Hebden Water. A good mix of deciduous and evergreen trees provide shelter from the scorching sun and shade a carpet of bluebells and other wild flowers. The estate is managed by the National Trust so the paths are kept in good order and there’s no litter or other blight to spoil the views. It’s a great place to put a camera through its paces and have a thoroughly enjoyable day out. As it happens I have a new camera that I’ve been eager to acquaint, or perhaps I should say “reacquaint”, myself with. So I thought this would be a great opportunity to do a quasi-review and share some images of this beautiful place.
[exif id=”1266″]
My first Fuji X camera was a 1st generation X100. It was a camera I really adored and got great use from, but which fell out of favour after I got my first interchangeable lens Fuji, an X-E1. While I loved the versatility and 35mm equivalent lens, the old 12 megapixel sensor and clunky, slow performance (even compared to the X-E1) eventually led me to sell it. Since then I’ve often lusted after its replacements, first the X100S and then the X100T – but I’ve always had other things to worry about spending money on, so it had remained a pipe dream. That is until a few days ago, when I came across a bargain priced X100T with barely 100 shots on the clock on eBay. I’m now the proud owner of that camera!
Since it’s now been around a year and half since the X100T was introduced, it’s at what I’d consider a good price range on the secondhand market. The S can be had for a bit less, but not at enough of a discount to make up for its shortcomings in my opinion. There’s also still a sliver of hope the T might get a firmware update with some new features or performance improvements whereas that’s generally considered to be completely off the table for the S model. Either way, at least the T is sufficiently close in terms of performance and features to cameras like the X-T1 and X-T10 to feel very familiar.
[exif id=”1268″]
As with every generation of X100, the handling out of the box isn’t great, especially for one handed shooting. To make this camera really shine, it benefits massively from a hotshoe mounted thumb grip and a half case makes it more comfortable to hold while providing some protection against knocks and scrapes. A lens hood and filter adapter are also must haves. Thankfully cheap 3rd party alternatives are now readily available as Fuji charges an insane premium, especially for the filter adapter and lens hood. Unfortunately good quality thumb grips are still quite expensive, and getting one designed specifically for the X100T is important due to the placement of the drive button and command dial. It’s also best to avoid ones that offer no bracing against the camera body as they put a lot of strain on the hotshoe. I’d recommend either the Lensmate or Match Technical models.
[exif id=”1277″]
The X100T performs very nicely in use – I wish I had a 1st generation X100 on hand to compare it to, as I’m sure the difference would be night and day. In terms of general operation I’d say it’s more or less equivalent to my X-T10, which makes sense as they share the same basic hardware and the firmware versions aren’t too far removed, with the exception of the major autofocus changes Fuji made last year. Speaking of autofocus, in general it’s very good, although it won’t be setting any speed records. Things do slow down a bit in lower light and outside of the phase detect area in the centre of the frame, but I think it’s nothing a competent photographer can’t work around.
[exif id=”1269″]
After going for three years sans-X100, I perhaps looked back on some aspects of it with rose tinted glasses. I’d forgotten for example, how much of a challenge it was to achieve decent subject separation with its 23mm f2 lens. You might think that’s obvious from the focal length, but given Fuji’s 18mm f2 is quite capable in this department and is even wider, it’s a shame the X100 lens falls down here.
The biggest limitation of the lens is the hazing it produces at very close subject distances when shot at f2. This necessitates stopping down to at least f4, and that really mitigates the shallow depth of field advantage you get from being close to your subject in the first place. Bokeh at mid distances is also a mixed bag. It can be quite harsh with the wrong background, to the point where in many cases it’s safer to just stop down and get everything crisp and use some other technique to draw the eye.
The lens also seems to exhibit more field curvature than I’m used to seeing with Fuji glass, where focusing at some distances can leave the edges of the frame softer than they should be – even when stopped down to moderate apertures. I think this is probably slightly more pronounced on a 16 megapixel sensor than it was on 12, so stopping down a little more than strictly necessary can be a good plan. You’ll notice I shot most images here at f8 to mitigate this issue.
Field curvature concerns aside, the overall sharpness of the lens is excellent, especially in the centre of the frame where it’s outstanding.
[exif id=”1270″]
All lens complaints aside though, I’ve completely fallen in love with the 23mm (35mm equivalent) focal length again. I really like Fuji’s 35mm lenses (50mm eqiv.), particularly the 35mm f2. They are great for many things which the X100’s 23mm lens is bad at (see above), but I often can’t shake the feeling that they feel too tight for a lot of general shooting. The 23mm lens just offers that bit of extra flexibility in composition, without throwing up all the challenges that 18mm and wider focal lengths do with controlling the scene or dealing with converging verticals. It’s a shame that the only current 23mm lens for the interchangeable lens Fujis is a bit of a behemoth. Hopefully rumours that a 23mm f2 akin to the new 35mm f2 prove correct.
[exif id=”1271″]
I’m making a concerted effort to make more use of the optical viewfinder in the X100T, and after shooting with purely electronic viewfinder based cameras for quite sometime now, it’s a refreshing change. Whether I end up mostly using the EVF again, like I did with my 1st generation X100 or not remains to be seen of course. But there’s something really nice about being able to see beyond the frame you’re capturing and it’s interesting to contrast what your eye sees unaided with what the camera captures when the preview pops up.
The big new feature in the hybrid viewfinder of the X100T, over the previous models, is the little tab you can activate that gives you a live preview of what the camera is seeing at the selected AF point. If you’e a manual focus fan wanting to use the optical viewfinder, this will be a major boon and lets you get closer to a true rangefinder experience. Personally I’m not entirely sold on its utility for focus confirmation in conjunction with autofocus, but perhaps it will grow on me.
[exif id=”1272″]
Overall I’m delighted with the X100T. It’s a much better camera than the old X100 that made me first fall in love with the Fuji system. It still shares some of the quirks and oddities from that first generation model as it’s built around the same lens, but overall it’s a very refined and polished camera. To get the most from it you will need to get some of the essential accessories I mentioned above, but the payoff is worth it. You get a very small and light camera that can tackle a huge range of subjects with aplomb.
Most of the X100T reviews I’ve seen have been heavily focused on street photography, obviously an area where this camera excels. But it’s also great for landscape work and hopefully the images here demonstrate that and provide a different perspective to your usual gritty street scenes.
As usual, if you like my writing and would like to help support me and the site, please consider buying a print on my on-line store or through Etsy.
When I was a Nikon shooter I was always quite fond of the 70-300 VR zoom lens. It wasn’t technically super sharp at the long end, but it had good range and nice bokeh. After moving over to the Fuji system, for some time the longest AF lens I had was the 60mm f2.4. While it’s actually quite a versatile focal length for the kind of shooting I do, I did find myself wishing for something with more reach on many occasions. Last year I picked up the XC 50-230mm f4.5-6.7 at a heavily discounted price. I shot with it for a bit and it’s actually a pretty good piece of kit for the money, but I found the slow maximum aperture limiting. I also found the overall rendering often not to my liking and given how finicky processing X-trans RAWs can be, you really need good glass to get the best from it. So earlier this year I sold it and bought the XF 55-200mm f3.5-4.8. After using it for much of the year, this is my review.
Ergonomics & Build Quality
The 55-200 is a hefty, heavy lens at nearly 600g. Owners of similar focal lengths on DSLRs or even Fuji’s 55-140mm f2.8, will scoff at the idea of 600g being heavy – but paired with featherweight bodies like my X-E1, its weight and bulk are very noticeable. I suspect the balance is better on an X-T1 or X-T10, but it’s a combination I’ve yet to be able to try.
As we’ve come to expect from XF lenses, the 55-200 is solidly built with a mix of metal and quality plastics. The focus ring is firm but moves smoothly, the cool feel of the metal exudes quality. The zoom ring with its rubberised grip looks smart, but is a bit too stiff for my liking. At least it means you don’t need to worry about zoom creep when you tilt the lens up or down, as it will most definitely stay where you’ve left it between shots. The aperture ring is reasonably stiff and will resist accidental changes fairly well. I wish Fuji would put marked aperture rings on all its zooms, the free spinning ones offer scant advantages over a thumb dial on the body, except familiarity of placement. It also has a couple of switches, one for toggling auto-aperture and one for enabling or disabling the image stabiliser.
At 200mm the lens nearly doubles in length, add the hood and it’s pretty serious looking at any focal length. It’s certainly hard to feel inconspicuous using this lens, which may limit its usefulness for some applications such as street photography. The front element is non-rotating as you’d expect on a modern lens and it takes 62mm filters. A filter size it shares with the 23mm f1.4, 56mm f1.2 and 90mm f2, which is unusually practical for Fuji who have a habit of picking a different filter size for each new lens.
Sharpness, Distortion & Focusing
The sharpness out of this lens is very impressive. It definitely gets a little weaker as you approach 200mm, but for most of the range the performance is strong, especially at typical working apertures of f5.6 to f8. Wide open there’s enough central sharpness to make it decent for portraiture at any focal length. As is common with Fuji XF lenses, the maximum aperture (at least at the long end) is a little brighter than usual at f4.8, rather than the more typical f5.6. You can use the lens at f4 through to 90mm.
The lens does exhibit some optical distortion which gets slightly more pronounced as you zoom in, but it’s not too extreme. Distortion is automatically corrected in software, so you don’t really need to worry about it. Here’s an example of an image with and without the correction applied (mouse over). The difference in colour rendering is down to one being processed in Lightroom and the other in Iridient Developer. Lightroom won’t let you disable the software distortion correction.
[exif id=”1061″]
Fine detail rendering is generally very good, which is particularly important with the X-Trans sensor as it helps avoid the ‘watercolour’ look with foliage. That said you need to be aware of the limitations of the optical image stabiliser, if your shutter speed is high it’s worth switching it off as it can introduce enough motion blur to take the edge off the lens’s sharpness. I’ve found using the OIS in mode 2 produces the most consistent results, although this does mean you don’t get a stabilised view when composing your shot. Ideally Fuji would give us the option to set a shutter speed over which the OIS would just disable, so you didn’t need to worry about doing it manually. I’ve not done any formal testing on the effectiveness of the OIS, but I find I can happily shoot 200mm at 1/125 without fear of camera shake. (I usually use auto-ISO with a minimum shutter speed of 1/125)
Focus speed is very good, and bearing in mind this is based on my experience of using it with a slow old X-E1, performance on newer bodies should be excellent. The dual linear motors are quiet and you’re unlikely to hear them working outdoors. I’ve found the lens rarely misses focus and any blurriness usually tends to be my fault rather than the lens’s.
[exif id=”1064″]
Bokeh
[exif id=”1067″]
The 55-200’s bokeh won’t win any awards, but it manages to be fairly smooth and pleasing in most situations. There’s an outlining effect visible in highlights and it becomes increasingly cat’s eye like towards the edges of the frame, as shown above. You can get very smooth results with the right background and distance to your subject however, as below with the Bentley hood ornament.
[exif id=”1063″]
Samples
Here are some more shots taken with the 55-200 for your viewing pleasure. It’s a versatile lens and I use it for a mix of detail, wildlife and landscape work. It should also work pretty well for portraiture, although some may find the limited subject separation achievable compared to its faster siblings less desirable, at least with full body portraits.
[exif id=”1066″]
[exif id=”1068″]
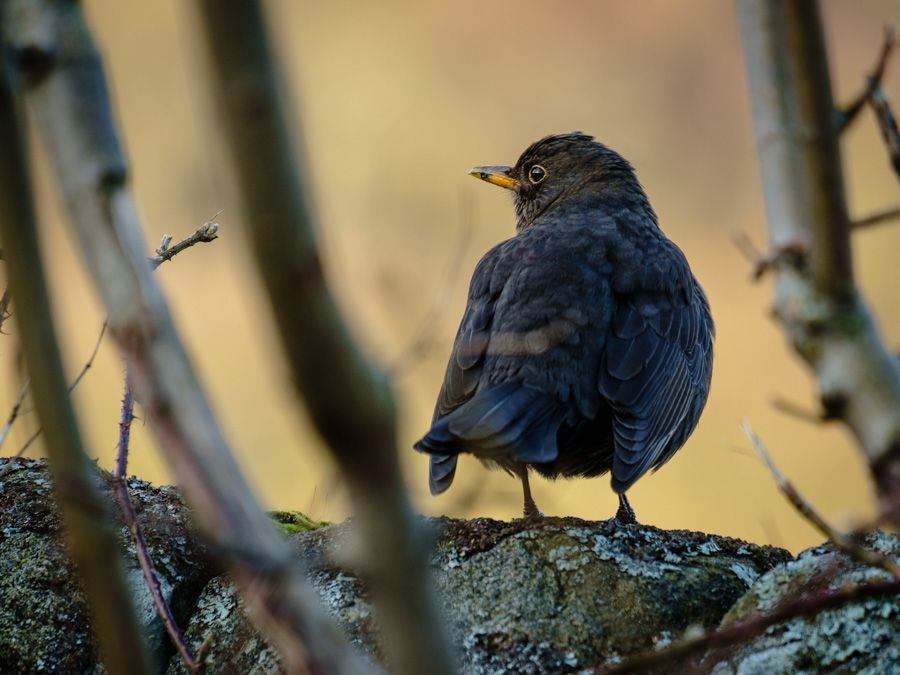
While 200mm is usually too short for wildlife photography, sometimes you get lucky as with the blackbird shot above. For ‘casual’ wildlife photography it can work though, just choose larger or tamer subjects! But don’t expect to be able to get shots of birds from any kind of distance.
[exif id=”1059″]
Summary
While the 55-200 isn’t my favourite Fuji lens, it’s a solid and versatile performer. If you need a focal length beyond 90mm it’s certainly the best option currently available. Its size and weight do feel somewhat at odds with the ethos of the mirrorless world however, which is supposed to be about leaving the heavy, cumbersome kit behind. The XC 50-230 demonstrates you can have good reach in a lightweight package, but it comes with sacrifices in image quality, maximum aperture, build and handling which make it hard to recommend unless price is your primary concern.
Whether Fuji could have made size or weight savings with the 55-200 without resorting to the same compromises as present in the XC lens is uncertain. But to me it feels like many of the XC’s shortcomings are driven by cost saving measures rather than fundamental limitations of lens design.
Fuji has two other zoom lenses whose focal ranges also intersect with the 55-200’s (aside from the 50-230) but which are far more niche products. The 18-135mm f3.5-5.6 “super zoom” will no doubt have its fans, especially due to its weather sealing and pairing with the X-T1 as a kit. But optically it’s more compromised owing to its nearly 8x zoom range. On the other hand, the 55-140mm f2.8 is clearly aimed at the professional market with its fast maximum aperture and top quality optics. However its cost, size and weight will make it impractical for many.
Between those two choices, the 55-200 looks like the most sensible general purpose offering for those looking for quality, but wanting to strike a balance between size and cost. It’s for this reason that this lens is in my kit bag and will remain there for the foreseeable future.
As always if you find my reviews helpful and you like my images, please consider purchasing a print either from the store here or on Etsy. I’m not famous enough to get freebies from Fuji so I need your support to keep both this site running and to keep my camera gear up-to-date.
I was surprised to see it’s been quite awhile since I last wrote anything on here, tempus fugit! Winter has slipped by and we’re well into spring now, with the tree’s starting to green up and all the usual spring flowers in abundance in this verdant valley I call home. We had quite a decent winter in Yorkshire, with some good snow falls. A marked improvement on last year’s mild, but damp and grey affair – at least as far as photography is concerned!
[exif id=”895″]
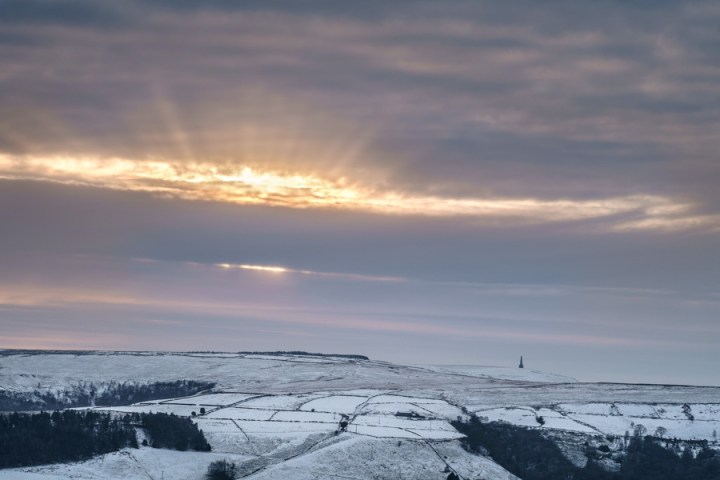
The heaviest snowfall deposited around a foot of the white stuff on the hillsides around Calderdale. Probably a little more up on the tops. Pictured above is the hamlet of Old Chamber, a stones throw east of market town Hebden Bridge. It was a hell of a slog up the steep cobbled road to reach it, with on and off snow showers to contend with. Still it was great to finally reach the top and meander along the high road, before descending down through Crow Nest Wood into town for a much needed hot drink!
[exif id=”896″]
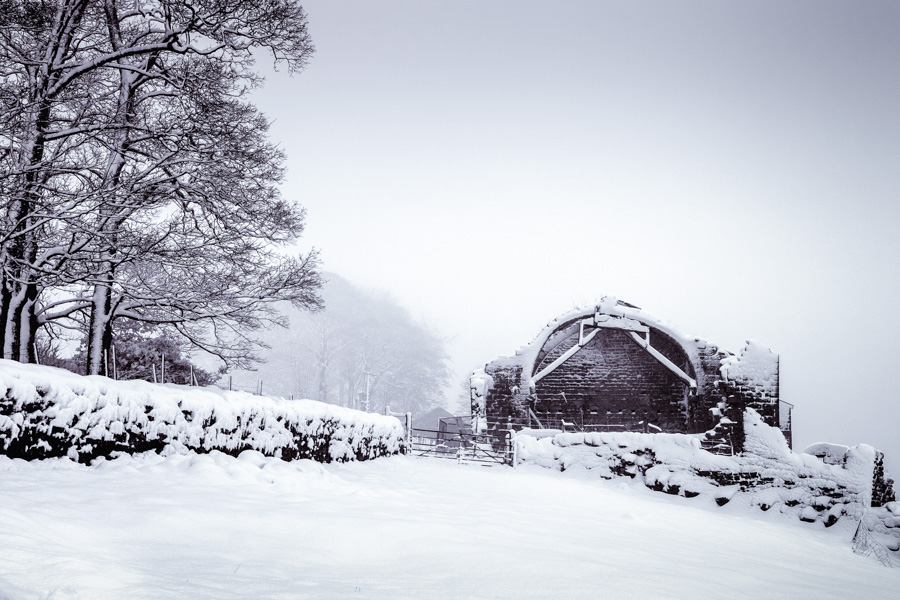
I’ve visited this old ruined cottage above Mytholmroyd on several occasions since 2012. Not much has changed in the last three years, save one or two more bricks going missing above the doorway. It looked lovely nestled in the undulating snow drifts with the valley behind largely obscured by fog. Such a shame it’s been left to fall down.
[exif id=”897″]
In February I made the decision to part ways with my Fuji 60mm prime. Like many owners of this lens, I’ve had something of a love hate relationship with it. It’s a focal length I grew to really enjoy, and optically the lens was stellar with lovely bokeh, great sharpness and a good size to weight ratio. Of course the major downside was, that despite several firmware updates, it was a slow lens to focus. Coupled with my ageing X-E1, and I was starting to find I was missing too many shots to AF errors and decided it was finally time to part ways. What could replace it – the 56mm f1.2? Well maybe one day, but for now I’ve decided to rearm myself with a long telephoto zoom.
Last year I briefly owned the cheap and cheerful XC 50-230mm zoom, after getting a good deal on one at the Photography Show in Birmingham. However I found after awhile that the slow maximum aperture, and to an extent the image rendering, weren’t really what I was looking for. So this time I’ve gone a step further and have opted for the Fuji XF 55-200mm. It’s bigger, heavier and has a slightly more limited zoom range. However it’s significantly faster at the long end (f4.8 vs f6.7), has more pleasing micro-contrast and colour rendering to my eye. Overall I’m pleased with the results it produces, it’s easily as sharp at 55mm as the 60mm prime and is very good through the range, only really getting a little weak at the far end (as is often the case with zooms). How much of that is actually the optic’s fault and how much my X-E1’s weak AF system, I’m not entirely sure yet as it seems a little variable.
Admittedly the 55-200mm is not really that well matched to an X-E body – I really notice the extra weight when it’s hanging from the camera around my neck. I’m hoping I’ll be able to upgrade to an X-T1 (or whatever replaces that), within the next year though. So it’s a forward looking purchase in that regard. I’ll post a full review when I’ve had some more time to put it through its paces.
[exif id=”891″]
February also saw a trip to iconic local landmark Stoodley Pike, with my good friend Penny. We approached from the Mankinhole’s side, which I’d not tried previously. This afforded me some new views, including this boulder strewn one which I rather like.
[exif id=”892″]
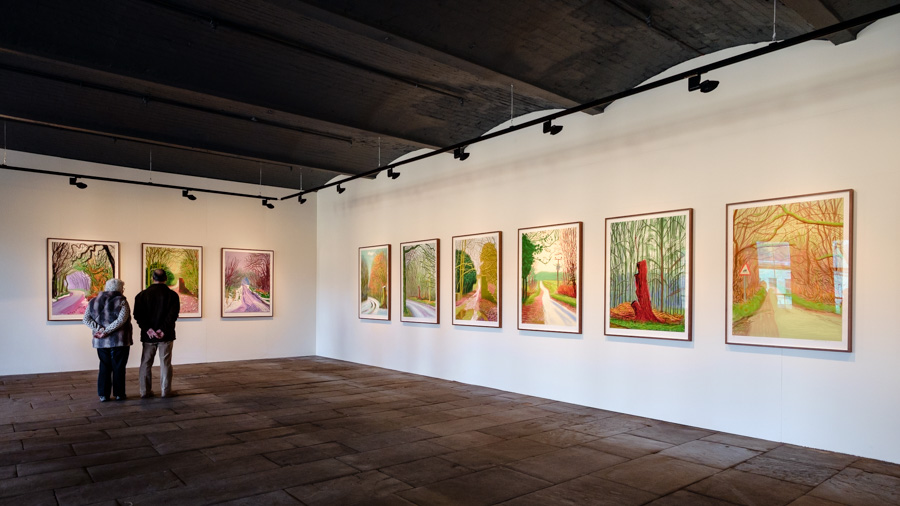
Onward’s to March now and a visit to Salt’s Mill in Saltaire, near Bradford. Salt’s Mill is an incredible sprawling Victorian textile mill, surrounded by a village of terraced houses that once provided homes for the mill’s many workers. It’s a lovely place and was designated a UNESCO World Heritage Site in 2001. The mill itself is no longer working, but remains in use as a gallery and shopping space. It has a strong connection with Bradford-born David Hockney, whose work can be found brightening the galleries.
[exif id=”899″]
Finally here’s one more shot from Mytholmroyd, this time of an old Victorian terrace that runs between the Rochdale Canal down towards the River Calder. I like the compressed perspective here and the neat angles. The gentle hump of the bridge hides the busy main road at the end of the terrace.
Until next time, if you enjoy my writing and images please consider supporting me and the site by purchasing a print from my store here or on Etsy.
![Light Priority - Photography by Rory Prior]](https://lightpriority.net/wp-content/uploads/2020/05/fulllogo.png)


 Finally, I’m working on doing a round up of all the various film types I’ve shot with my thoughts on their rendering, easy of digitising etc. so keep an eye out for that. If you enjoy my writing and images please help support me and the site by purchasing a print from my store


 [exif id=”1266″]
 [exif id=”1268″]
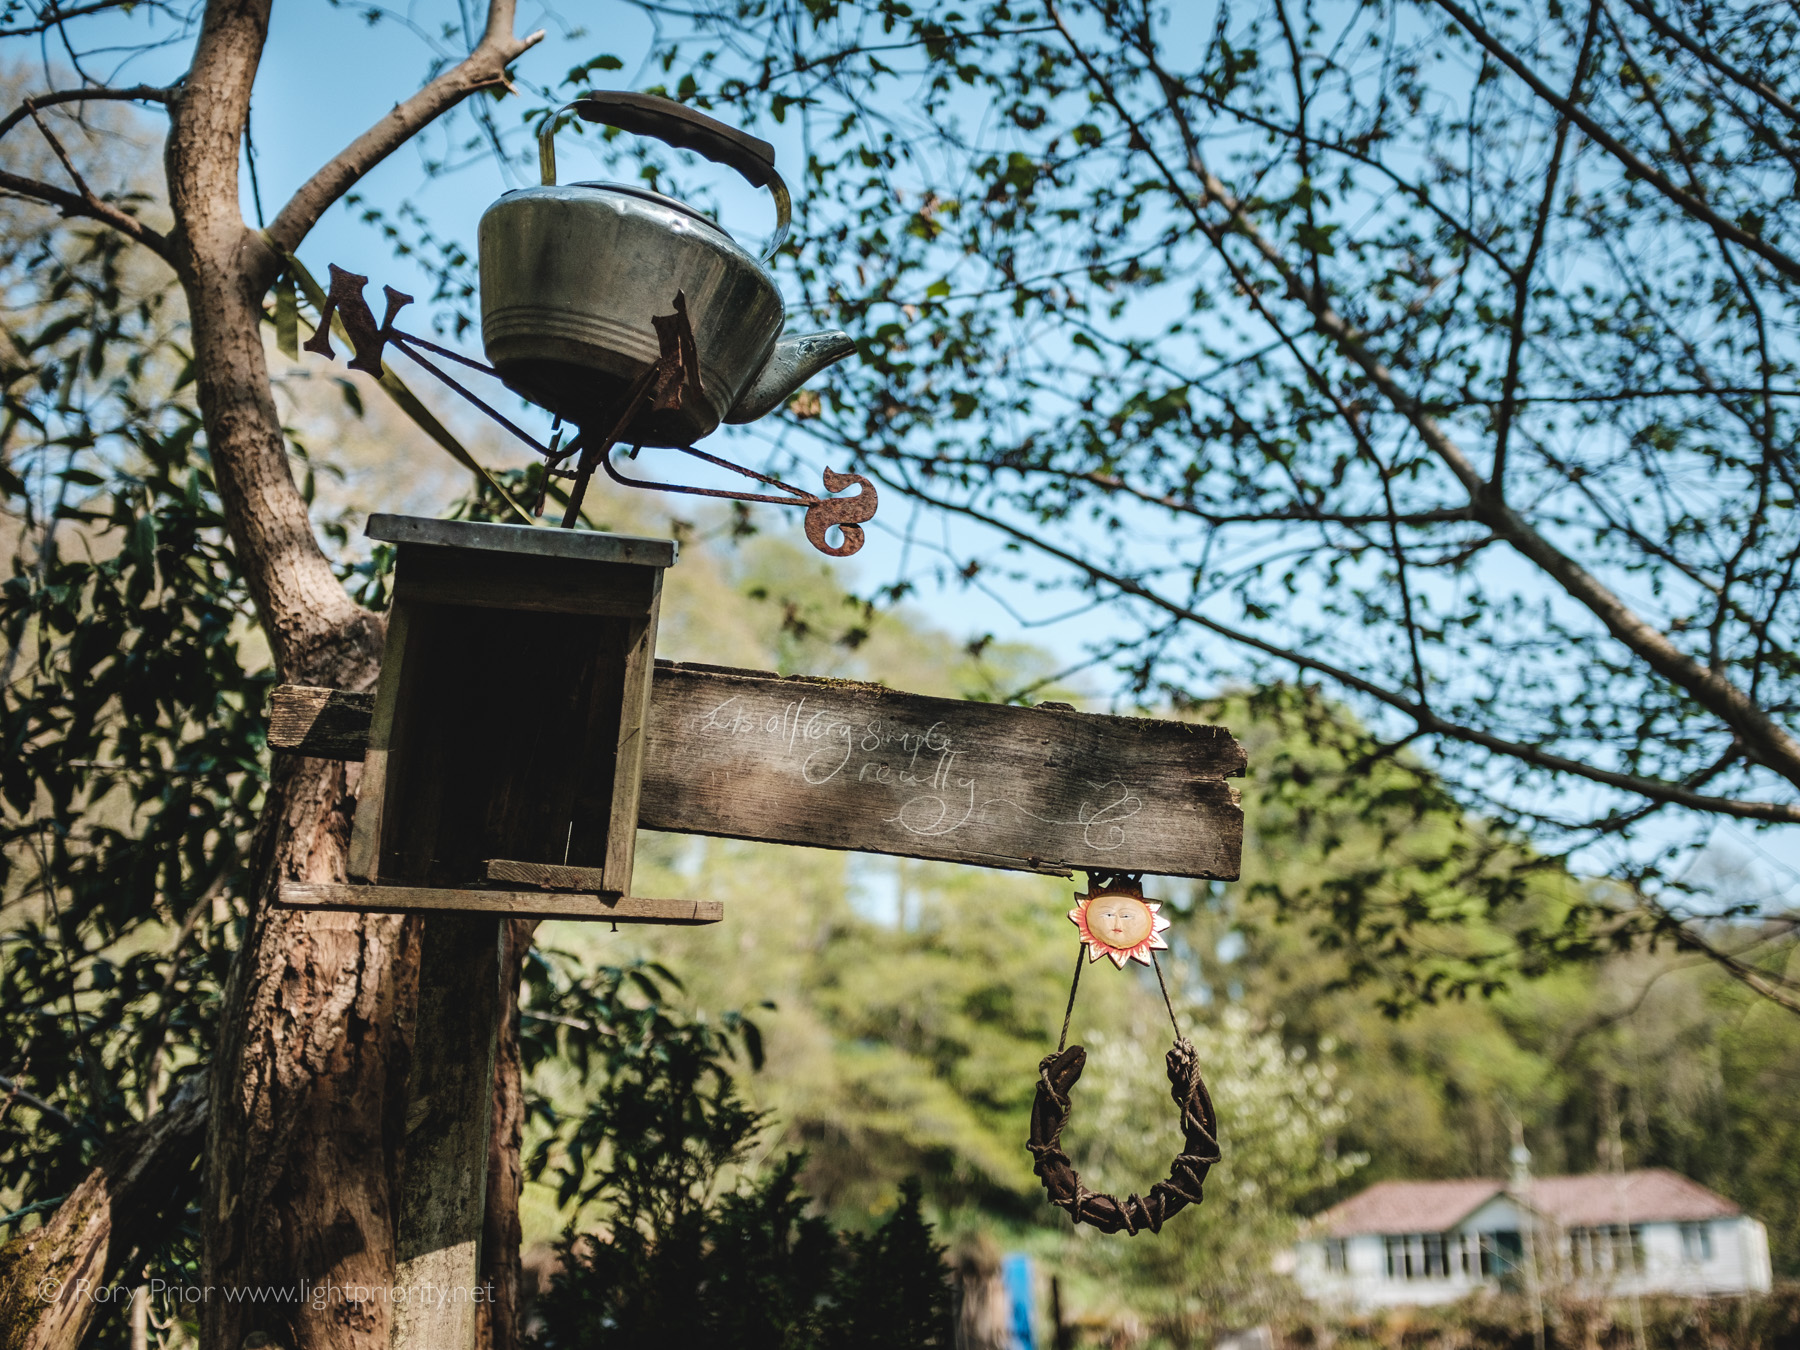 [exif id=”1277″]
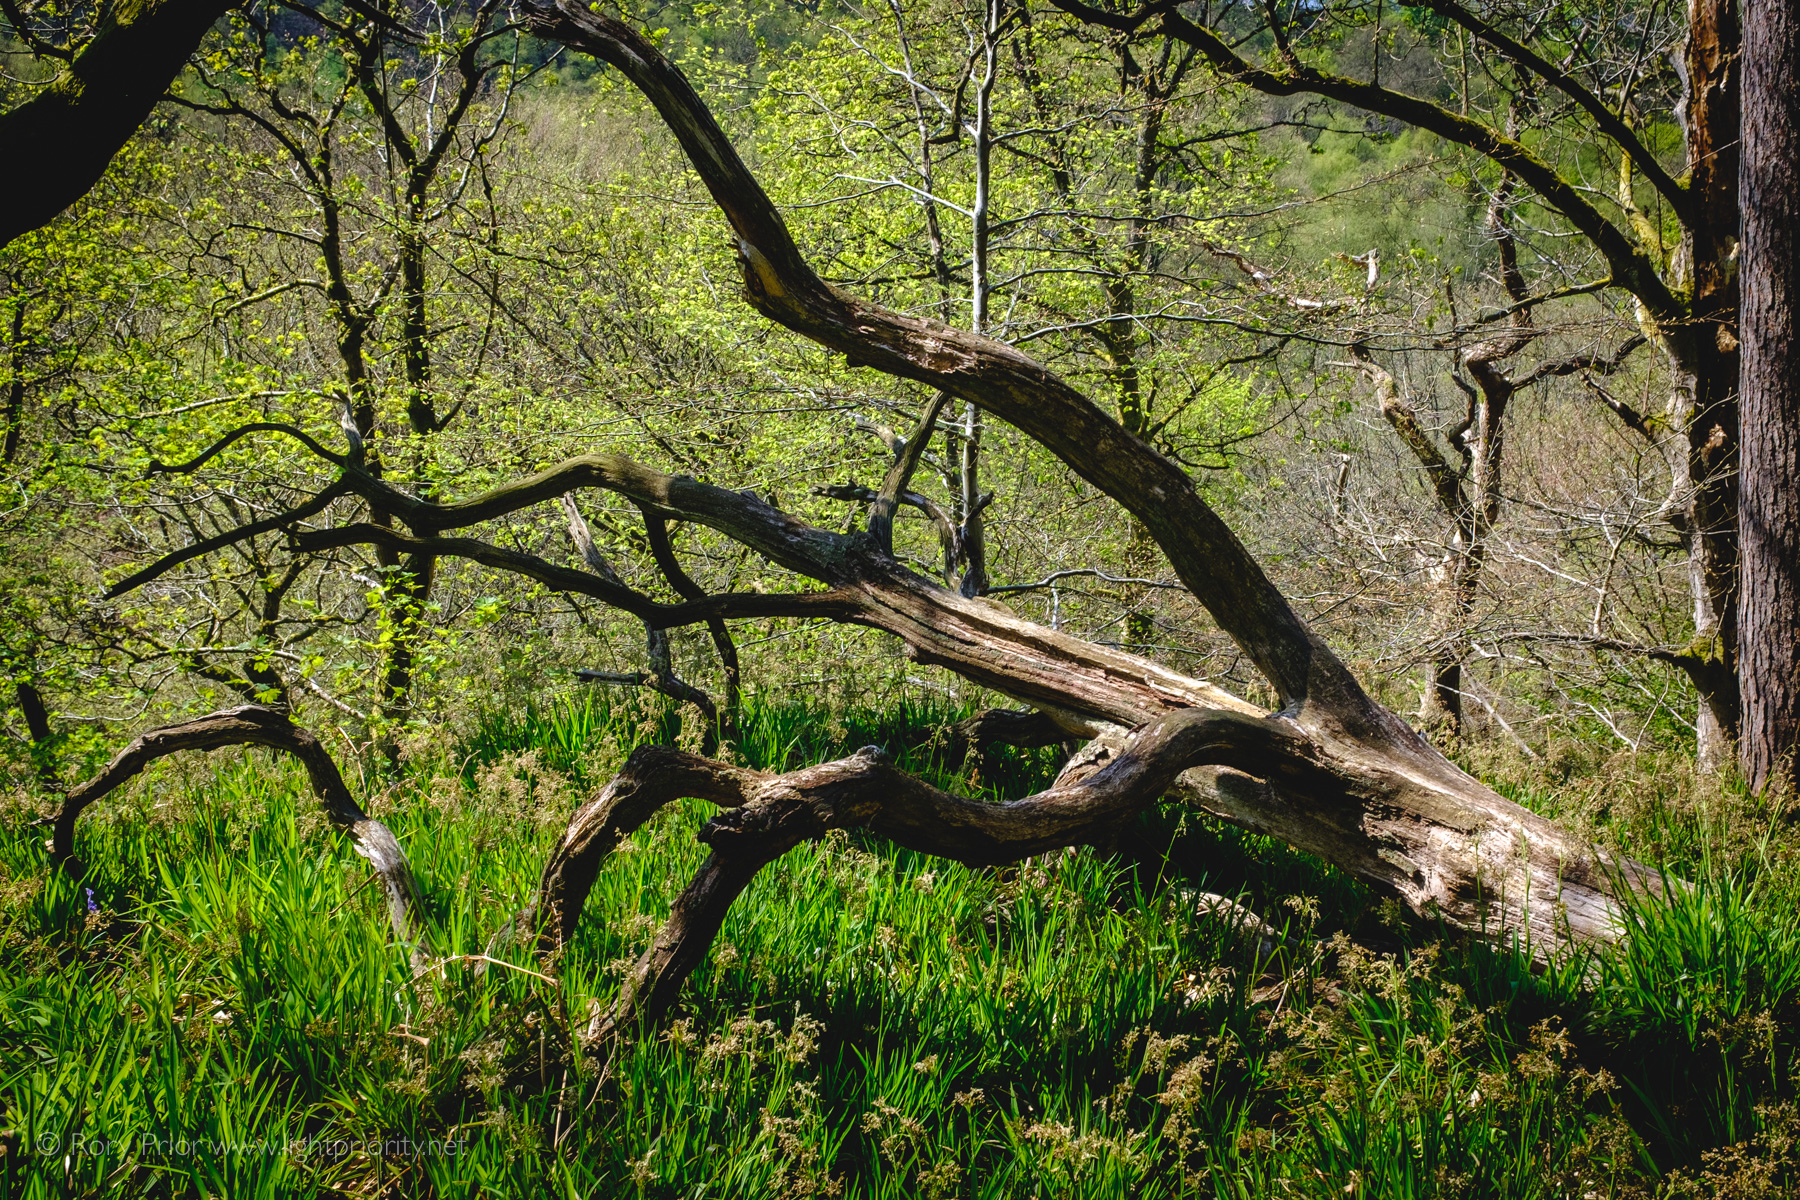 [exif id=”1269″]
 [exif id=”1270″]
 [exif id=”1271″]
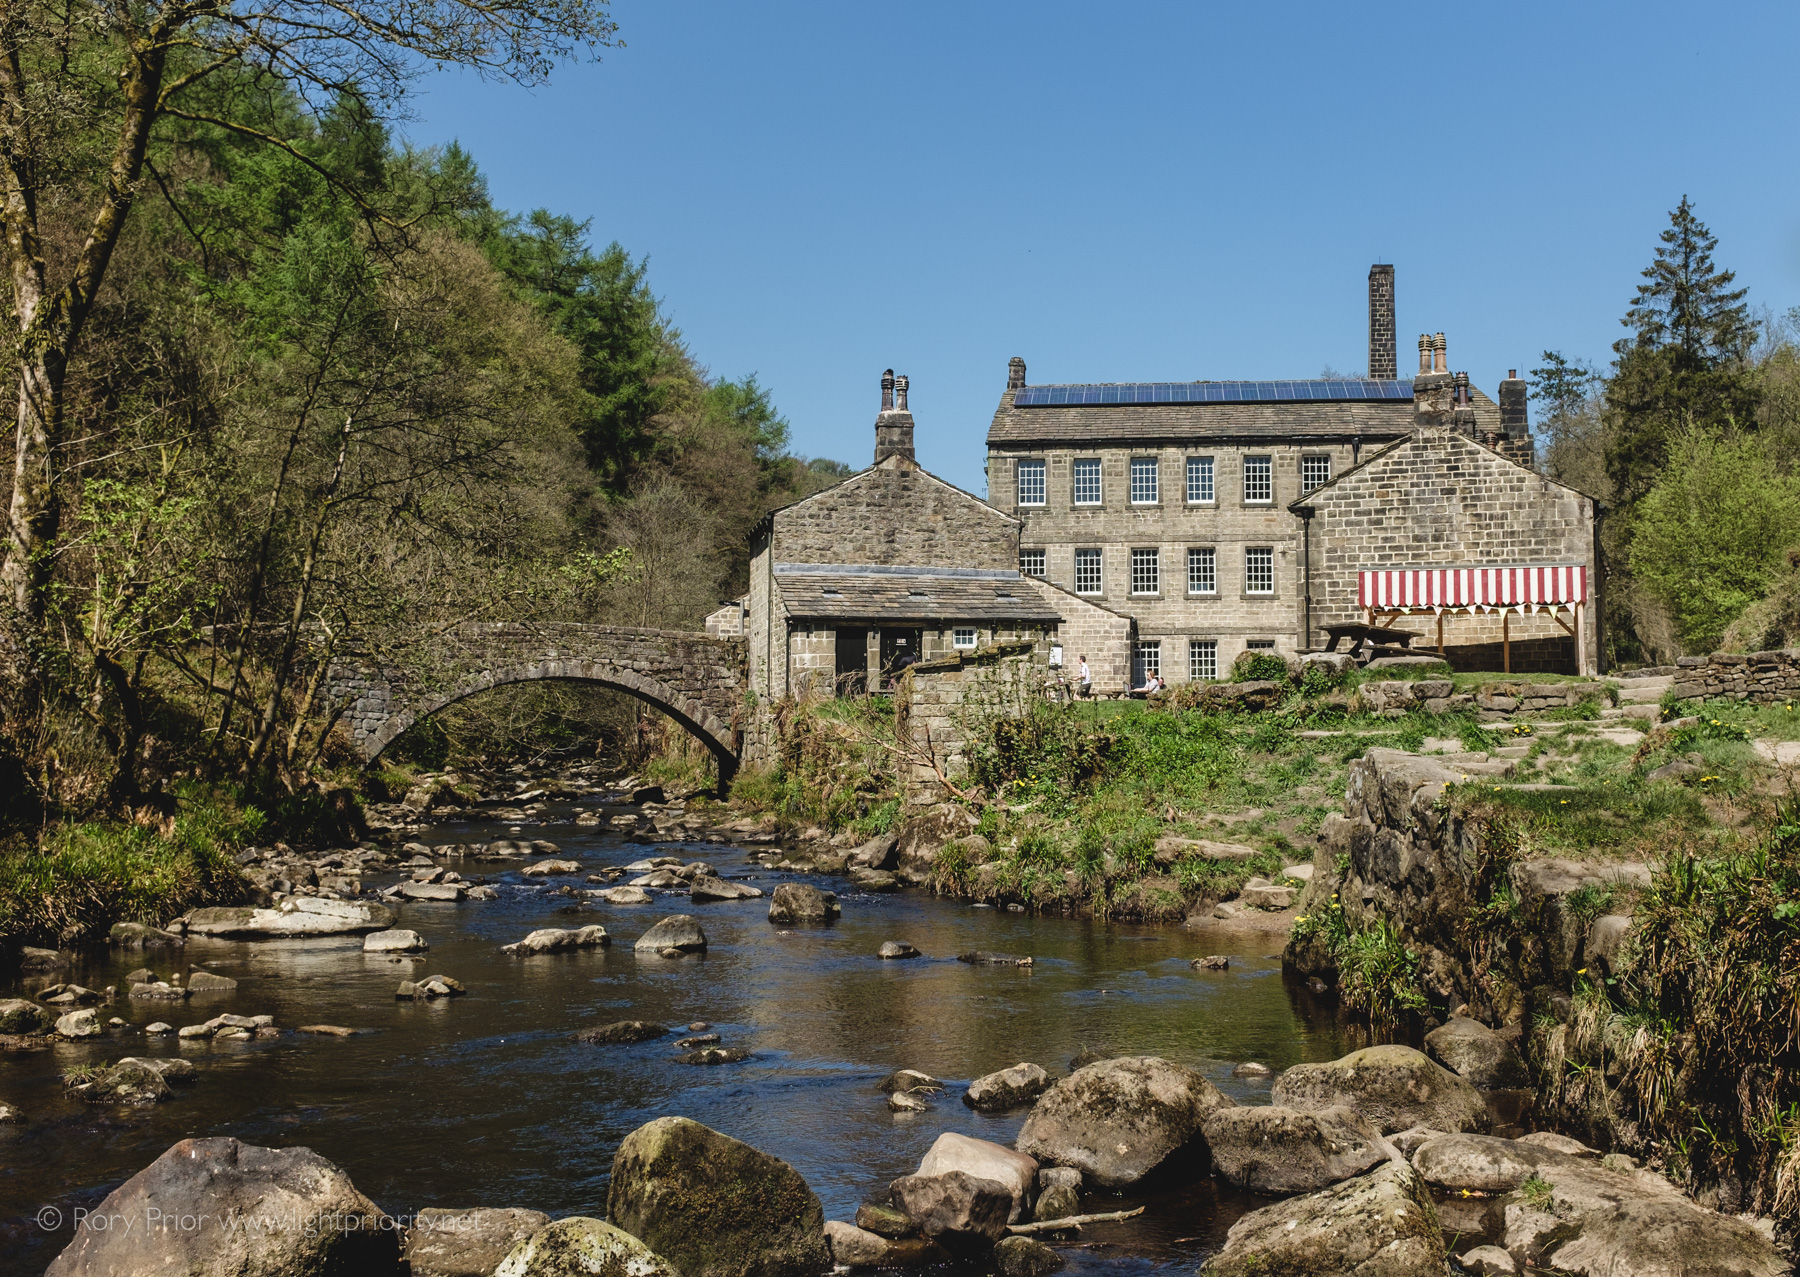 [exif id=”1272″]