![Light Priority - Photography by Rory Prior]](https://lightpriority.net/wp-content/uploads/2020/05/fulllogo.png)
One of the benefits of being in a camera club full of largely retired people who were all into photography long before digital was ever a thing, is that lots of them have old film, paper and gear lying around they’re happy to give away.
Last year I was offered a photographic enlarger for making prints, but I initially turned it down because I didn’t think I’d have the space to set up a darkroom and use it. Well, turns out with a little imagination our windowless bathroom actually converts into a pretty tidy darkroom with fairly minimal setup and teardown – thankfully we also have an ensuite so my partner can cope with this arrangement with only minimal grumbling
So I took possession of an old Gnome enlarger of 1950-60s vintage, from Alan at the camera club. I bought some trays for the various chemical baths and was given an enlarging easel, safe light, focus finder and some 5×7″ Multigrade paper to play with.
The printing process is very simple, but has quite a few steps that you have to work through methodically. Basically you need to put a negative into the enlarger, focus that at whatever size you want to print it, do a test run with a strip of paper that you expose incrementally to the projected light to determine the optimal exposure time, then repeat the process with that exposure time for a full sheet of paper.

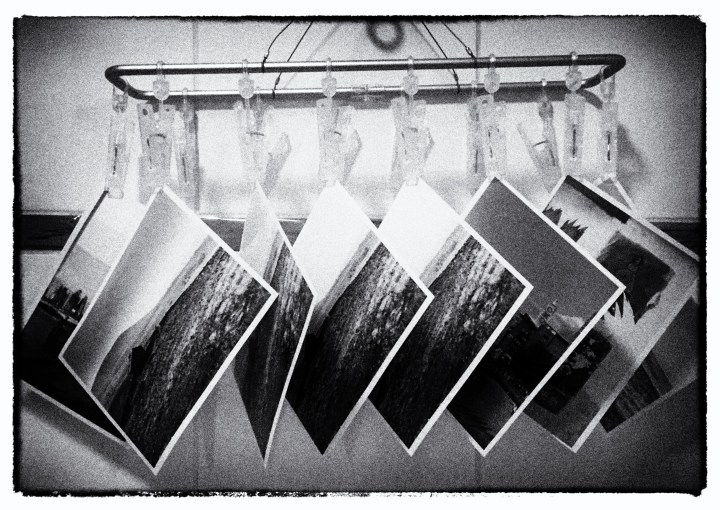
The process of actually developing black and white photographic paper is identical to that of processing black and white film. That is a three step process of moving the exposed paper between a developer bath, a stop bath and a fixer bath. Paper development is fast, taking just a minute to develop, about 10 seconds to stop and another minute to fix. Then just a couple of minutes of washing and you have a print ready to dry. Unlike normal film, photographic paper isn’t sensitive to red light so you can safely do all this under the dim red glow of a safe light to see what you’re doing.
When it comes to printing there are two basic paper types, resin coated and fibre. These come in various finishes from full gloss to matt. Resin coated is the easiest to work with (and all that I’ve used so far). It dries quickly and doesn’t wrinkle. Fibre based paper is more like regular paper with a photographic emulsion coated on to it and it requires significantly longer to wash and dry. Also care has to be taken to flatten it out as it wrinkles easily when drying. Fibre paper is generally regarded as offering a nicer finish than resin so it’s something I will have to try sooner or later.
Since my initial forays on 5×7″ paper I’ve been given a variety of larger sizes from 8×10″ to 12×16″. My trays only fit up to 9.5×12″ paper and I can’t reasonably fit larger ones into the bathroom, but I’ve now acquired a cheap drum for doing up to 12×16″ paper on my Jobo rotary processor that I usually use for film development. Once paper is loaded into the drum it can also be processed in full daylight as it has a light trap allowing chemicals to be poured in and out without exposing the paper.

A few months ago I was able to upgrade my enlarger to a Durst C35 from the early 1980s. It’s considerably smaller and easier to handle than the rather cumbersome Gnome. Retrofitted with a modern bright LED bulb it also probably works better now than it ever did with a dim, hot 55W incandescent in it. The one downside of the C35 is that it lost me the ability to print medium format negatives, but that’s something I hope to rectify soon as I’ve finally sourced one of the incredibly rare upgrade kits for it.
I’m continuing to enjoy my analogue journey as you can probably tell, and darkroom printing is a fun and rewarding addition to that. It’s interesting to learn new techniques like dodging and burning, split grading to control contrast, adding borders and so on. It’s a cliché of course, but it really is a magical process. There’s more than a century of accumulated knowledge and science behind it, but the hands on nature of the process and your ability to play with it anyway you want, is a long way removed from the relentlessly automated, digital world we’ve created for ourselves.
If you’d like to see more of my darkroom prints take a peek at my Etsy store! They are of course genuinely hand made and each one is unique thanks to the analogue process.


