![Light Priority - Photography by Rory Prior]](https://lightpriority.net/wp-content/uploads/2020/05/fulllogo.png)

The C35 was an entry level colour 35mm enlarger made by Italian firm Durst in the early 1980s. It had a sister model called the C65 (yes 65) that was designed for up to 6×6 negatives. The only difference between the two models was the supplied mixing box, negative carrier and lens, they otherwise shared all the same components. From my searching it seems like the C65 is rather rare, especially compared to the C35 which can be easily found on eBay or at specialist photography stores that carry secondhand kit, usually for around £50 or less.
Upgrading to an LED light source
The main weakness of the C35 (and C65) is the light source. They were originally designed to be used with a 55W reflector bulb. When paired with the mixing box diffusor this was decidedly dim compared to an enlarger using a condensing lens. Luckily the lamp fitting takes a standard E27 Edison screw mains voltage bulb, so we can bring things into the 21st century by fitting a much brighter LED bulb.
I recommend the Philips Corepro LED bulbs, you’ll want a cool white version because photographic paper reacts primarily to blue light. Don’t cheap out on the bulb as you want something that will emit an even and wide spectrum of light.
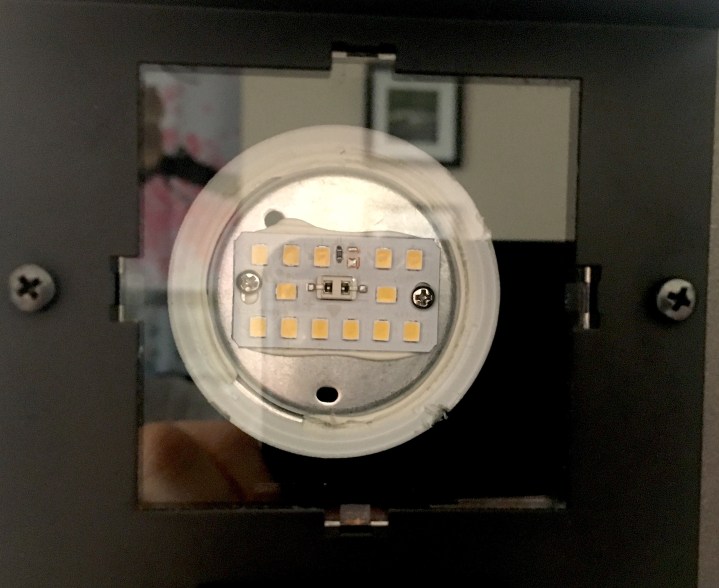
To level up the light bulb even more for our purposes I recommend (carefully) removing the opal diffuser from the bulb itself. This means more of the light will go directly into the mixing box instead of bouncing around in the lamp housing. On the Corepro bulbs this is simply held in place with adhesive and can be pried loose with a flat head screw driver without too much difficulty. Obviously don’t do this while it’s plugged in or turned on and don’t touch the exposed LEDs or you risk electric shock! Once installed in the enlarger the bulb will be safely behind a glass heat shield.
Note that I’ve only tried black and white multigrade printing with an LED bulb, I can’t guarantee you’ll get great colour results using one; but then if you’re serious about colour printing the C35 isn’t a good option anyway given the lack of a proper cyan filter or voltage regulator.
Upgrading the Lens
The C35 comes with a fairly basic, plasticky 50mm f2.8 lens Durst brands as a Neotaron. Mine was full of fungus and refused all attempts at disassembly so I was unable to clean it. The C35’s lens board will take any Leica M39 screw mount lens so you have plenty of upgrade options.
Durst also made a very nice premium 50mm f2.8 lens with the Neonon name. This is an excellent quality lens that generally sells for a lot less than other popular enlarging lenses from the big brands. If you’re looking for a 50mm lens for your C35 this is what I’d recommend.
Note that due to the maximum column height of the C35 you won’t be able to make much more than a 9.5×12″ print with a 50mm lens. If you want to print bigger you either need to find a wide angle 40mm lens or rotate the column on the enlarger so it projects on to the floor. Sadly you can’t rotate the enlarger head to project on to a wall.
If you have a C65 or an upgraded C35 that can handle 6×6 negatives, you’ll also need a 75 or 80mm lens. Durst made a fairly dark 75mm f4.5 lens, but I’d recommend looking for something a little brighter. I have an inexpensive Meopta 80mm f4 that came bundled with my old Gnome enlarger. Unfortunately it’s too big to use the C35’s swing in red filter, but that’s not the end of the world.
Upgrading the C35 to handle 6×6 negatives

As I mentioned at the start of the post, the only differences between the C35 and C65 are the negative carrier, mixing box and lens. So it stands to reason you can simply upgrade by swapping these components. Indeed Durst sold a kit called the MEKIT 65 for just this purpose. Unfortunately despite how common the C35 itself is, these kits are exceptionally rare*. So this part of the guide will probably only be helpful to a small number of people, but given the absence of any real information about it online I thought I’d try and fill the void.
* Another source of these components (other than the kit) might be a broken C65 – as long as you have at least the negative carrier and intact mixing box you should be in business.
I was extremely lucky and did manage to find a MEKIT 65 the other week by chance, albeit missing the 75mm f4.5 lens. As mentioned above I already own a Meopta 80mm lens so this wasn’t an issue.
However it wasn’t until after ordering I noticed a problem when examining pictures of the kit – on my C35 the magenta and yellow filters are integral to the mixing box, but the MEKIT 65 seems designed for a version of the C35 where this is instead fixed to the lamp housing. Oh dear!
So it turns out there are two versions of the C35, my one that is presumably a late model, whose main differentiating feature seems to be illuminated scales on the mixing box and the original which didn’t have this. The illuminated scale model for some reason moved the yellow and magenta filters to the mixing box itself, where as on the older model this was on the lamp housing.

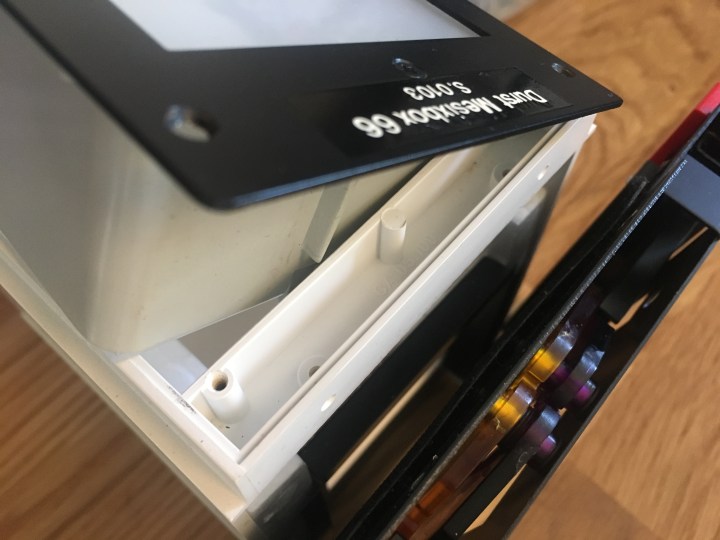
Checking the manual that came with my C35 it still talks about the enlarger being upgradable but makes no mention of the MEKIT 65 and instead mentions MESIXKIT 65. Searching for MESIXKIT 65 turned up nothing of use.
After further inspecting both my mixing box and pictures of the MEKIT 65 one, I became convinced it would be possible to retrofit the colour filters to it as the overall design of the box itself was largely unchanged. Today I put that to the test as the upgrade kit was delivered!

It was straight forward to remove both the metal plate from the 6×6 mixing box and the colour mixer from the 35mm mixing box. They both attach in the same manner at the top of the box with two little hooks that clip into the plastic, but they are screwed into slightly different locations at the bottom.
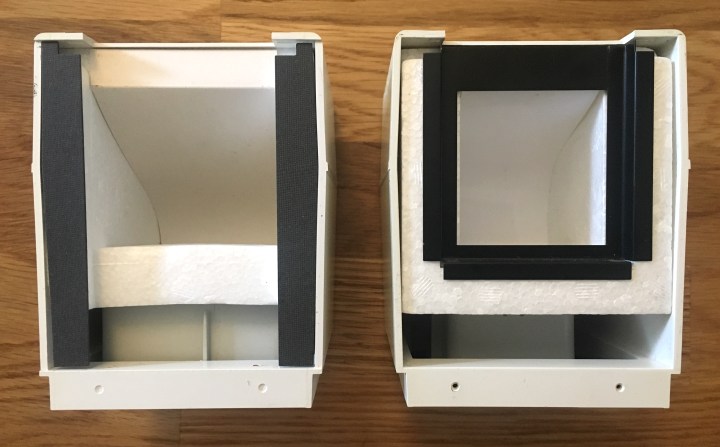
Interestingly there are indents where the screws should go on the 6×6 version of the box, presumably that isn’t a coincidence! I removed the black card baffles and swapped the metal filter holder over from the 35mm mixing box. It fit perfectly so that was a good sign (the 35mm box still has a 6×6 aperture where it meets the lamp housing).
Next up I tried to fit the colour filter plate and thankfully it simply slotted into place. The metal plate from the 6×6 mixing box would not fit the 35mm box however – although that’s not a concern here, it does mean you might have difficulty if you were trying to fit a MESIXKIT 65 to an older style C35 for some reason.
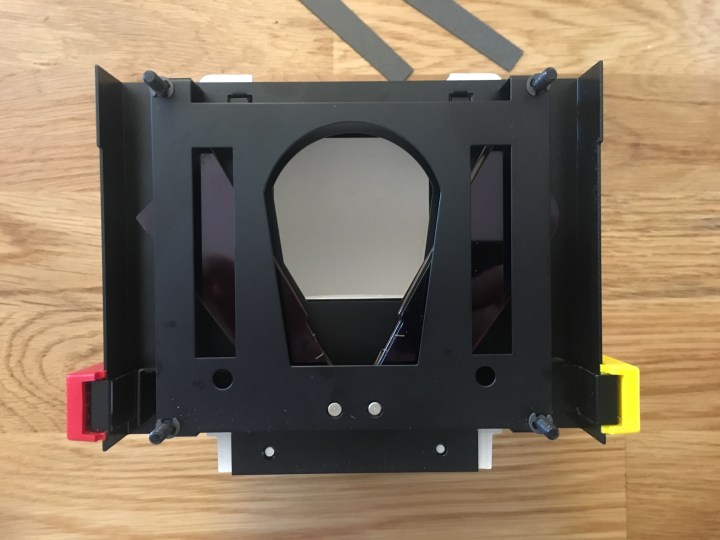
Now it was just a case of screwing the colour filter plate into the 6×6 mixing box. First I removed the diffuser from the bottom of the box to make sure I wouldn’t be damaging anything with the screws (and to give it a clean). There was just an empty void where the screws were going so I had nothing to worry about. The plastic is fairly soft and it wasn’t hard to drive the screws from the 35mm mixing box into it without risking cracks.
After getting the screws in, I blew out any remaining dust with a blower, gave both sides of the diffuser box a gentle clean and then screwed that back in place.

The final step then was to simply affix the mixing box with colour filters back to the enlarger. This is super easy as there are four fixed bolts on the back of the colour filter plate that correspond with holes on the lamp housing, then it’s just a case of tightening 4 plastic nuts to lock it into position.
So that’s how you fully upgrade your Durst C35 to handle both 35mm and 6×6 negatives, at least if you end up with a mismatched enlarger and upgrade kit! Knowing now that there are multiple versions of the C35, if I were buying one today I’d look for the older model as it would be easier to upgrade and the illuminated scales are really not worth the extra hassle.


Did you just move your blog around a bit? A stack of URLs just changed. I assume it’s all fine and intended.
LikeLike
Yeah I just moved from a self-hosted site to WP.com. Keeping everything up-to-date and dealing with constant ContactForm7 spam was getting more trouble than it was worth.
LikeLike
Excellent article on the Durst C35 & C65 enlargers that has proved a very useful source of reference.
I rather hastily discarded my old hobby darkroom equipment as digital took over (As you can guess I wish I hadn’t. Although I still kept hold of my 1st Paterson enlarger while the Meopta Colour 4 enlarger was discarded and sadly a poor decision in reflection). Have been looking at upgrading again, but requiring 35mm & 6×6 on a tight budget is not that easy. I’ve managed to pick up via eBay a C35 and the 6×6 MEKIT 65 Conversion kit with 75mm f4.5 lens (just minus the 6×6 neg carrier, but have sourced that from elsewhere on eBay). My only possible addition note wise to your article is regarding the supplied lens. You make reference to the supplied lens with the enlarger as being a bit plasticky. Just to clarify that appears to be a Durst Neotar 50mm f3.5 made in Japan. Now here’s the thing that I’ve noticed is that you had the 75mm lens missing from your conversion kit, but what I can tell you is, that Durst lens is actually surprisingly made by Rodenstock (Inscribed on side of lens). I’d picked up the made in Japan 50mm Neotar to compliment the original C35 set up supplied. Since purchasing the Neotar cheaply, I’ve luckily sourced from eBay Germany a 50mm f2.8 Neotaron once again by Rodenstock, which I assume has originally come from the 35mm conversion kit for the C65 enlarger. I’m naturally delighted to have unexpectedly sourced these items to maintain the brand set of equipment as a package. Looking forward to setting it all up and using once again. You article has been a great help and part of that process.
LikeLike
Just started thinking (reminiscing) about my days doing b&w then attempted colour d&p in my teens using Paterson kit and my C-35 enlarger. Interesting comments about light and lens upgrades. Still got my OM-2, motor drive and lenses – I can feel rekindling this hobby with my teenage son – thanks BR Paul
LikeLike
Hi, very helpful ideas. I’ve upgraded my C35 lighting along these lines now! Trying to change the enlarger lens for a better one but I can see no way of removing it? Tried unscrewing the lens by hand but no movement and I don’t want to risk breaking the lens by attempting to force it. There seems to be what might be a retaining ring but no notches or apparent way of applying any friction to it, especially as it is a very thin piece and also recessed? Any advice much appreciated🙏
Best wishes,
Jez
LikeLike
It should just screw out, it’s a standard m39 lens. I guess it’s possible a previous owner glued it? Otherwise it might just be stuck from age.
LikeLike
Stuck due to being cross threaded perhaps? Or stuck due to old age as Rory mentioned?
Try some lighter fluid on a tip of something like a small jewellers screwdriver and allow to penetrate. May need several drops before any success, but I’ve had good success with lighter fluid for removing stuck camera lens on my fixed lens rangefinders that have screw threads within the lens barrel.
If it’s glued the lighter fluid may also act as a releasing agent.
To do this you’d be wise to lay the enlarger on its side for ease of access to the lens board area, then apply the lighter fluid.
Alternatively try applying some warm Air heat from a hand held hair dryer, as the dry heat may be enough to reactivate the glue and allow the lens to unscrew again with a firm grip around the lens.
Hope this helps, good luck.
LikeLike
Great infoes here thanks a lot, what is the LED equivalent of the Philips Corepro Bulb for the old 55W ?
LikeLike
I would buy the most powerful one you can get, I think I have a 100w equivalent in mine. With LEDs heat is not an issue like it was with incandescent bulbs and the development times on the C35 are very slow otherwise.
LikeLike
Good, i fitted a 120w cool white led equivalente from Philips, removing the plastic bulb and clipping the plastic border around a bit to fit the narrow opening, when my Neonon lens arrive i am ready to try.
LikeLiked by 1 person
Thank you for the article I have just bought a C35 and plan to print my own photos when it is up and running.
The enlarger lens is foggy and marked and wa0s wondering what would be a good size lens to fit to it I was thinking of an 75 or 80mm but rereading the article you mentioned a 40mm lens for larger prints I hope to print 8×10 in prints or smaller.
And lastly about the bulb upgrade to led was it a normal screw in light bulb where you took off the ball type diffuser off it
Thank you very much for the article
LikeLike
Hi Michael. 50mm is fine for 8×10, you’d only need a 40mm if you wanted to print much larger like 16×12. 75 or 80 would be for medium format if you have the 6×6 upgrade. The bulb on mine was a standard screw type, I assume all models are the same in this regard. Happy printing!
LikeLike
hi im wondering if you can send me the manual, and can you tell me how to change the lens? And if you know how to repair the knob of the colum mine seems to lack a thing that goes between the column andthe knob it doesent keep in its place. Please
LikeLike
Hi Saul, you can find the manual online here.
The lens uses an M39 screw mount so it just unscrews; if it’s never been removed it may be a bit tight on there. On mine I can see a piece of white plastic that presumably applies friction to the main column to help keep the enlarger head in one place, if you’re missing that you might be out of luck unless you can find another Durst C35 for spares or repairs. They are fairly basic though so I wouldn’t spend too much on it.
LikeLike
thanks for replying and the help You are awesome! Can you send me some fotos of the plastic thing? Maybe i can 3d print some replacement, please. Again thank you for the help.
LikeLike