![Light Priority - Photography by Rory Prior]](https://lightpriority.net/wp-content/uploads/2020/05/fulllogo.png)

The C35 was an entry level colour 35mm enlarger made by Italian firm Durst in the early 1980s. It had a sister model called the C65 (yes 65) that was designed for up to 6×6 negatives. The only difference between the two models was the supplied mixing box, negative carrier and lens, they otherwise shared all the same components. From my searching it seems like the C65 is rather rare, especially compared to the C35 which can be easily found on eBay or at specialist photography stores that carry secondhand kit, usually for around £50 or less.
Upgrading to an LED light source
The main weakness of the C35 (and C65) is the light source. They were originally designed to be used with a 55W reflector bulb. When paired with the mixing box diffusor this was decidedly dim compared to an enlarger using a condensing lens. Luckily the lamp fitting takes a standard E27 Edison screw mains voltage bulb, so we can bring things into the 21st century by fitting a much brighter LED bulb.
I recommend the Philips Corepro LED bulbs, you’ll want a cool white version because photographic paper reacts primarily to blue light. Don’t cheap out on the bulb as you want something that will emit an even and wide spectrum of light.
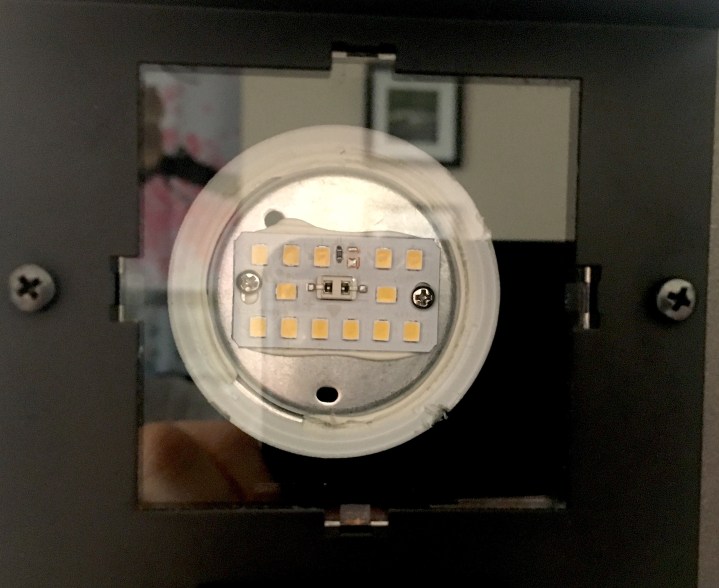
To level up the light bulb even more for our purposes I recommend (carefully) removing the opal diffuser from the bulb itself. This means more of the light will go directly into the mixing box instead of bouncing around in the lamp housing. On the Corepro bulbs this is simply held in place with adhesive and can be pried loose with a flat head screw driver without too much difficulty. Obviously don’t do this while it’s plugged in or turned on and don’t touch the exposed LEDs or you risk electric shock! Once installed in the enlarger the bulb will be safely behind a glass heat shield.
Note that I’ve only tried black and white multigrade printing with an LED bulb, I can’t guarantee you’ll get great colour results using one; but then if you’re serious about colour printing the C35 isn’t a good option anyway given the lack of a proper cyan filter or voltage regulator.
Upgrading the Lens
The C35 comes with a fairly basic, plasticky 50mm f2.8 lens Durst brands as a Neotaron. Mine was full of fungus and refused all attempts at disassembly so I was unable to clean it. The C35’s lens board will take any Leica M39 screw mount lens so you have plenty of upgrade options.
Durst also made a very nice premium 50mm f2.8 lens with the Neonon name. This is an excellent quality lens that generally sells for a lot less than other popular enlarging lenses from the big brands. If you’re looking for a 50mm lens for your C35 this is what I’d recommend.
Note that due to the maximum column height of the C35 you won’t be able to make much more than a 9.5×12″ print with a 50mm lens. If you want to print bigger you either need to find a wide angle 40mm lens or rotate the column on the enlarger so it projects on to the floor. Sadly you can’t rotate the enlarger head to project on to a wall.
If you have a C65 or an upgraded C35 that can handle 6×6 negatives, you’ll also need a 75 or 80mm lens. Durst made a fairly dark 75mm f4.5 lens, but I’d recommend looking for something a little brighter. I have an inexpensive Meopta 80mm f4 that came bundled with my old Gnome enlarger. Unfortunately it’s too big to use the C35’s swing in red filter, but that’s not the end of the world.
Upgrading the C35 to handle 6×6 negatives

As I mentioned at the start of the post, the only differences between the C35 and C65 are the negative carrier, mixing box and lens. So it stands to reason you can simply upgrade by swapping these components. Indeed Durst sold a kit called the MEKIT 65 for just this purpose. Unfortunately despite how common the C35 itself is, these kits are exceptionally rare*. So this part of the guide will probably only be helpful to a small number of people, but given the absence of any real information about it online I thought I’d try and fill the void.
* Another source of these components (other than the kit) might be a broken C65 – as long as you have at least the negative carrier and intact mixing box you should be in business.
I was extremely lucky and did manage to find a MEKIT 65 the other week by chance, albeit missing the 75mm f4.5 lens. As mentioned above I already own a Meopta 80mm lens so this wasn’t an issue.
However it wasn’t until after ordering I noticed a problem when examining pictures of the kit – on my C35 the magenta and yellow filters are integral to the mixing box, but the MEKIT 65 seems designed for a version of the C35 where this is instead fixed to the lamp housing. Oh dear!
So it turns out there are two versions of the C35, my one that is presumably a late model, whose main differentiating feature seems to be illuminated scales on the mixing box and the original which didn’t have this. The illuminated scale model for some reason moved the yellow and magenta filters to the mixing box itself, where as on the older model this was on the lamp housing.

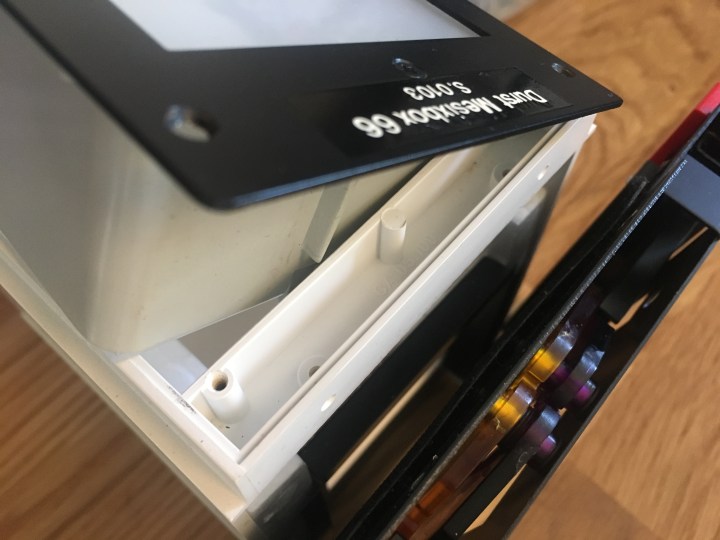
Checking the manual that came with my C35 it still talks about the enlarger being upgradable but makes no mention of the MEKIT 65 and instead mentions MESIXKIT 65. Searching for MESIXKIT 65 turned up nothing of use.
After further inspecting both my mixing box and pictures of the MEKIT 65 one, I became convinced it would be possible to retrofit the colour filters to it as the overall design of the box itself was largely unchanged. Today I put that to the test as the upgrade kit was delivered!

It was straight forward to remove both the metal plate from the 6×6 mixing box and the colour mixer from the 35mm mixing box. They both attach in the same manner at the top of the box with two little hooks that clip into the plastic, but they are screwed into slightly different locations at the bottom.
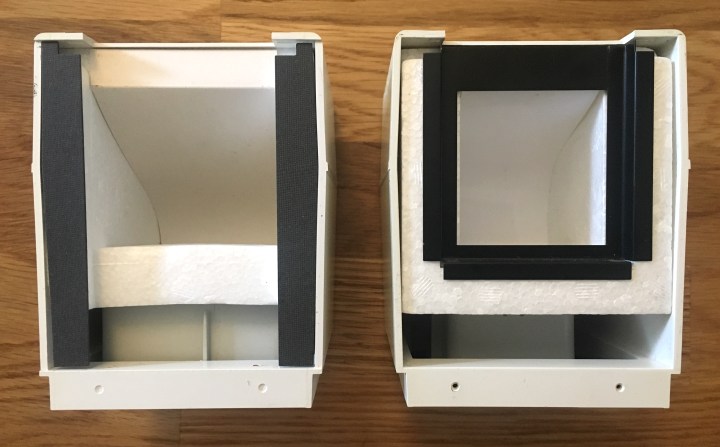
Interestingly there are indents where the screws should go on the 6×6 version of the box, presumably that isn’t a coincidence! I removed the black card baffles and swapped the metal filter holder over from the 35mm mixing box. It fit perfectly so that was a good sign (the 35mm box still has a 6×6 aperture where it meets the lamp housing).
Next up I tried to fit the colour filter plate and thankfully it simply slotted into place. The metal plate from the 6×6 mixing box would not fit the 35mm box however – although that’s not a concern here, it does mean you might have difficulty if you were trying to fit a MESIXKIT 65 to an older style C35 for some reason.
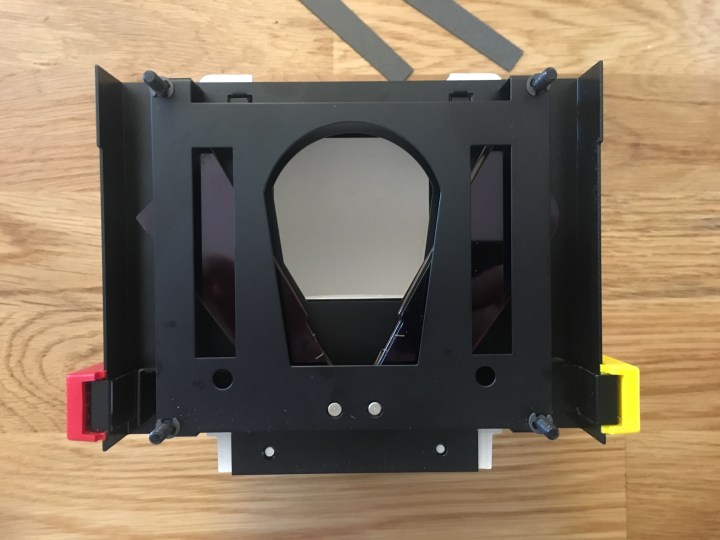
Now it was just a case of screwing the colour filter plate into the 6×6 mixing box. First I removed the diffuser from the bottom of the box to make sure I wouldn’t be damaging anything with the screws (and to give it a clean). There was just an empty void where the screws were going so I had nothing to worry about. The plastic is fairly soft and it wasn’t hard to drive the screws from the 35mm mixing box into it without risking cracks.
After getting the screws in, I blew out any remaining dust with a blower, gave both sides of the diffuser box a gentle clean and then screwed that back in place.

The final step then was to simply affix the mixing box with colour filters back to the enlarger. This is super easy as there are four fixed bolts on the back of the colour filter plate that correspond with holes on the lamp housing, then it’s just a case of tightening 4 plastic nuts to lock it into position.
So that’s how you fully upgrade your Durst C35 to handle both 35mm and 6×6 negatives, at least if you end up with a mismatched enlarger and upgrade kit! Knowing now that there are multiple versions of the C35, if I were buying one today I’d look for the older model as it would be easier to upgrade and the illuminated scales are really not worth the extra hassle.


