![Light Priority - Photography by Rory Prior]](https://lightpriority.net/wp-content/uploads/2020/05/fulllogo.png)

Fisheyes are an interesting and exotic breed of lens. They offer a super-wide, uncorrected view of the world, often covering a field of view as great as 180º. Whether used to exploit their characteristic distortion or as a software corrected wide prime, a fisheye is a great photographic tool.
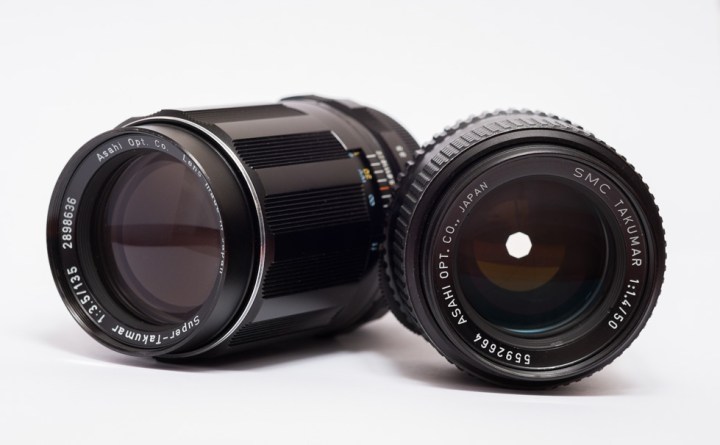
Samyang 8mm f2.8 UMC fisheye
The Samyang* 8mm fisheye is specially designed for use on mirrorless cameras and comes with a variety of mounts to suit different systems including the Fuji X and Sony E mounts. The main benefits of the lens being designed for mirrorless cameras are its small size and light weight. Given you’ll probably not want this lens on your camera constantly, making it pocketable gives you a good excuse to carry it around for when that right moment arises. Presently the Samyang is the only native-mount fisheye for the Fuji X system.
* Samyang lenses are also sold under several other brand names including “Rokinon” and “Bower”.
The lens is made of high quality plastics and metal. As is typical of Samyang lenses, the fit and finish are excellent. The mount is all metal and a thick plastic integrated hood provides some protection to the front element. The lens uses a clip-on style plastic cap that once mounted stays firmly in place. Typical for a fisheye, the bulbous front-element makes using filters impossible. You could possibly affix a small filter inside the mount at the rear of the lens if you were desperate and could find one less than about 35mm wide.
Like all Samyang lenses to-date the 8mm is manual focus and has no electrical contacts to talk with your camera. As such it won’t record aperture information in your photo’s EXIF data. You can however specify the focal length in the settings on your Fuji so that will be recorded. You’ll also need to enable the ‘shoot without lens’ option as the lack of electrical connection will make your camera think there’s nothing in front of the sensor.
You might be wondering if manual focusing with the lens will be a problem, especially if you’re primarily used to shooting with auto-focus lenses. The good news is you’ll rarely ever need to worry about focus – because of its extreme wide nature you’ll have a massive depth of field to work with. As long as you set your focal distance to around 2m you’ll have everything from your feet to the far horizon nice and sharp. If ever in doubt the magnified view in MF mode on your camera combined with focus peaking should make getting tack sharp shots every time simple.
This little lens is extremely sharp, especially when stopped down to between f5.6 and f8, you’ll be hard pressed to find any softness even in the extreme corners. Wider open and the centre remains fantastic but the corners naturally get softer. My copy of this lens is slightly softer in the bottom right corner than elsewhere in the frame.
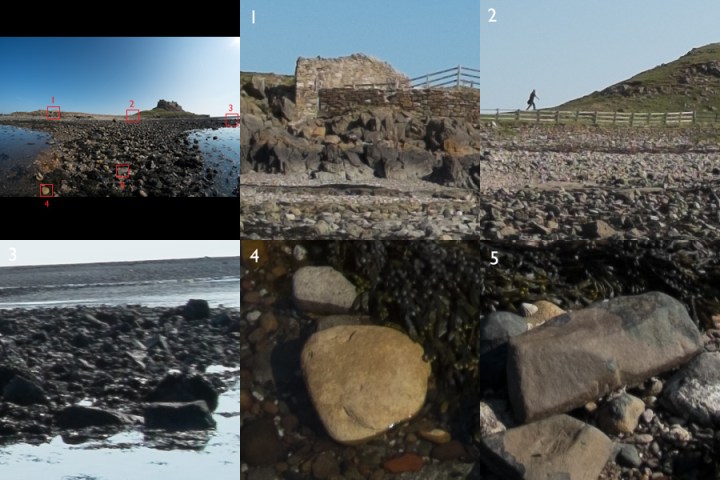 Here are some 100% crops taken at f8. Processed with Lightroom 5.2 using default settings. No distortion correction applied.
Chromatic aberration (red and blue fringing) is well controlled and is easily corrected in software when visible.
Applications
Fisheyes tend to be thought of as novelty or special effect lenses. While they certainly can be used in such a way, software correction makes them usable as super-wide primes, within certain limitations. Even without correction careful framing and composition of your subject can hide much of the distortion.
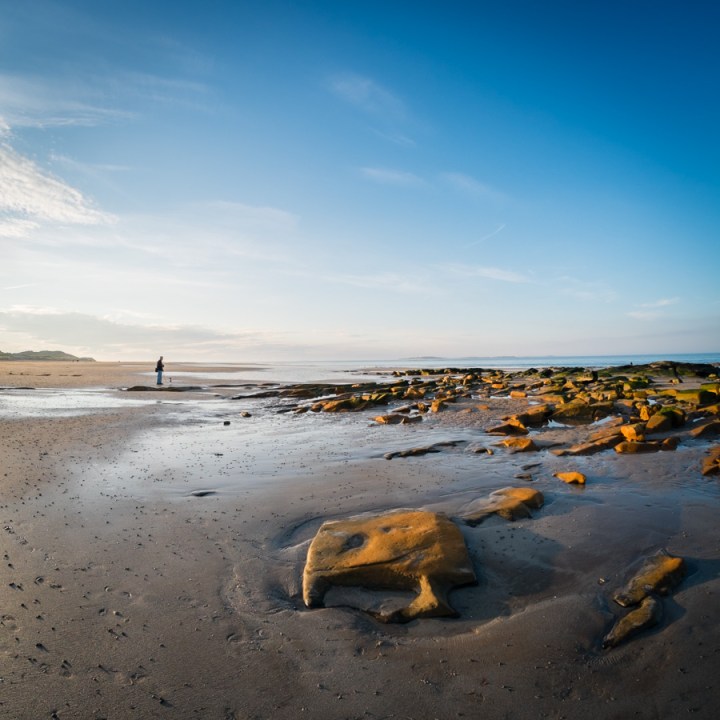
Landscapes
For typical landscape shots with a fisheye the main rule for creating a fairly undistorted view is to align the horizon with the middle of the frame, that will keep it flat. Depending on your subject you may be able to get away with tilting up or down a little. You could even use the effect to exaggerate the height and shape of a hill or valley.
 This square crop of a portrait photo has had no distortion correction applied and the subject matter makes the distortion all but invisible.
Another rule is to try and avoid vertical objects on the periphery of your shot as they’ll appear to bend somewhat comically. Buildings, trees, lampposts, fences and so on. Where possible get them in the centre of the frame where they will have barely visible distortion. Where it’s simply not possible to avoid vertical subjects towards the edges of the frame either for practical or artistic reasons help is at hand. A piece of software called Fisheye-Hemi by Image Trends does an amazing job of fixing vertical distortion while leaving horizontal distortion largely untouched. Most software that corrects fisheye distortion tends to lose large portions of the edges in an attempt to recreate a standard rectilinear projection as you’d see from a corrected wide-angle lens. Fisheye-Hemi solves this problem by applying more limited corrections which don’t skew the edges of the frame.
Interiors
Fisheyes are a great way to show off interior spaces large and small. With such a wide field of view you can get three walls, the floor and ceiling of a room all in one shot. Distortion correction in software may be necessary depending on your subject and desired look, but even uncorrected a fisheye shot can provide a fascinating seldom-seen view. If you can find somewhere with lots of curves to exploit, the fisheye will work wonders.
 Again no correction applied to this image, the fisheye emphasises arches and uneven walls.
Dramatic effect
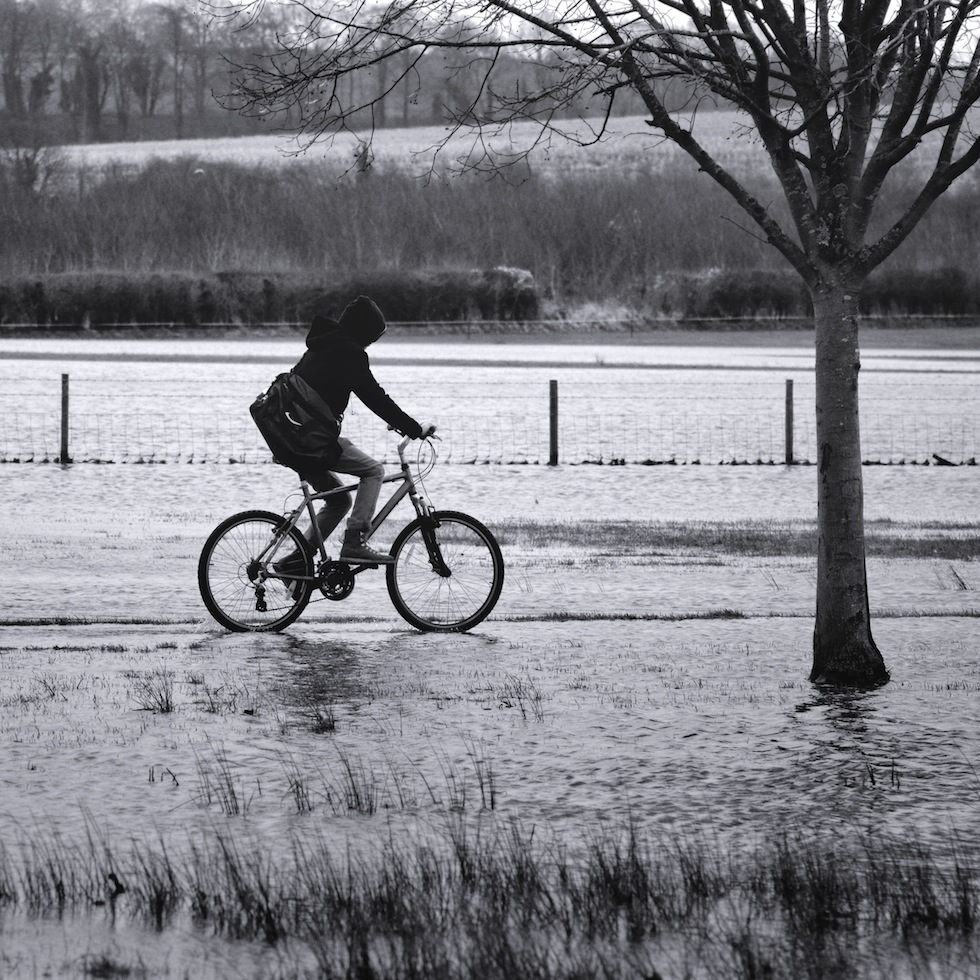
As already mentioned you can use a fisheye to exaggerate naturally occurring curves, be that in man-made things or the landscape itself. In the shot of York station below, the distortion adds to the sense of space and scale. You can also use the lens’ characteristic of making the subject in the centre appear small compared to its surroundings to great artistic effect as well. If there were a person standing on the platform edge in this shot they would appear tiny surrounded by the vast station building for example. Sadly no one obliged at the time! When placing people in a fisheye shot it’s best to keep them near the center to avoid unflattering distortions.
 Fisheye-Hemi has been applied here to straighten the verticals while retaining the pleasing curves of the platform and roof.
Problems and Considerations
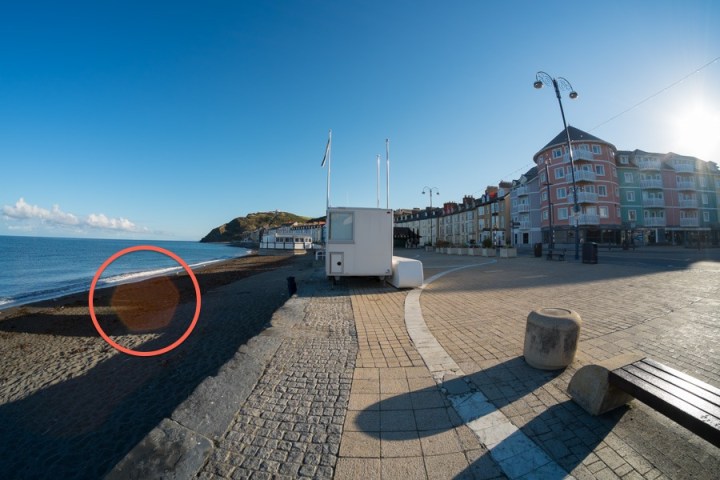
The problem with such a wide-angle lens is its often hard not to be in your own shot, whether you want to be or not. Tilt down too much and you’ll likely have your feet in the photo. Hold the lens too near the end and you may find a stray finger arching in. Even when you hold your camera perfectly you may find your shadow hard to avoid with the sun behind you. Be prepared to experiment to get the best composition and resigned to occasionally having to correct unavoidable intrusions into the frame by your body or shadow in post.
The Samyang is also a little prone to flare, if you’ve got the sun in your shot be very careful about the angle you choose as the lens can produce quite a pronounced ugly flare that will be quite a bit of work to remove in Photoshop.