Wonderful Copenhagen, part 1

Wonderful Copenhagen, part 1

I went to Copenhagen with my partner for a short holiday this April. Copenhagen is a really beautiful city that strikes a good balance between preserving its history and being modern. I’ve been meaning to see more of Europe for some time now, so it was great to experience a bit of Scandinavia. Denmark is sufficiently different from the UK to be really interesting, but familiar enough to feel comfortable. This is helped particularly by the excellent English most people are able to speak, that makes life so much easier for foreign tourists. We were very lucky with the weather, although it was grey and wet on the day we landed, every other day was glorious sunshine and blue skies.

One advantage of the poor weather on the first day, was that when we got to see the famous Little Mermaid statue it wasn’t crowded with tourists. A couple of days later when we passed it while doing a canal tour, people were swarming over it like flies. Every cloud has a silver lining as they say!

Architecture

I’m going to try and structure this article around topics, so lets kick off with architecture.

X-E1 60mm f5.6 1/120 sec

This curvy office building, which is the headquarters of financial group SEB, has an organic feel. The 60mm is great of picking out little details like this with minimal distortion.

X-E1, 18mm f8 1/80 sec

The National Gallery of Denmark neatly ties old and new with a glass covered atrium. Here I used the 18mm in portrait, but decided later to crop square as the rest of the image wasn’t conveying anything extra particularly.

DSCF7568
Fuji X-E1, 18mm f8 1/70 sec

This is a detail of the arches around the square at Christiansborg Palace. Taken during golden hour, I love the warm light and soft shadows.

Culture

DSCF7479
Fuji X-E1, 60mm f2.4 1/850

Bicycles are everywhere in Copenhagen, even where they shouldn’t be! Most main roads have cycles paths and separate traffic lights for cyclists to keep things safe.

DSCF7579
X-E1, 60mm f2.4 1/280 sec

I didn’t spot many restaurants that specialised in Danish cuisine, most places sold Western or Asian food. I was surprised by the prevalence of sushi restaurants in particular. I liked this grungy old neon sign for a seafood restaurant.

X-E1, 27mm f5.6 1/400

This obelisk outside the old university building is one of many public artworks around Copenhagen. Almost everywhere you go you’ll find impressive statues. Despite the intense near mid-day sun the X-E1 did a great job metering this scene and I managed to avoid lens flare luckily. I use a screw-in filter on my 27mm lens and I’m sure it helped here.

DSCF7612
X-E1, 27mm f5.6 1/430

Christiania is kind of a hippy community where drug use is rife and many people are openly using marijuana. In the so called ‘Green Light District’ there are lots of signs requesting visitors not to take pictures, so the shot above is more on the outskirts. It’s a shame as the center is very visually interesting, with the old buildings covered in elaborate graffiti.

Below is another shot from Christiania.

DSCF7609
X-E1, 27mm f5.6 1/125

DSCF7649-Edit

Nyhaven is one of my favourite areas in Copenhagen. The canal is surround by beautiful painted buildings, lots of which contain bars and restaurants that spill out onto the street. Various old wooden sailing vessels and other historic boats are moored along it too, further adding to the atmosphere. The shot above was taken on a Sunday evening when it was relatively calm and peaceful. During the daytime and on Friday and Saturday night the place was heaving with people.

~

I’ve got too many photos from Copenhagen to put them all in one post, so look out for part 2 of this article soon.

Spring has sprung

Spring has sprung
X-E1, 8mm f8 1/420 sec

After a long, wet and wild winter it’s nice that the evenings are drawing out once again and it’s getting a little warmer and sunnier. Spring always has a wonderful freshness to it, all the greens are that bit brighter, the sky bluer than its been in months and flowers blossoming everywhere you look. Here’s a selection of photos I’ve taken over the last month.

DSCF6516

X-E1, 18mm f8 1/160 sec

A Manchester bound train pulls into Hebden Bridge station. Despite all the wonderful greenery that surrounds us, we’re still well connected to the all the big northern cities, less than an hour from both Manchester and Leeds.

DSCF6656

X-E1, 27mm f5.6 1/75 sec

A precarious narrow ledge beneath the main path above afforded this nice view.

DSCF6780-Edit

X-E1, 8mm f8 1/680 sec

High up above Cragg Vale on the moors, the ruined Red Dykes farmhouse is looking a little worse for ware since I last visited it a year ago, when more of the roof was still intact. Here I’ve used my Samyang fisheye and corrected the vertical distortion in software using FishEye Hemi.

DSCF6837

X-E1, 8mm f8 1/160 sec

The fishseye lens offers a wide perspective on this lock gate just outside Hebden Bridge. Unlike the last image I’ve not corrected the distortion here. Although I got a little flare in this image it wasn’t too noticeable and was quite easy to clone out.

DSCF6994

X-E1, 50-230mm @ 140mm f6 1/1100 sec

Easter means it’s Pace Egging time here in Yorkshire. The Pace Egg play is held in various places on Good Friday every year, the above shot taken at Heptonstall. It’s a tradition dating back centuries, where good vanquishes evil in a silly, slapstick way. Various challengers come out to clash swords with King George. Here I’ve used my newly acquired 50-230mm. As you can see you can get pretty good subject separation even at f6. Look out for a review in the coming months.

DSCF7043
X-E1, 60mm f2.4 1/3200 sec

One of the Hill Millies morris dancing group, also performing at the Pace Egg in Heptonstall. The 60mm shows off again that its a great portrait lens, f2.4 gives good separation and keeps your subject nice and crisp.

Fuji XF 27mm f2.8 review

Fuji XF 27mm f2.8 review

Earlier this year I decided to part with my X100 and just focus on building up my lens collection for the X-E1. It was sad to part with the X100, it was a lovely camera that’s taken some great photos, but after you’ve been using a faster more modern camera it’s always a bit jarring to go back to something a bit older and clunkier. As my budget wouldn’t stretch to a shiny new X100S, my choice of replacement X lenses were the 23mm f1.4, the 27mm f2.8 or 35mm f1.4. The 23mm while amazing, was really too expensive for me, and also a little bit large and heavy. I wish Fuji would offer a smaller and less expensive f2 variant. Between the 27 and 35 it was a harder choice, both were within budget and ticked the right boxes for sharpness, size and weight. Ultimately I decided the 35mm focal length (52.5mm equivalent) was a little long for my tastes and the truly tiny dimensions of the 27mm helped seal the deal.

So small

The first mockups Fuji showed of the 27mm made it look similar in size to the 18mm pancake. When it ultimately shipped, Fuji surprised everybody by making it even smaller, in fact barely bigger than a normal lens’s end cap. The tiny size and light weight are certainly attractive features, it makes an already lightweight camera system even more portable. Pair it with the 18mm pancake and you can leave the camera bag at home, this lens can be kept in your shirt pocket when you’re not shooting with it! Even though it’s tiny and light, the 27 has the usual excellent build quality you’d expect from a Fujinon.

There was a sacrifice made to achieve that tiny size though – note the conspicuous absence of an aperture ring. This was quite a ballsy move on Fuji’s part. One of the primary appeals of the X series are the traditional controls, the aperture ring being one of the key ways you control your camera. To my pleasant surprise, I find I don’t actually miss it that much. I always found the aperture control on the X100 a little fiddly and can imagine it would have been a similar affair with the 27 given its size. Changing the aperture using the rear thumb dial works nicely (you may need to upgrade your firmware to get this ability if you’ve not been keeping up-to-date).

27mm next to the 18mm pancake

The 27mm f2.8 next to the somewhat larger 18mm f2

The other omission from the lens is less forgivable, that would be any kind of lens hood. While the marketing people will tell you about how great the “Super EBC” coatings are, the reality is if you have the sun in the wrong position you will get lens flare. Hoods also provide valuable protection to the front element without requiring you to compromise the lens’s optical quality with an extra piece of glass. Thankfully nice metal screw in hoods are cheaply available, even for the awkward 39mm filter thread Fuji insisted on using here.

So sharp

The 27 is sharp from corner to corner and at its best from f5.6 to f8. At wider apertures the center stays remarkably crisp, but the corners fall off a bit. The maximum aperture of f2.8 doesn’t make it super easy to throw the background out of focus and this isn’t helped by the rather pedestrian minimum focus distance of 34cm (about 13″). The bokeh you can get can be a little busy, but at minimum focus distance it’s fairly smooth with a pleasing degree of roundness. This really isn’t a lens for people who are looking for serious subject isolation and you’ll be disappointed if you get it for that.

DSCF4876

X-E1, 27mm f2.8 1/125 – Bokeh can be a mixed bag with this lens, either smooth or harsh depending on the subject

DSCF6024

X-E1, 27mm f2.8 1/320 – Here the light filtering through the branches creates a harsher and more distracting effect in the background

For those wanting to maximise depth of field and have everything really crisp, this lens excels. Its practical 40.5mm equivalence and unobtrusive size make it ideal for a range of applications like street or travel photography. Its sharpness and good micro-contrast also lend it to landscape work where you really want as much detail out of foliage as possible to avoid getting a green mush in distant fields and trees.

DSCF4915

X-E1, 27mm f8 1/160
DSCF4991
X-E1, 27mm f8 1/100

Distortion is reasonably minimal and corrected in camera and most RAW processors as you’d expect. Unlike with the 18mm lens, the correction doesn’t overly impact sharpness at the edges of the frame. There is very little to no chromatic aberration or purple fringing to worry about, so shots generally look good without requiring much work. As mention above, flaring can be an issue if the sun or another bright light source hits the lens at the wrong angle, even with a hood you may find you have to adjust your composition sometimes to avoid it. To be fair this is true of nearly every lens so it’s certainly not a show-stopper.

Final thoughts

The 27mm isn’t a lens for everybody, those with deep pockets will likely opt for an X100S or 23mm f1.4. But for anybody looking for a really tiny, affordable lens to make their X series body as portable as possible and with a good all-round focal length, its hard to beat. It punches far above its weight in terms of sharpness, rivalling Fuji’s best performing primes from f5.6. AF is quick and quiet although sadly not internal, so the front element does pump in and out during focusing. The 39mm filter ring is a fairly uncommon size, only the 60mm macro shares it in Fuji’s lineup. This means filters tend to be more expensive than for more common larger sizes, despite the smaller amount of glass required. I found using a step-up ring caused AF to fail so you may have limited luck adapting larger filters . Overall though I’d still find it hard not to recommend this lens, it’s just fun to use and I’ve yet to be disappointed by its optical quality. It does’t replace the 23mm f2 my X100 had perfectly, but no lens in the current Fuji X mount lineup really does.

DSCF4820
X-E1, 27mm f8 1/75

If you like my images and writing, please help support this site by buying a print from my on-line store or via Etsy.

Winter photography

Winter photography
X-E1, 18mm f8, 1/150 ISO 250

We’ve had an unusually mild and stormy winter here in the UK. What that translates to is little traditional cold winter weather and seemingly endless rain with storm after storm. Thankfully between the storms there’s usually been a day or two of halfway pleasant weather which has provided a few opportunities to head out with the camera.

DSCF5378

X-E1, 60mm f5.6, 1/100 ISO 1600

The bare branches offer a brief glimpse of these ruins far below in Paper Mill Wood, Cragg Vale. As soon as the trees are green again it’s very hard to see from the footpath. The steep to sheer bank down to the river makes getting any closer all but impossible.

DSCF5135

X-E1, 60mm f5.6, 1/100 ISO 400

Landscape shots full of leafless trees quickly start to feel a bit boring to me, so taking a break to do some urban shooting is a nice alternative. This remarkable old building is Hunslet Mill in Leeds.

DSCF4984

X-E1, 60mm f5.6, 1/450 ISO 200

Also seen in Leeds, these reflections were spotted by my friend Richard and made for an interesting pattern shot. Leeds is a really gorgeous city with lots of nice historic buildings, well worth a visit with or without your camera.

DSCF5225

X-E1, 60mm f5.6, 1/250 ISO 1250

Any time of year is ripe for a little urban exploration, this decaying old truck is parked outside a disused but surprisingly fortified old mill building in Walsden. It would have been nice to get some closer shots but sadly it’s very fenced off and lots of CCTV cameras abound. Still that’s probably why it’s as intact as it is so you can’t have it all.

DSCF5302

X-E1, 60mm f4, 1/2200 ISO 200

Some long overdue sunshine at the weekend provided a nice opportunity to get a shot of the local war memorial.

Looking at the metadata for these shots you’d be forgiven for thinking I’ve only been carrying my 60mm lens! I am very fond of the 60, it’s super sharp, has lovely bokeh and useful reach. I’ve also been shooting with my 18mm and recently acquired 27mm pancake, I hope to do a little write up on the later in the coming months.

Fuji XF 18mm f2 R Review

Fuji XF 18mm f2 R Review

Part of Fuji’s original XF lens lineup launched alongside the X-Pro 1, the 18mm pancake prime has a bit of a reputation for being the weakest. The problem is this reputation really isn’t deserved. Sure it’s not quite as sharp across the frame as its 35 and 60mm siblings, but it’s a very different class of lens. What it offers is a really compact, wide view of the world with a bright f2 maximum aperture and crazy close focusing abilities. It can also produce some surprisingly nice bokeh, which is unusual for a wide angle lens. I’ve been shooting the 18mm f2 for several months – in fact it replaced my 18-55mm zoom as I prefer shooting primes and wanted something more compact. So far I’ve not been disappointed.

DSCF0822

The 18mm (left) next to its larger siblings the 35 and 60mm primes

Sharpness in the center of the frame is really good throughout the range. For landscapes I find f8 is the sweet spot for across the frame sharpness. If available light won’t allow that then f5.6 isn’t much worse. Where corner performance is less critical I have no problem using it wide open or at f2.8 for when I need a hair more depth of field. For scenes where distortion is not disturbing, it’s worth using a 3rd party RAW processor that lets you disable the automatic  correction applied by Lightroom, SilkyPix and the in-camera JPG engine. I find this makes the extreme corners a lot sharper. I use Iridient Developer which allows you to disable all automatic corrections, see the sample below for the difference it makes. Applying chromatic aberration correction is also important to get the most from this lens as even stopped down it’s quite pronounced in the corners. It would be nice of course if the lens was fully optically corrected, but then it would no doubt be a lot larger and more expensive, akin to Fuji’s 14mm prime. The trade off for price and size is a bit more work on your computer, but you can still get fantastic results.

DSCF3530-2

X-E1, 18mm f8 1/320 sec

correction

Detail of the extreme right edge showing the softening that distortion correction causes

The 18mm lets you focus extremely close to your subject, up to 18cm (~7″) which is both interesting from a compositional stand point and lets you experience the surprisingly nice bokeh this lens can produce when the depth of field is shallow enough. Nice bokeh and wide angles don’t usually go hand in hand, and this is an area where the prime handily beats the 18-55mm zoom at f2.8.

DSCF3628

X-E1, 18mm f2.8 1/80 sec

DSCF2826-Edit

X-E1, 18mm f7.1 1/125 sec

DSCF2334

X-E1, 18mm f2.8 1/50 sec

So in conclusion what the 18mm gives you is a versatile, sharp, tiny lens with nice bokeh. It does have its flaws, but all of them are correctable with post processing. Compared to Fuji’s other offerings, the 18mm definitely has an edge on the zooms that cover its focal length in terms of sharpness, size and bokeh. It may be outclassed by the 14mm, but it still wins on size and cost by a large margin.

If you like my images and writing, please help support this site by buying a print from my on-line store or via Etsy.

Happy Holidays

Happy Holidays

Have a great Christmas and New Years everyone, I hope you get some awesome pictures over the holidays 🙂

Taking good photos without a DSLR or 50mm lens

Today I saw (via Daring Fireball) a blog post on Prolost titled  “How to take good photos for under $1,000“. The author states a bunch of things I disagree with that I’d like to address. I think there are a lot of misconceptions out there about ‘serious photography’ and frankly I would probably have believed all this stuff myself five years ago.

Don’t buy a DSLR

DSLRs, even the entry level consumer ones, are big pieces of technology. The chances are at any given time you want to take a photo you’ll have left the camera at home because it’s too big and awkward to carry with you. There’s a reason the iPhone is one of the most popular camera’s on the planet, it’s effortless to have with you. Mirrorless “compact system cameras” (CSC) aren’t as small as an iPhone, but many are pocketable, purse-able or generally unobtrusive enough to have with you without getting in the way. What’s more the image quality between CSCs and DSLRs is basically the same. All that bulk in a DSLR is coming from supporting legacy lenses and mirror boxes to allow through-the-lens optical view finders, neither of which are necessary to take great photos but are instead throwbacks to the days of film.

The other, oft overlooked, factor with DSLRs is that they intimidate people. If you want natural looking candid photos of people who aren’t used to having big black cameras thrust in their faces, a smaller, more friendly looking CSC will help set them at ease.

Don’t just buy a 50mm lens

The so called “nifty 50” lens was standard in the film days, it’s a simple, cheap lens that lets you throw the background out of focus and provides a nice general purpose field of view. Perfect. The problem is on anything other than a 35mm film camera or expensive full frame DSLR it’s actually a 75mm equivalent lens. Suddenly it’s not so general purpose anymore. What this means in practical terms is that at the same distance to your subject on a crop sensor DSLR (like the Nikon D3200 or Canon Rebel that Stu Maschwitz recommends), you’ll see a lot less of the scene. Where on a full frame D800 you’ll see all 4 kids, on your D3200 you’ll maybe see just 2 and a bit. That means to get more people into the photo you’ll have to stand further away from your subjects, and that’s not always possible or practical. Forget about doing large family group shots indoors unless you have a huge room or want to stitch images together in Photoshop.

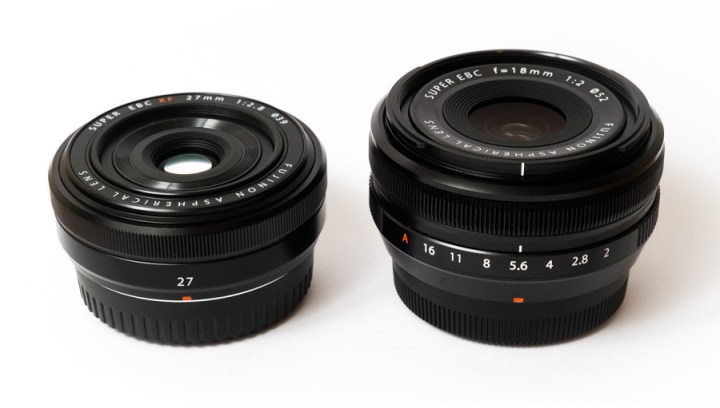
If you want to recreate that 50mm look on crop sensor cameras, you need something like a 35mm prime instead. These do tend to be a bit more expensive, but you’ll use it a lot more as it’s a more versatile focal length. You can also get some fixed lens cameras like the Fuji X100S or Ricoh GR, that have wide fast primes at 35mm and 28mm equivalent focal lengths which are even more general purpose. For reference the iPhone camera has a roughly 28mm equivalent focal length.

Do use Aperture Priority, but don’t then just set it and forget it

You’ll have way more fun with photography if you take some control back from the camera’s onboard computer. Don’t just shoot wide open all the time though, especially with a 50mm prime. People move, photographers move and in the time it’s taken you to focus, recompose, say “Cheese” and push the shutter button, the subject’s position will have changed enough that their eyes are no longer sharp but the tip of their nose is. Choosing an aperture for a given photograph is a compromise between available light and the depth of field* required to have your subject in focus. Like everything there’s no one size fits all solution and just going ‘wide open’ all the time isn’t a panacea for pleasing photographs. In the wrong circumstances it’s as likely to wreck as to make a picture.

*Depth of field is the area in front of and behind the point in space you have focused on. As your aperture gets wider (smaller f number) it gets shallower and as your aperture gets narrower (higher f number) it gets deeper. Depth of field also decreases the closer you get to your subject and the longer your focal length is.

Do use Auto ISO

The ISO capabilities of DSLRs and CSCs are amazing these days, it’s generally safe to go up to at least 1600 and even higher with some models (ISO 3200 is definitely usable on Fuji X series cameras). After that things can get a bit mushy and blotchy, so it’s a good idea to experiment to see what your tolerance for such artefacts is.

Only manually set your focus point if there isn’t a better option

Personally I like using the focus and recompose method, but it’s not necessarily the best option for all situations. If your subjects are moving around a lot and you’re using a wide open aperture you’re going to miss focus with this method. Lots of cameras these days have face recognition, if your camera has that and you’re shooting people: use it. Similarly cameras with good subject tracking AF will do a better job than you in many cases for moving targets.

Do Shoot RAW, but understand what it means

Shooting RAW is like shooting film in the sense that when you’re done you have a bunch of negatives that need developing to see the end result. Most RAW processors like Aperture, Lightroom and so on produce fairly flat boring looking default conversions so do expect to have to invest some time not only learning the tools but fiddling with sliders to get the look you want. If you don’t want to spend long periods faffing with the computer over the holidays, consider shooting RAW and JPEG mode, that way you get the immediacy of a hopefully nice looking JPEG and the option to go back and further tweak an image to your hearts content later on. Fuji cameras in particular shoot very pleasing JPEGs with great colours.

Don’t machine gun it

You’ll end up quite quickly with thousands of terrible pictures which you’ll spend hours sorting through trying to find the handful of keepers. Cameras these days have vast numbers of megapixels, and if you’re shooting RAW images that quickly means many tens of gigabytes which you then have to sift through, edit, organise and (hopefully) backup in perpetuity.

Instead actually think about your shot, where is your subject, what are they doing, would it be better if they moved a bit, or if you moved. Composition is one of the most important parts of photography, the spray and pray method works on the assumption you’ll get lucky  with a few shots and miss tens or even hundreds. Why not set out to make every shot you take good rather than leaving it to chance? The more you learn to compose your images nicely in the viewfinder or on the rear screen, the quicker you’ll get and more natural it will seem. Spray and pray is a crutch for bad photography.

Also again think of the intimidation factor of someone holding a big black camera in your face clicking away like a machine gun, it’s just not very nice. Not a good way to get the best from anyone remotely camera shy or young children.

Get a flash if you want to shoot in the dark

If you want to take really great photos in crappy light you need to use a flash. Ideally you want a flash you can angle so it’s not blinding your subject, but bounced off the ceiling or a wall to provide nice soft, even illumination. You can get a basic model which will be more than adequate for $50 or less. Pop it in your camera’s hot shoe, point it at the ceiling and snap away without worrying about crazy high ISOs or blurry low shutter speeds.

I think I’ll wrap this up here, hopefully I’ve given you some food for thought if the Prolost article was swaying you towards a DSLR+50mm combo.

Autumn in the Valley

Autumn in the Valley

The seasons are distinct here in Yorkshire, during autumn the valleys become full of a beautiful array of hues as the leaves and moors change colour. The images here are all from my X-E1, mainly using either my trusty 60mm f2.4 or newly acquired 18mm f2. There are a couple shot with my 50mm Takumar as well.

_DSF3781-Edit

X-E1 60mm, f6.4, 1/105 sec

The grasses and reeds on the moors change colour throughout the seasons, here augmented by drifting clouds of mist. It’s amazing quite how quickly the mist moves and changes, in the time it takes to walk a short distance to recompose a shot the mist can have completely cleared an area.

_DSF3981

X-E1 50mm Takumar, f5.6, 1/300 sec

_DSF3996

X-E1 50mm Takumar, f5.6, 1/250 sec

This shot and the one above were taken in Cragg Vale which had just seen its first light dusting of snow for the winter up on the hill tops. The densely wooded hillsides positively glowed in the bright morning sunshine.

DSCF3305

X-E1 18mm, f8, 1/125 sec

The low winter sun can make even mid-afternoon feel more like golden hour. The long shadows it creates can also be a nice element in your photos. I liked the contrast here between the increasingly leafless trees and the almost spring-fresh look of the grass.

DSCF3647

X-E1, 60mm, f5.6, 1/110 sec

Some interesting trivia here, in the shot above the walled area with the railing is actually an old and long forgotten graveyard. Once attached to Mount Olivet Baptist chapel. It contains a small jumble of overgrown headstones from the late 1800’s.

DSCF3731

X-E1, 18mm, f8, 1.8 sec

Many of the valleys around here used to have their rivers harnessed to power mills, as such you’ll see many weirs, walls and mill ponds about. Sadly the mills themselves are in most cases rarely evident anymore save for the odd wall or chimney left standing.

DSCF3732

X-E1, 60mm, f5.6 1/950 sec

Heptonstall Festival 2013

Heptonstall Festival 2013

On September 21st the West Yorkshire village of Heptonstall hosted a fantastic festival with various live acts and stalls selling local food. With my pro photographer friend Craig Shaw, I spent about 8 hours walking around taking photos armed with my X100 and X-E1. My go to lens for this kind of event is Fuji’s fabulous 60mm f2.4. It’s often maligned as being too slow to focus but I generally find it works a charm, especially with the most recent firmware update making it far faster. With its lovely smooth bokeh and decent reach, it’s ideal for capturing portraits. I’ve also been trying out the fabled 35mm f1.4, although I’m still not sure if it will earn a permanent place in my gear bag.

DSCF1819
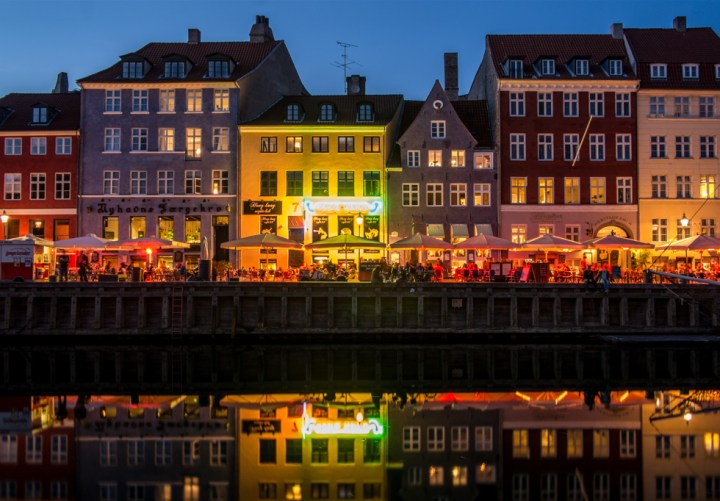
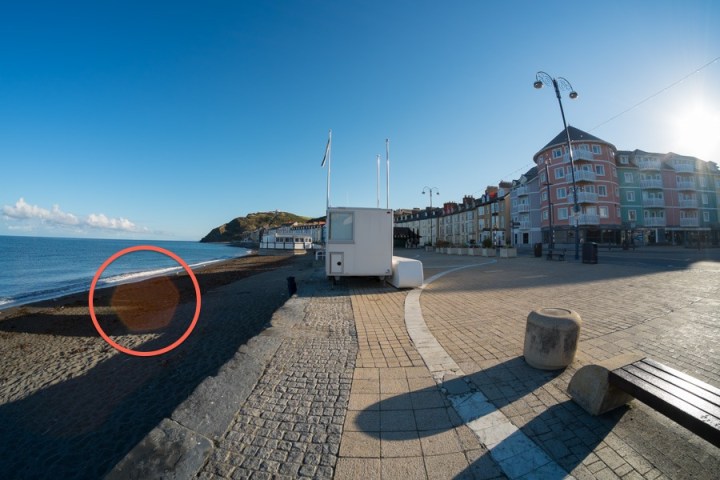
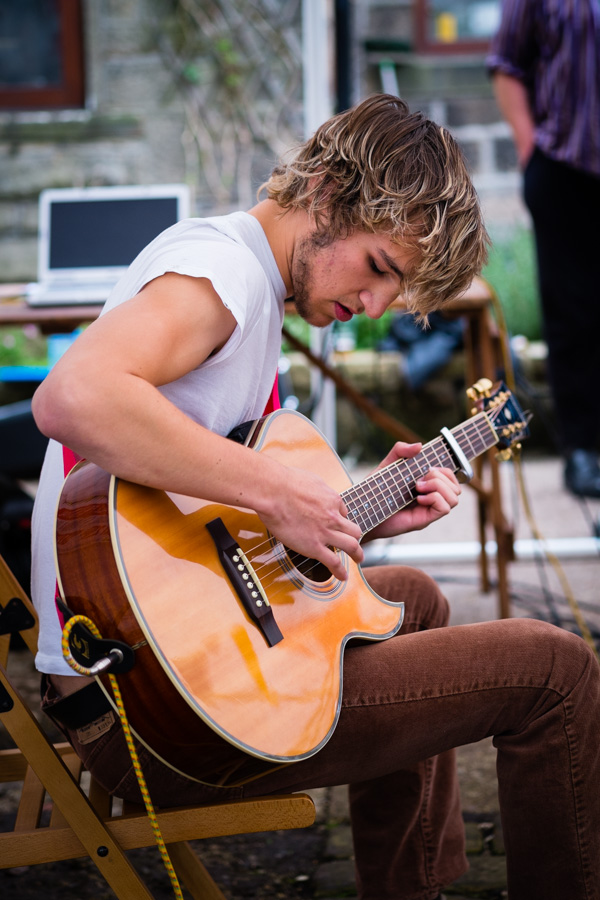
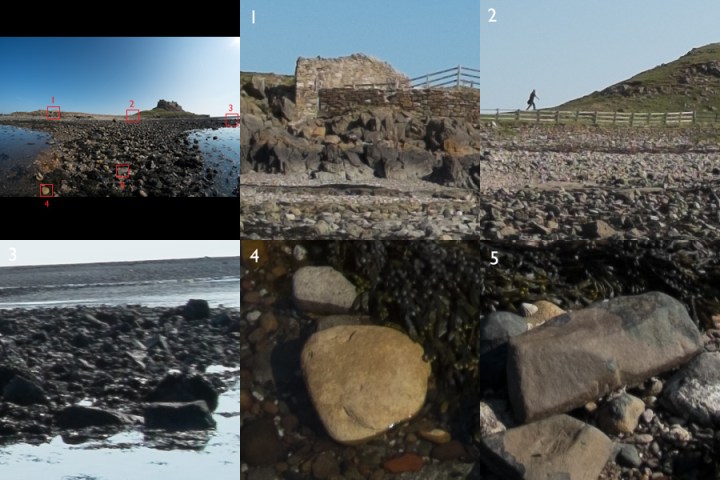
X-E1, 35mm f5.6, 1/640 sec

Heptonstall is the quintessential little Yorkshire hill-top village, with beautiful old buildings and narrow cobbled streets. Yet it has thus far managed to avoid becoming overly touristy like nearby Haworth. At the centre are two large churches, the oldest of which is now a well preserved ruin. That ruin formed the main stage for the days events.

DSCF1915
X-E1, 35mm f2.8 1/850 sec

With a strong family element to the festival, an Alice in Wonderland themed parade and Mad Hatter’s tea party were part of the lineup. There were performances from  local school children and CBeebies TV celebrity Mr. Bloom. Two actors enthusiastically portrayed the Queen of Hearts and the White Rabbit.

DSCF0756
X100 23mm f5.6 1/170 sec

Various musicians played for the crowd including several bands. The nice thing about small festivals is that you’re often able to get very close to the performers so you’re not reliant on monstrous zoom lenses or a press badge to get some of the action.

DSCF0782
X100 23mm f2, 1/320 sec

The X100’s 23mm  lens feels incredibly wide after you’ve been shooting with 35 and 60mm. It forces you to get much closer to your subject which can lead to more interesting compositions. I’m quite pleased with how this shot of guitarist James Paul turned out. The X100 actually performs very well wide open at f2 for portraiture.

DSCF1967
X-E1, 60mm f2.4 1/320 sec

DSCF1996
X-E1, 60mm f2.4, 1/1600 sec

The 60mm has lovely bokeh and avoids the fringing you see around highlights on the 35mm wide open. The 35 comes into its own in darker conditions like inside the White Lion pub where I took the shot below.

DSCF1926
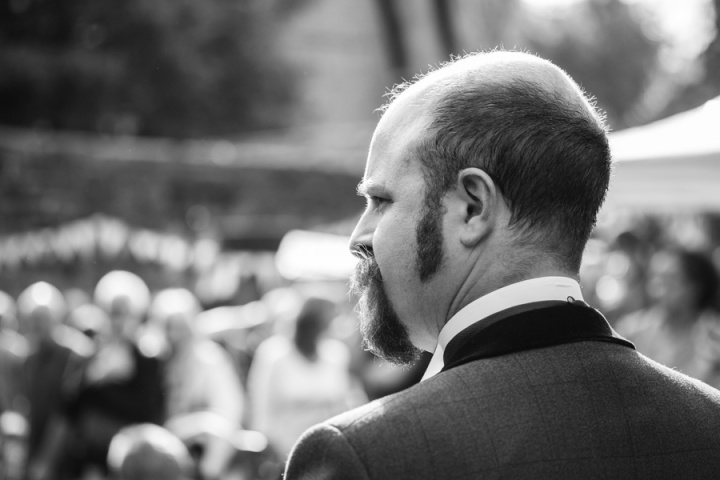
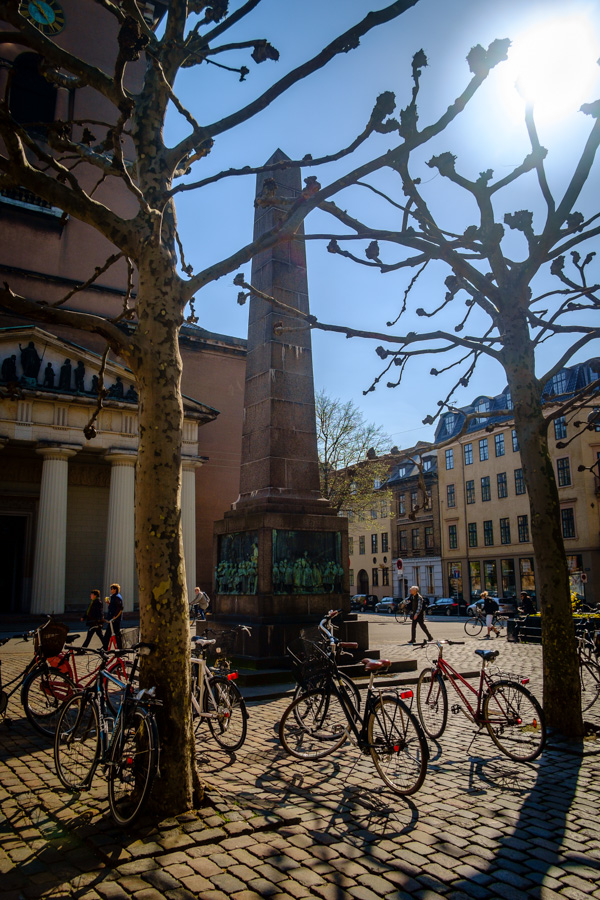
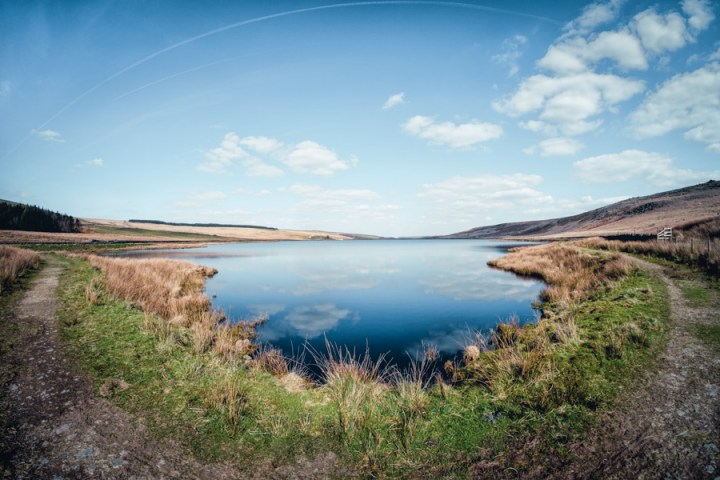
X-E1 35mm f1.4  1/100 sec

DSCF2012
X-E1, 60mm f2.4 1/70 sec

Dull lighting on the main stage during the day meant a bit of post processing was required to lighten performer’s faces and make things appear less flat.

DSCF2043
X-E1, 60mm f2.4 1/125

DSCF2059
X-E1, 60mm f2.4 1/100 sec

Nizlopi gave a rousing performance as it began to grow dark – a true test of the 60mm and X-E1’s autofocus system. Both performed well. The fairly dim LED spotlights didn’t do much more than add a bit of colour to the performers so quite a bit of brightening was required in post to make things pop. When shooting in these kinds of conditions I recommend switching over to manual or shutter priority and choosing the minimum shutter speed you feel will deliver you sharp results. With the 60mm I try and stay at 1/100 at a minimum.

A Fisheye View

A Fisheye View

Fisheyes are an interesting and exotic breed of lens. They offer a super-wide, uncorrected view of the world, often covering a field of view as great as 180º. Whether used to exploit their characteristic distortion or as a software corrected wide prime, a fisheye is a great photographic tool.

Samyang 8mm f2.8 UMC fisheye

The Samyang* 8mm fisheye is specially designed for use on mirrorless cameras and comes with a variety of mounts to suit different systems including the Fuji X and Sony E mounts. The main benefits of the lens being designed for mirrorless cameras are its small size and light weight. Given you’ll probably not want this lens on your camera constantly, making it pocketable gives you a good excuse to carry it around for when that right moment arises. Presently the Samyang is the only native-mount fisheye for the Fuji X system.

* Samyang lenses are also sold under several other brand names including “Rokinon” and “Bower”.

The lens is made of high quality plastics and metal. As is typical of Samyang lenses, the fit and finish are excellent. The mount is all metal and a thick plastic integrated hood provides some protection to the front element. The lens uses a clip-on style plastic cap that once mounted stays firmly in place. Typical for a fisheye, the bulbous front-element makes using filters impossible. You could possibly affix a small filter inside the mount at the rear of the lens if you were desperate and could find one less than about 35mm wide.

Like all Samyang lenses to-date the 8mm is manual focus and has no electrical contacts to talk with your camera. As such it won’t record aperture information in your photo’s EXIF data. You can however specify the focal length in the settings on your Fuji so that will be recorded. You’ll also need to enable the ‘shoot without lens’ option as the lack of electrical connection will make your camera think there’s nothing in front of the sensor.

You might be wondering if manual focusing with the lens will be a problem, especially if you’re primarily used to shooting with auto-focus lenses. The good news is you’ll rarely ever need to worry about focus – because of its extreme wide nature you’ll have a massive depth of field to work with. As long as you set your focal distance to around 2m you’ll have everything from your feet to the far horizon nice and sharp. If ever in doubt the magnified view in MF mode on your camera combined with focus peaking should make getting tack sharp shots every time simple.

This little lens is extremely sharp, especially when stopped down to between f5.6 and f8, you’ll be hard pressed to find any softness even in the extreme corners. Wider open and the centre remains fantastic but the corners naturally get softer. My copy of this lens is slightly softer in the bottom right corner than elsewhere in the frame.

Samyang-samples
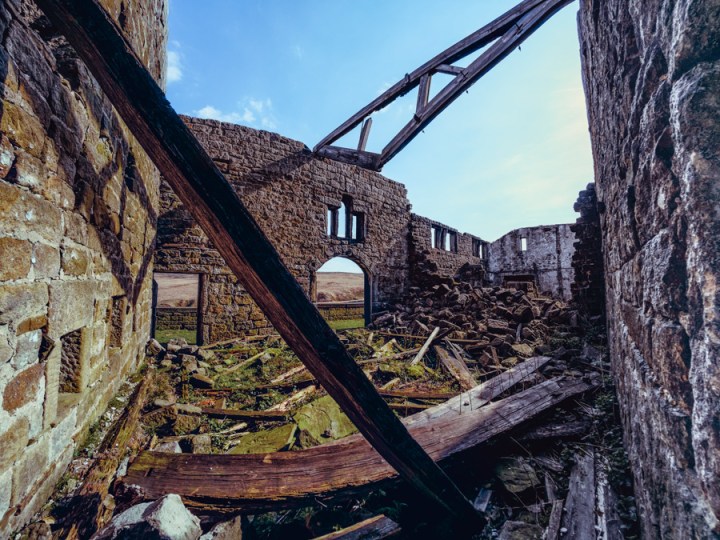
Here are some 100% crops taken at f8. Processed with Lightroom 5.2 using default settings. No distortion correction applied.

Chromatic aberration (red and blue fringing) is well controlled and is easily corrected in software when visible.

Applications

Fisheyes tend to be thought of as novelty or special effect lenses. While they certainly can be used in such a way, software correction makes them usable as super-wide primes, within certain limitations. Even without correction careful framing and composition of your subject can hide much of the distortion.

Landscapes

For typical landscape shots with a fisheye the main rule for creating a fairly undistorted view is to align the horizon with the middle of the frame, that will keep it flat. Depending on your subject you may be able to get away with tilting up or down a little. You could even use the effect to exaggerate the height and shape of a hill or valley.

DSCF8920
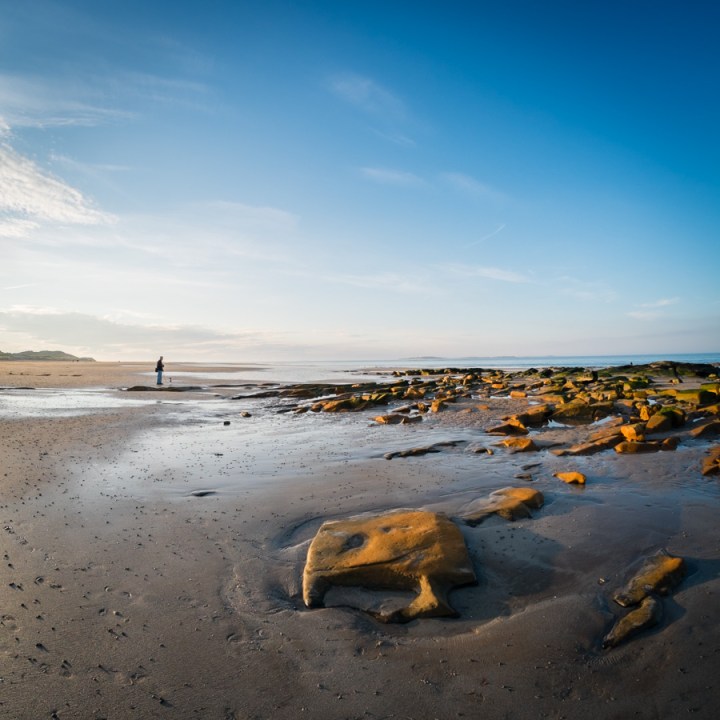
This square crop of a portrait photo has had no distortion correction applied and the subject matter makes the distortion all but invisible.

Another rule is to try and avoid vertical objects on the periphery of your shot as they’ll appear to bend somewhat comically. Buildings, trees, lampposts, fences and so on. Where possible get them in the centre of the frame where they will have barely visible distortion. Where it’s simply not possible to avoid vertical subjects towards the edges of the frame either for practical or artistic reasons help is at hand. A piece of software called Fisheye-Hemi by Image Trends does an amazing job of fixing vertical distortion while leaving horizontal distortion largely untouched. Most software that corrects fisheye distortion tends to lose large portions of the edges in an attempt to recreate a standard rectilinear projection as you’d see from a corrected wide-angle lens. Fisheye-Hemi solves this problem by applying more limited corrections which don’t skew the edges of the frame.

Interiors

Fisheyes are a great way to show off interior spaces large and small. With such a wide field of view you can get three walls, the floor and ceiling of a room all in one shot. Distortion correction in software may be necessary depending on your subject and desired look, but even uncorrected a fisheye shot can provide a fascinating seldom-seen view. If you can find somewhere with lots of curves to exploit, the fisheye will work wonders.

DSCF9037
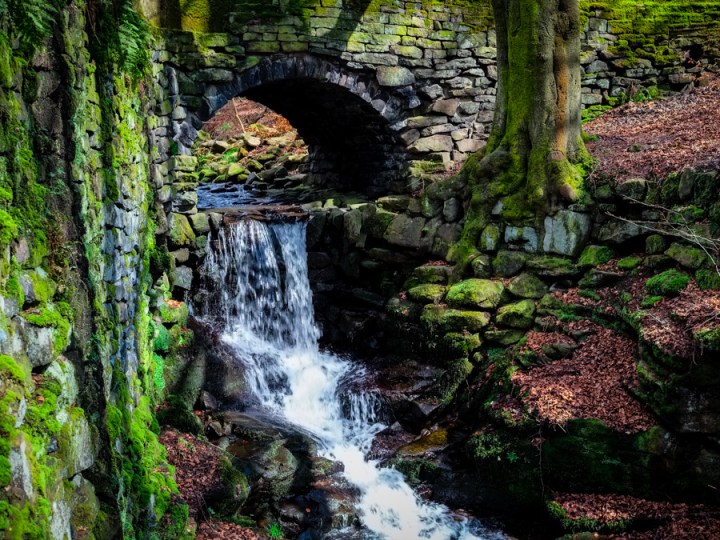
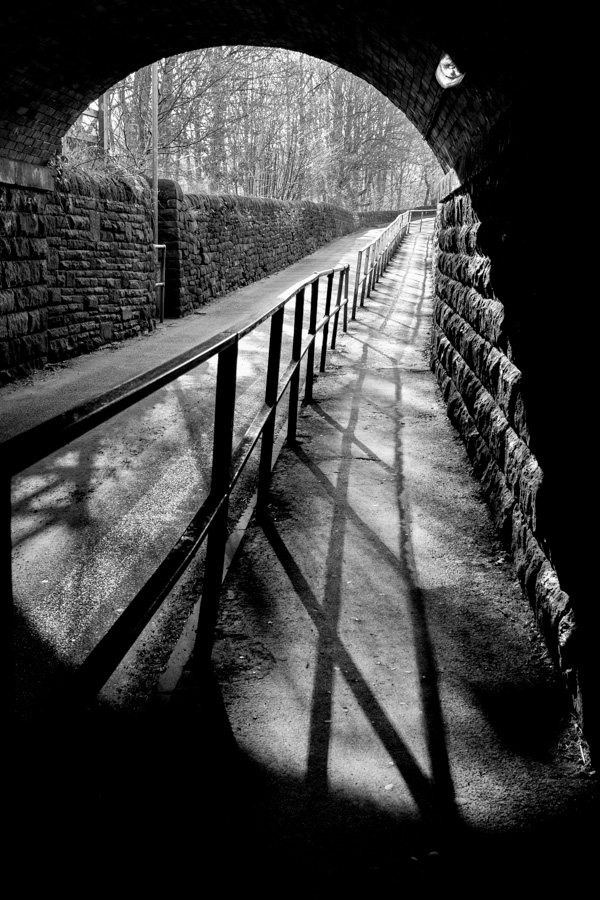
Again no correction applied to this image, the fisheye emphasises arches and uneven walls.

Dramatic effect

As already mentioned you can use a fisheye to exaggerate naturally occurring curves, be that in man-made things or the landscape itself. In the shot of York station below, the distortion adds to the sense of space and scale. You can also use the lens’ characteristic of making the subject in the centre appear small compared to its surroundings to great artistic effect as well. If there were a person standing on the platform edge in this shot they would appear tiny surrounded by the vast station building for example. Sadly no one obliged at the time! When placing people in a fisheye shot it’s best to keep them near the center to avoid unflattering distortions.

DSCF9402-Edit
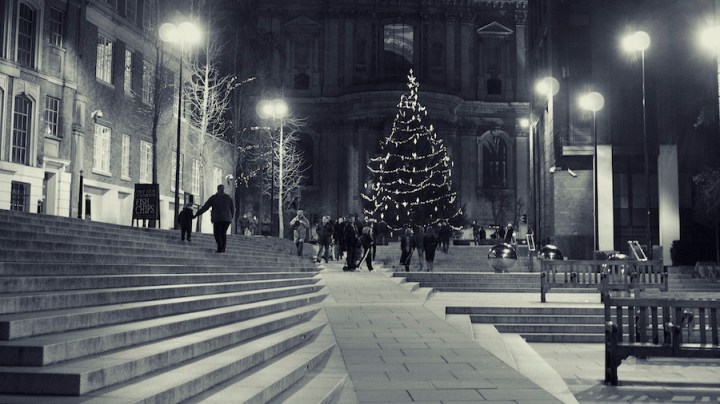
Fisheye-Hemi has been applied here to straighten the verticals while retaining the pleasing curves of the platform and roof.

Problems and Considerations

The problem with such a wide-angle lens is its often hard not to be in your own shot, whether you want to be or not. Tilt down too much and you’ll likely have your feet in the photo. Hold the lens too near the end and you may find a stray finger arching in. Even when you hold your camera perfectly you may find your shadow hard to avoid with the sun behind you. Be prepared to experiment to get the best composition and resigned to occasionally having to correct unavoidable intrusions into the frame by your body or shadow in post.

The Samyang is also a little prone to flare, if you’ve got the sun in your shot be very careful about the angle you choose as the lens can produce quite a pronounced ugly flare that will be quite a bit of work to remove in Photoshop.

Samyang 8mm flare example